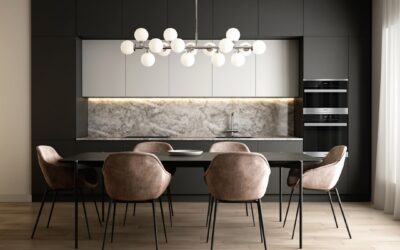
That empty space between the top of your wall cabinets and the ceiling is one of the trickiest spots in a kitchen. Left bare it collects dust and looks unfinished, but crammed with clutter it makes the whole room feel busy. Thoughtful above kitchen cabinet decor turns that gap into an intentional design feature that adds height, warmth, and personality. This guide walks through the design rules that make it work, curated ideas by style, what to avoid, and how to pull it off on any budget.
Part of our Kitchen Remodeling guide — explore the full guide →
- Why the Space Is So Tricky
- The Core Design Rules
- Greenery and Trailing Plants
- Baskets, Trays, and Vessels
- Adding Light
- Decor by Kitchen Style
- The Case for Closing the Gap Instead
- Mistakes to Avoid
- Doing It on a Budget
- Seasonal and Rotating Displays
- Cohesion With the Rest of the Kitchen
- Putting It All Together
Why the Space Is So Tricky
The gap above cabinets usually runs 12 to 18 inches, high enough to notice but too shallow to be practical storage you actually use. Because it sits near the ceiling, anything you place there is viewed from below and from a distance, which changes what reads well. Small, fussy items disappear or look like clutter, while a few larger pieces with visual weight hold their own. Understanding that viewing angle is the key to decorating the space successfully rather than just filling it.
The Core Design Rules
A few principles keep above-cabinet decor from looking messy:
- Go big and few. A handful of large items reads as intentional; a dozen small ones reads as clutter.
- Vary the height. Group objects in odd numbers with tall, medium, and short pieces so the eye moves across a pleasing silhouette.
- Angle and layer. Turn some pieces slightly and overlap them rather than lining everything up like soldiers.
- Leave breathing room. Do not fill the entire run; let some negative space between groupings keep it from feeling packed.
- Mind the sightline. Since you view it from below, choose items with height and presence rather than flat, low objects.
Follow these and almost any collection of objects can look curated.
Greenery and Trailing Plants
Greenery is the most reliable above-cabinet decor because it softens the hard rectangle of the cabinets and adds life. Trailing faux plants like ivy, pothos, or eucalyptus draped along the top and spilling down the cabinet face instantly warm the space, and because they are up high, faux is perfectly convincing and needs no light or water. Real plants can work if the spot gets natural light, but most kitchens do not, so quality artificial greenery is the practical choice. A long garland woven along the whole run creates a cohesive, organic line.
Baskets, Trays, and Vessels
Large-scale objects with texture fill the space beautifully. Consider:
- Woven baskets turned on their sides or stacked, adding warmth and a farmhouse or boho feel.
- Oversized ceramic vases and urns in a few complementary colors, grouped in threes.
- Decorative pitchers, crocks, and jugs, especially in a rustic or country kitchen.
- Wooden bowls or dough bowls that echo natural materials elsewhere in the room.
These items have the scale to be seen from across the room and the texture to feel collected rather than sparse.
Adding Light
One of the smartest upgrades is lighting the space. LED strip lights or puck lights tucked behind the cabinet crown wash the ceiling with a warm glow that makes the whole kitchen feel more expensive and cozy at night. This uplighting also highlights whatever decor you place there. Battery or plug-in LED strips make it a simple no-wiring project, and a warm color temperature around 2,700K to 3,000K flatters the space. Even with no other decor, above-cabinet lighting alone transforms the look of a kitchen after dark.
Decor by Kitchen Style
Match the objects to your kitchen’s aesthetic so it feels integrated:
- Farmhouse: woven baskets, white ironstone pitchers, trailing greenery, and a weathered sign.
- Modern: a few sculptural vases in monochrome, clean geometric shapes, and hidden LED lighting, with lots of negative space.
- Traditional: decorative plates, urns, and framed botanical art leaned against the wall.
- Boho: layered baskets, trailing plants, and pottery in earthy tones.
- Coastal: glass vessels, driftwood, and soft blue-and-white ceramics.
The Case for Closing the Gap Instead
Decorating is not the only answer. If dust and upkeep bother you, or if your style leans minimalist, consider eliminating the gap altogether. You can extend the cabinets to the ceiling with stacked upper cabinets or glass-front display cabinets for real storage, or close the space with a soffit or trim so it reads as a clean built-in. Taking cabinets to the ceiling is a popular modern move that removes the dust-catching ledge and makes ceilings feel taller. Weigh whether you want to decorate the gap or design it away before investing in either.
Mistakes to Avoid
Steer clear of the common pitfalls:
- Cramming every inch so it looks like an overflowing storage shelf rather than decor.
- Using tiny knickknacks that vanish from below and just gather dust.
- Storing real, used items up there, which reads as clutter and gets greasy.
- Ignoring color harmony, mixing clashing tones instead of a cohesive palette.
- Forgetting maintenance; whatever you place there collects kitchen grease and dust, so choose wipeable pieces and plan to clean them.
Doing It on a Budget
Above-cabinet decor is one of the cheapest ways to refresh a kitchen. Thrift stores, discount home shops, and your own attic yield large vases, baskets, and crocks for a few dollars each. A garland of faux eucalyptus runs $10 to $20, and a set of plug-in LED strips is under $25. Spray-painting mismatched found objects a single unifying color instantly makes them look like a designed collection. For $50 to $100 you can style an entire cabinet run, and for far less if you shop your own home first.
Seasonal and Rotating Displays
One underrated advantage of above-cabinet decor is how easy it is to change, making it a natural spot for seasonal touches. Because nothing up there is functional, you can swap in fall foliage and small pumpkins in autumn, evergreen garland and warm lights in winter, or bright faux florals in spring without disrupting how the kitchen works. Keep a base layer of year-round anchors, a few large vases or baskets, and simply tuck seasonal accents among them so the display never looks bare between changes. Storing the seasonal pieces together in a labeled bin makes the swap a ten-minute job. This rotating approach keeps the kitchen feeling fresh and intentional rather than static, and it is far cheaper than redecorating a whole room.
Cohesion With the Rest of the Kitchen
The most polished above-cabinet displays echo materials and colors already present in the room, so the decor reads as part of the design rather than an afterthought. Pull a metal finish from your hardware or faucet, a wood tone from your cutting boards or open shelving, or an accent color from a backsplash or a nearby rug, and repeat it in the objects up top. Limiting the palette to two or three colors that appear elsewhere in the kitchen is the single easiest way to make a random collection of found objects look curated. Standing back and viewing the cabinet top alongside the counter and backsplash, rather than in isolation, helps you judge whether the display truly belongs.
Putting It All Together
Start by clearing the space and cleaning off the grease and dust. Add hidden LED lighting first, since it sets the mood and highlights everything else. Then place your largest anchor pieces, a big vase or basket, at intervals, fill in with medium objects at varied heights, and weave trailing greenery to connect the groupings. Step back and view it from where you normally stand in the kitchen, then edit down until it feels intentional with a little breathing room. Leaving some empty space is what separates styled from stuffed.
Above kitchen cabinet decor is your chance to turn a dusty, awkward gap into a warm design feature that draws the eye upward and makes the ceiling feel higher. Work with scale by going big and few, vary the heights, add hidden lighting, match the objects to your kitchen’s style, and resist the urge to fill every inch. Whether you decorate the gap or decide to close it off entirely, treating that space with intention is what gives a kitchen its finished, pulled-together look.