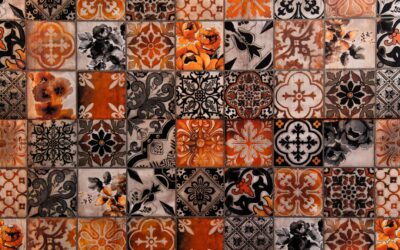
A backsplash lives or dies on its edges. You can install the most beautiful field tile in the world, but if the perimeter looks raw or unfinished, the whole wall reads as amateur work. That is why smart backsplash border trim ideas matter so much, and why designers obsess over how a run of tile terminates against a cabinet, a window, or open drywall. The right trim turns a functional wall into a deliberate design feature. Below you will find the borders, liners, and edge profiles that professionals rely on to finish a backsplash cleanly.
Part of our Kitchen Remodeling guide — explore the full guide →
- Why Border and Trim Choices Make or Break a Backsplash
- Pencil Liner Borders for a Classic Frame
- Metal Edge Trim: Schluter and Beyond
- Bullnose and Ceramic Trim Pieces
- Chair-Rail and Decorative Accent Borders
- Matching Trim to Your Backsplash Style
- Installation Tips for Clean Edges
- Frequently Asked Questions
Why Border and Trim Choices Make or Break a Backsplash
Every backsplash has exposed edges: the top course where tile meets paint, the outside corners near a window, and the ends of a run beside a range hood or refrigerator. Left untreated, these edges show the unglazed biscuit of the tile, a chalky gray or beige line that instantly cheapens the installation. Trim solves two problems at once. It hides that raw edge, and it introduces a finished line that frames the field tile like a picture frame frames art.
Budget for trim early. A quality edge profile runs $8 to $18 per linear foot for metal, while ceramic pencil liners land around $4 to $12 per linear foot. On a typical 30-square-foot kitchen backsplash you might have 20 to 30 linear feet of exposed edge, so trim can add $150 to $400 to your material cost. It is money well spent.
Pencil Liner Borders for a Classic Frame
Pencil liners are thin, rounded strips of ceramic or glass, usually 1/2 inch to 3/4 inch wide, that run along the top or perimeter of a backsplash. They create a slim, elegant frame and are the go-to choice for traditional and transitional kitchens.
- Top-course cap: Run a single pencil liner along the top edge to give the backsplash a crisp horizontal line where it meets the wall.
- Full frame: Wrap a liner around the entire field, including the vertical ends, to box in the tile completely.
- Contrast color: A dark bronze or matte black liner against white subway tile reads sharp and modern.
Glass pencil liners catch light and add subtle shimmer, while ceramic versions in a satin glaze feel calmer and more timeless. Both are easy for a tile setter to miter at corners for a continuous, seamless border.
Metal Edge Trim: Schluter and Beyond
For contemporary kitchens, nothing beats a metal edge profile. Schluter-Jolly is the industry standard, an L-shaped aluminum or stainless strip that tucks under the tile edge and presents a clean, rounded or squared face. It comes in anodized aluminum, brushed nickel, brass, and matte black to match your hardware and faucet.
Metal trim shines in three situations: where tile meets an outside corner, where a run ends against drywall, and where the top course would otherwise show a raw edge. Because the profile is only about 3/8 inch wide on the face, it disappears into the design while doing all the protective work. Expect to pay $10 to $18 per 8-foot length, and insist your installer set it into the thinset before the field tile so the metal sits flush.
Choosing a Metal Finish
- Brushed nickel or stainless: Pairs with most stainless appliances and chrome faucets.
- Matte black: Grounds a light backsplash and echoes black window frames or cabinet pulls.
- Brass or champagne bronze: Adds warmth to white and cream palettes and reads as a jewelry accent.
Bullnose and Ceramic Trim Pieces
Bullnose tile has one or more finished, rounded edges built right into the ceramic. When your field tile comes with a matching bullnose piece, it is often the cleanest possible termination because the color and glaze match exactly. Subway tile lines almost always offer a matching bullnose in the same 3-by-6-inch or 4-by-8-inch format.
Use bullnose along the top course and down the exposed vertical ends. Because the finished edge is the same material as the field, the eye reads the backsplash as one continuous surface. If your chosen tile lacks a matching bullnose, that is your cue to switch to a metal profile or a contrasting liner rather than leaving a raw cut.
Chair-Rail and Decorative Accent Borders
Chair-rail moldings borrow a profile from wall trim and translate it into ceramic or stone. These chunkier borders, often 1 inch to 2 inches tall with a sculpted face, add architectural weight and work beautifully in traditional and farmhouse kitchens. Run a chair-rail border horizontally across the middle of a tall backsplash to break up a large expanse, or use it to cap the top course with more presence than a slim pencil liner provides.
Decorative accent bands take this further. A mosaic strip, a row of hand-painted tiles, or a band of marble basketweave set between two liners becomes a focal point behind the range. Keep decorative borders to one or two moves per kitchen so the accent stays special rather than busy.
Matching Trim to Your Backsplash Style
The trim should answer to the room, not fight it. Match your border choice to the overall design direction so everything feels intentional.
- Modern and minimalist: Choose a squared metal Schluter profile in matte black or brushed stainless. Skip decorative liners entirely.
- Traditional: Reach for a ceramic pencil liner or a sculpted chair-rail in a glaze that matches the field.
- Farmhouse: Use bullnose subway tile for the cleanest look, or a simple satin liner in warm white.
- Transitional: A slim brushed-nickel or champagne-bronze edge profile bridges classic and contemporary without committing to either.
Coordinate the trim finish with your existing metals. If your faucet, pulls, and light fixtures are unlacquered brass, a brass edge profile ties the whole kitchen together. Fighting metals, chrome trim beside brass hardware, is the fastest way to make a thoughtful backsplash look accidental.
Installation Tips for Clean Edges
Great trim depends on great installation. Set metal profiles first, embedding the perforated flange in thinset before the adjacent field tile so the two sit in the same plane. For pencil liners and bullnose, dry-lay the top course before mixing thinset to confirm the border lands at a logical height, ideally where it meets the underside of upper cabinets or a window sill without an awkward sliver cut.
Miter outside corners at 45 degrees for a continuous liner rather than butting one piece against another. Keep grout lines consistent between the border and the field, and use a matching grout color so the trim reads as part of the whole. Finally, caulk, do not grout, the joint where the backsplash meets the countertop, because that seam needs flexible movement.
Frequently Asked Questions
Do I need trim on every edge of my backsplash?
Only on exposed edges. Where tile runs into an upper cabinet, a wall corner, or behind an appliance, no trim is needed because the edge is hidden. Finish the top course and any open vertical ends.
Is metal or ceramic trim more durable?
Metal profiles resist chipping better and suit busy kitchens. Ceramic bullnose and liners can chip if struck, but they match the field perfectly and hold up fine under normal use.
How much should I budget for backsplash border trim ideas?
Plan for $150 to $400 in trim material on an average kitchen, depending on whether you choose economical bullnose or premium metal and stone borders. Labor for careful edge work may add a modest amount to your installer’s quote.
Whichever direction you choose, treat the border as part of the design from day one. A finished edge is the difference between tile on a wall and a backsplash you are proud to show off.