Few projects change a kitchen’s character per dollar like the wall between the countertop and the cabinets. A backsplash started life as pure utility — a wipeable barrier against grease and water — but it has become the room’s jewelry: the 30 to 60 square feet where color, pattern, and texture get to perform. Because the square footage is small, materials that would blow a flooring budget become affordable here. This guide walks the planning decisions in order: material, layout, height, and budget, with the measurements and price ranges to make each call confidently.
Materials: The Realistic Contenders
Six materials cover nearly every kitchen and bath installation:
- Ceramic tile ($2 to $15 per sq ft) — the volume king. Classic subway (3×6) starts around $2 per square foot; handmade-look and colored-glaze versions run $8 to $15. Easy to cut, easy to live with.
- Porcelain tile ($4 to $20) — denser and more color-through than ceramic, and the format range is huge, including slim large-format slabs that do a whole wall in two pieces.
- Natural stone ($8 to $40) — marble, travertine, slate. Unmatched depth, but porous: sealing is mandatory and lemon juice etches marble, a fact to accept before installing it behind a cooktop.
- Glass tile ($7 to $30) — luminous color and easy cleaning; demands a skilled setter because adhesive shows through and edges chip.
- Quartz or stone slab ($40 to $100 installed) — the seamless, grout-free look, often run up from matching countertops. The premium buys zero joints to clean.
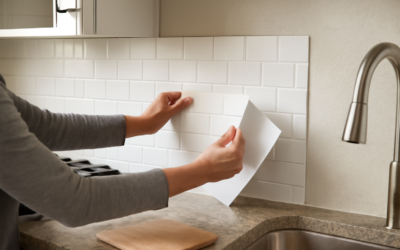
- Peel-and-stick ($5 to $12) — vastly improved in the last decade; real vinyl-gel and thin-tile versions serve renters and one-weekend refreshes, with the honest caveat that heat tolerance behind ranges is limited.
Metal, brick veneer, and beadboard round out the niche options. Whatever the material, everything behind a sink or range must tolerate a damp scrub — that disqualifies bare paint and most wallpapers in the splash zone.
Layout and Pattern: Where Style Actually Lives
The same $3 subway tile produces five different kitchens depending on the set. Running bond (the classic 50 percent offset) is timeless; stack bond (grid-aligned joints) reads modern and pairs with slim grout lines; vertical stack pulls the eye up and suits low-ceilinged kitchens; herringbone and chevron add motion at a 15 to 25 percent labor premium because of all the cuts; and picture-framing a mosaic panel behind the range creates a focal point without pricing the whole wall in mosaic money. Grout color is half the design — matching grout melts the grid away, contrasting grout turns it into graphics — and the full decision framework is in our grout guide. One reliable rule: the busier the countertop, the calmer the backsplash, and vice versa. Two competing patterns eight inches apart exhaust a room fast.
How High to Go
Height is the decision people revisit in year five, so get it right now. The standard field runs from counter to the underside of the upper cabinets — usually 18 inches. A 4-inch mini-splash (the strip matching the counter) reads dated in most current designs and is being ripped out across America. The move with momentum is full-height: running the material to the ceiling or the hood on walls without uppers, which costs more square footage but delivers the custom look photographers love. Behind the range, always carry material to the hood — that zone takes the most grease and deserves the most durable surface. Windows get a judgment call: wrapping the sill in tile is practical and increasingly popular. Measure honestly: length times height for each wall section, minus windows, plus 10 percent waste (15 percent for diagonal patterns).
Installation Realities
A standard tile backsplash is among the most DIY-friendly tile jobs in the house — the surface is vertical but small, the tiles are light, and nobody walks on the result. The sequence: clean, sound drywall is an acceptable substrate in dry zones (patch holes first — see our drywall repair guide); mark a level line, because countertops are never level and the tile must be; comb on thin-set or use mat adhesive; set with spacers; grout the field; and finish every plane change with color-matched caulk, not grout — the counter-to-splash joint moves, and caulk is the only thing that survives there. Outlets deserve planning: covers must sit flush on the new surface, which means outlet spacers (a $4 fix) and ideally relocating or converting outlets to horizontal under-cabinet strips when walls are open. Budget a weekend for a typical 30-square-foot kitchen; hire out glass, slab, and full-height stone.
Removing the Old One First
Replacement projects start with demolition, and the substrate you uncover sets the real budget. Tile set on drywall with mastic — the typical builder-grade installation — comes off with a stiff putty knife and patience, but it takes paper facing and chunks of gypsum with it. Small gouges are patchable with setting compound; walls that lose their paper across large areas are faster to cut out and replace with new board than to skim coat, a judgment call our drywall repair guide walks through. Tile on cement board or old mud-set walls is a heavier demo, and prying against countertops risks chipping stone edges — tape cardboard over the counter before the first swing. Budget a half day of removal and wall repair for a standard kitchen, wear eye protection (glazed shards fly), and score the caulk line at the countertop first so demolition stress does not telegraph into the splash-to-counter seal below.
Beyond the Kitchen: Baths, Laundry, and Bars
The same planning logic covers every splash zone in the house, with small rule changes. Bathroom vanity backsplashes run shorter — 4-inch matching-stone strips still read fine in traditional baths, though tiling to the mirror bottom is the current move — and moisture-tolerant grout matters more than heat tolerance. Laundry rooms reward cheap, tough surfaces: a run of ceramic above the utility sink handles detergent splash better than the painted drywall most builders leave there. Wet bars and coffee stations are where bold material choices belong, because the square footage is tiny (often under 10 square feet) and the space wants personality — mirror, zellige, and dramatic stone all shine at this scale for under $300 in material. The constant across all of them: seal the counter-to-wall joint with flexible caulk, keep grout appropriate to the moisture load, and let the smallest walls in the house take the biggest design swings.
Budget Math: Three Realistic Tiers
For a typical 30-square-foot kitchen splash, the math lands in three tiers. Budget refresh: $150 to $400 DIY with ceramic subway or quality peel-and-stick. Mid-range: $800 to $1,800 for porcelain or handmade-look ceramic professionally installed — installer labor runs $10 to $30 per square foot for standard sets. Premium: $2,000 to $5,000-plus for slab quartz, marble, or full-height designs with hood surrounds. Two upgrade priorities punch above their cost everywhere: upgraded grout (epoxy or urethane behind a range is self-defense, not vanity) and full-height treatment behind the cooktop. And one saving strategy works in every tier — expensive tile as a small feature panel framed by affordable field tile buys the magazine moment at a fraction of the price.
Making the Final Call
Order samples before committing — glaze color shifts dramatically between website photos and your kitchen’s actual light, and a $30 sample order beats a $1,200 regret. Tape samples to the wall and live with them for a week, checking morning and evening light against the countertop and cabinet fronts. Then buy everything from one dye lot with your waste factor included, since matching a discontinued tile two years later is a lost cause. The backsplash is the rare renovation where boldness is cheap and reversal is feasible; it is 30 square feet, not 300. Pick the material that survives your cooking honestly, set it on level lines with the right joints, and it will carry the kitchen’s personality for the next two decades of spaghetti nights.