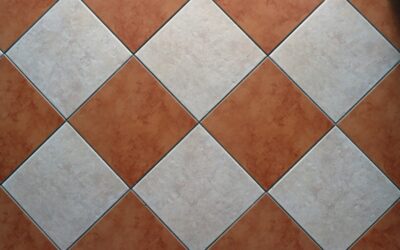
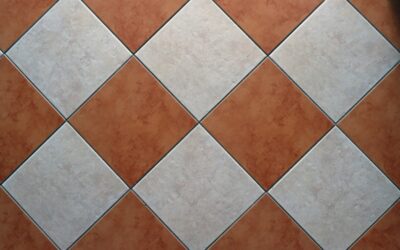
Tile gets all the attention in a kitchen or bathroom, but the material filling the lines between those tiles does just as much work. So what is grout, exactly? Grout is a dense paste, usually a mix of cement, water, and fine aggregate, that fills the joints between tiles to lock them in place, block moisture, and give the finished surface a clean, unified look. Choosing the right type and keeping it sealed makes the difference between a tile job that lasts decades and one that cracks and stains within a few years.
Part of our Tile & Grout guide — explore the full guide →
This guide breaks down what grout does, the main types available, and how to keep it looking good for the long haul.
- What Grout Actually Does
- The Main Types of Grout
- How to Choose the Right Grout
- Joint Width by Tile Type
- Grout Color and Design
- Mixing and Applying Grout
- Sealing and Maintenance
- Common Grout Problems
- First-Week Issues: Haze and Uneven Color
- How Much Grout You Need
- Regrouting Old Tile
- What Grout Costs
- The Bottom Line
What Grout Actually Does
Grout serves several jobs at once. It fills the gaps between tiles so dirt and water cannot get underneath, it bonds the tile edges together to add rigidity, and it accommodates the small dimensional differences between individual tiles. On floors, it keeps tiles from shifting and chipping at the edges. On walls and in showers, it forms a continuous surface that resists moisture penetration.
It is important to know that grout is not an adhesive. Thinset mortar bonds the tile to the substrate, while grout fills the joints afterward. The two materials work together but do different jobs.
The Main Types of Grout
Sanded Grout
Sanded grout contains fine sand that adds bulk and strength. It is the standard choice for joints wider than about 1/8 inch, which covers most floor tile and many wall applications. The sand prevents shrinkage and cracking in wider gaps, but it can scratch delicate surfaces like polished marble or glass, so test it first or choose an alternative on soft stone.
Unsanded Grout
Unsanded grout is smoother and stickier, designed for narrow joints of 1/8 inch or less. It clings well to vertical surfaces, which makes it a favorite for wall tile, glass mosaics, and polished stone where scratching is a concern. It is not strong enough for wide floor joints, where it tends to crack.
Epoxy Grout
Epoxy grout uses resins and a hardener instead of cement. It is highly resistant to stains, chemicals, and moisture, and it does not require sealing. That makes it ideal for showers, kitchen backsplashes, and high-traffic floors. The tradeoffs are a higher price, a shorter working time, and a more demanding application, since it sets fast and is unforgiving of mistakes.
Urethane and Premixed Grout
Premixed urethane and hybrid grouts come ready to use in a pail. They offer consistent color, some flexibility, and good stain resistance without the steep learning curve of epoxy, which makes them popular for backsplashes and DIY projects. They cost more than cement grout and need a longer cure before water exposure, often up to a week in a shower, so follow the label closely.
How to Choose the Right Grout
Matching grout to the job comes down to joint width, location, and the tile material:
- Joint width: Use unsanded for joints under 1/8 inch and sanded for wider gaps.
- Moisture exposure: Pick epoxy or a high-quality cement grout with a good sealer for showers and wet areas.
- Tile type: Avoid sanded grout on easily scratched surfaces like polished marble and glass.
- Maintenance tolerance: Choose epoxy if you want to skip sealing and minimize staining.
Joint Width by Tile Type
The tile usually sets the joint width, and the joint width then narrows your grout choice. Rectified porcelain with precisely cut edges can run joints as tight as 1/16 inch, which calls for unsanded or premixed grout. Standard pressed ceramic tile needs about 1/8 to 3/16 inch to absorb small size differences between pieces. Handmade tile with irregular edges often needs 3/16 inch or more. Polished natural stone is commonly set with very tight joints and unsanded grout so the surface reads as one piece. Forcing joints narrower than a tile can handle makes size variation and uneven edges much more obvious.
Where Grout Does Not Belong
Grout is rigid, so it should not fill joints where two planes meet or where different materials touch: inside wall corners, the joint between a tub and wall tile, tile against a countertop, and the perimeter of a floor. Those spots move slightly with temperature and settling, so they get a flexible sealant or color-matched caulk instead. Rigid grout in a moving joint tends to crack within months.
Grout Color and Design
Color is a design decision, not just a practical one. Matching the grout to the tile creates a seamless, expansive look that hides the joint lines. Contrasting grout, such as dark gray with white subway tile, highlights the pattern and adds a graphic, intentional feel. Lighter grout shows dirt faster in high-traffic areas, so on floors and busy kitchens a mid-tone gray or beige often stays looking clean longer than bright white.
Mixing and Applying Grout
Cement grout rewards a careful process. Mix it to a smooth, peanut-butter consistency using only the amount of water on the bag, since extra water is a leading cause of weak, blotchy joints. Let it rest for 5 to 10 minutes, then remix without adding more water. Spread it with a rubber float held at an angle, working diagonally across the joints so they pack full, then scrape off the excess.
Once the grout firms up, usually 15 to 30 minutes later, wipe the surface with a well-wrung sponge, again moving diagonally so you do not pull grout out of the joints. Buff off the remaining haze with a dry microfiber cloth after it dries. Epoxy grout follows a tighter schedule: work in small sections and clean as you go, because cured epoxy on the tile face is very hard to remove. Wear gloves when handling grout, and a dust mask when mixing powder, since cement products irritate skin and the dust contains silica.
Sealing and Maintenance
Cement-based grout is porous, which means it absorbs water, oil, and dirt unless it is sealed. After the grout has fully cured, usually 48 to 72 hours, apply a penetrating grout sealer and reapply it every year or two in wet areas. A simple water-drop test tells you when it is time: if water beads on the grout, the seal is holding; if it soaks in and darkens, reseal.
For routine cleaning, warm water and a soft brush handle most grime. A paste of baking soda and water lifts stains, and a diluted vinegar solution works on cement grout, though vinegar should be avoided on natural stone tile. Steer clear of harsh acids and stiff metal brushes that erode the grout over time. Epoxy grout needs none of this sealing routine, which is part of its appeal.
Common Grout Problems
Even good grout can develop issues, but most are fixable:
- Cracking usually points to substrate movement or the wrong grout for the joint width.
- Staining means the seal has worn off or the grout never got sealed.
- Efflorescence, a white powdery haze, comes from mineral deposits and can be cleaned and resealed.
- Crumbling often results from too much water during mixing or application.
First-Week Issues: Haze and Uneven Color
A few cosmetic problems often appear right after grouting, and most clear up with patience. A dull film on the tile face, called grout haze, wipes off with a dry microfiber cloth in the first day; older haze needs a haze remover made for your tile type, and acid-based removers should never touch natural stone. Joints that dry lighter or darker in patches usually come from inconsistent mixing water or uneven sponge pressure. Mild blotching often evens out as the grout finishes curing, and stubborn patches can be corrected with a grout colorant instead of regrouting. Avoid harsh cleaners until cement grout has had about four weeks to reach full strength.
How Much Grout You Need
Estimating grout keeps you from running short mid-project or wasting a second bag. The amount depends on four things: tile size, joint width, joint depth, and the square footage you are covering. Larger tiles with narrow joints use very little grout, while small mosaics with wider lines can use several times as much over the same area. Most grout bags print a coverage chart on the label that matches these variables.
As a rough guide, a standard 25-pound bag of cement grout covers roughly 100 to 200 square feet of 12-inch floor tile with 1/8-inch joints, but far less for mosaic or large-format installations. Buy about 10 percent extra so you have enough for the final joints and a small reserve for future repairs. Mixing a new batch midway can cause slight color variation, so it pays to have enough on hand from the start.
Regrouting Old Tile
You do not always have to live with cracked, stained, or crumbling grout. If the tile itself is sound, regrouting refreshes the whole surface for a fraction of the cost of new tile. Use a grout saw, a rotary tool, or an oscillating multi-tool to remove the old grout to a consistent depth without chipping the tile edges. Vacuum out the dust, then apply fresh grout exactly as you would on a new install.
Regrouting is also the moment to switch to a better product, such as moving from plain cement to epoxy in a shower that keeps staining. If only a few joints are damaged, spot-repair them, but expect a slight color difference between old and new grout until everything weathers in.
What Grout Costs
Grout is one of the cheapest materials in a tile project. Cement grout for a typical bathroom floor usually costs well under fifty dollars, while epoxy for the same space can run two to three times as much. Labor is where costs climb: hiring out grout removal and replacement often costs more per square foot than the original tile setting. That makes choosing the right grout the first time one of the most cost-effective decisions in tiling. Pick the color from a dried sample, since cement grout typically dries lighter than it looks when wet.
The Bottom Line
Grout is the unsung hero of any tile installation, filling the joints, blocking moisture, and tying the whole surface together. Match the type to your joint width and location, seal cement-based grout to protect it, and keep up with simple cleaning. Get those basics right and your tile will look sharp and stay solid for years.