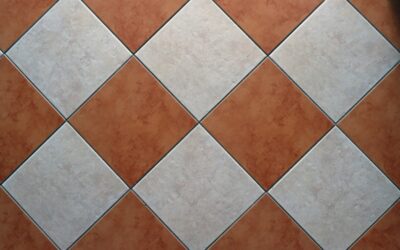
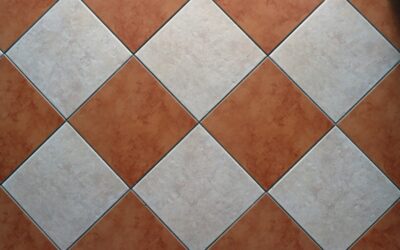
Bathroom tile grout is the unsung hero of any tiled wall, floor, or shower, filling the gaps between tiles and locking the whole surface into a unified, water-shedding plane. Choosing and maintaining the right bathroom tile grout makes the difference between a shower that stays clean and watertight for years and one that grows mold, cracks, and crumbles within a season or two.
Part of our Bathroom Remodeling & Flooring guide — explore the full guide →
What Grout Is and Why It Matters
Grout is the cement- or resin-based filler packed into the joints between tiles after they are set. Its job is partly structural and partly cosmetic. By locking tiles in place, it stops them from shifting, chipping at the edges, or rattling loose. By sealing the gaps, it keeps water from seeping behind the tile where it can rot substrate and feed mold.
In a bathroom, grout faces tougher conditions than almost anywhere else in the house. Constant moisture, soap scum, temperature swings, and frequent scrubbing all wear on it. That is why selecting the correct grout type and keeping it maintained is so important for the long life of your tile.
The Main Types of Grout
Walk into any tile shop and you will face a few core choices. Each behaves differently and suits different parts of the bathroom:
- Sanded cement grout: Contains fine sand for strength, ideal for joints wider than about 1/8 inch. It resists shrinking and cracking but can scratch soft or polished tile if you are not careful.
- Unsanded cement grout: Smoother and stickier, made for narrow joints of 1/8 inch or less and for delicate surfaces like glass or polished stone.
- Epoxy grout: A two-part resin system that is highly stain-resistant, waterproof, and durable. It costs more and is trickier to apply but rarely needs sealing, making it popular for showers and heavy-use floors.
- Single-component or pre-mixed grout: Ready to use straight from the bucket, convenient for small jobs, though it can be pricier per square foot.
For most bathroom showers, epoxy or a high-quality sanded cement grout strikes a good balance of performance and ease.
Choosing the Right Grout Color
Grout color quietly shapes the entire look of a tiled surface. Matching the grout to the tile creates a seamless, expansive feel, while contrasting grout turns each tile into a defined element and emphasizes patterns like subway or herringbone layouts.
Practicality matters too. Bright white grout looks crisp at first but shows dirt and staining quickly, especially on floors. Mid-tone grays and beiges hide grime far better and age more gracefully. If you love a clean white look, epoxy grout will hold that color longer than cement because it resists absorbing stains.
Sealing Your Grout
Cement-based grout is porous, which means it soaks up water and stains unless it is sealed. Sealing creates a protective barrier that buys you time to wipe up spills and slows the growth of mold in damp joints. Epoxy grout is non-porous and generally does not require sealing, one of its biggest selling points.
If you have cement grout, plan to seal it after it cures, usually 48 to 72 hours after installation, and reapply roughly once a year in a busy bathroom. The process is straightforward:
- Clean the grout thoroughly and let it dry completely.
- Apply a penetrating grout sealer with a small brush, roller, or applicator bottle along the joints.
- Wipe excess sealer off the tile face before it hazes.
- Let it cure per the label, often 24 hours, before exposing the surface to water.
Cleaning and Everyday Maintenance
Routine care keeps grout looking fresh and prevents the deep grime that demands aggressive scrubbing later. After showers, a quick wipe-down or a squeegee on walls removes the moisture that mold loves. Weekly, a soft brush and a pH-neutral cleaner handle most buildup.
Avoid harsh acids and undiluted bleach as routine cleaners, since they can erode cement grout and dull some tile finishes over time. For stubborn stains, a paste of baking soda and water scrubbed with an old toothbrush often lifts discoloration without damaging the joint. Always rinse well and dry the area afterward.
Repairing and Regrouting
Even well-maintained grout eventually cracks, crumbles, or stains beyond cleaning. Small cracks can be patched, but widespread failure usually calls for regrouting. The good news is that you can often regrout over old tile without disturbing the tile itself.
The basic regrouting process involves raking out the old grout with a grout saw or oscillating tool, vacuuming the dust, and packing fresh grout into the cleaned joints. After it sets, you wipe away the haze and, for cement grout, seal it once cured. One caution: never grout the joint where tile meets a tub, sink, or wall corner. Those movement joints need flexible silicone caulk instead, because rigid grout will crack as the surfaces shift.
When to Call a Professional
Regrouting and resealing are realistic weekend projects for a patient DIYer, and tackling them yourself can save a few hundred dollars. Materials are inexpensive, often $15 to $40 for grout plus a sealer, and the skills are learnable on a small area before you commit to the whole shower.
That said, if your grout failure signals a deeper problem, such as water already behind the tile, soft spots in the wall, or extensive mold, bring in a tile professional. They can diagnose whether the substrate is compromised and whether a full tear-out and waterproofing rebuild is the safer long-term fix. Spending on the right repair now beats paying for water damage later.
Grout Width and Tile Layout
The width of your grout joints is not just an aesthetic decision; it affects both performance and the type of grout you can use. Wider joints, around 1/8 inch and up, accommodate the slight size variations found in handmade, rustic, or natural stone tiles and call for sanded grout to resist cracking. Narrow joints under 1/8 inch suit rectified tiles with crisp, uniform edges and need unsanded grout to pack cleanly into the tight space.
Joint width also influences maintenance over the long haul. Narrower lines mean less exposed grout to stain and scrub, while wider lines can read as more rustic and forgiving of imperfect tile alignment. Whatever width you settle on, keep it consistent across the installation, since uneven joints draw the eye and make a wall look amateurish even when the tile itself is high quality.
Prefer to explore on your own?
See how new flooring looks in your actual room in seconds — free, no signup.
Try the free Floor Studio →