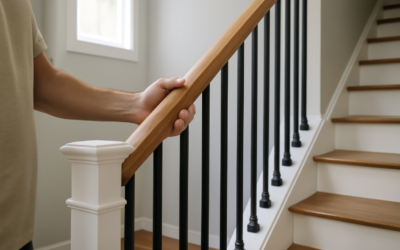
Basement stairs are often the steepest, dimmest, and least-finished steps in the house, and they are frequently missing a proper handrail altogether. A solid basement stairs railing is one of the cheapest safety upgrades you can make, and it matters more than most homeowners realize: falls on stairs send more than a million Americans to emergency rooms each year. Whether you are finishing the basement, fixing a wobbly rail, or adding a rail where none exists, this guide covers code requirements, materials, costs, and installation.
Part of our Stairs & Stair Flooring guide — explore the full guide →
- Why a Basement Stairs Railing Matters More Than Other Stairs
- Handrail vs. Guardrail: Know the Difference
- Code Requirements for Basement Stair Railings
- Railing Material Options
- Typical Costs
- How to Install a Wall-Mounted Handrail
- Adding a Guard on the Open Side
- When to Call a Licensed Professional
- Finishing Touches That Improve Safety
Why a Basement Stairs Railing Matters More Than Other Stairs
Older basement stairs were often built as utility stairs, with steep risers of 8 inches or more, shallow treads, open backs, and a single 2×4 nailed to the wall as a makeshift handrail. You carry laundry baskets, storage bins, and tools up and down them, which means your hands are frequently full and your view of the treads is blocked. Add concrete at the bottom and poor lighting, and the risk profile is higher than that of your main staircase.
A properly installed rail gives you something continuous to grip from the top step to the bottom step. It also keeps anyone from stepping off the open side of the stair, which is where the most serious basement falls happen. If you are finishing the basement or selling the home, inspectors will flag a missing or non-compliant rail almost every time.
Handrail vs. Guardrail: Know the Difference
These two terms get used interchangeably, but building codes treat them differently.
- Handrail: the graspable rail you slide your hand along while climbing. Required on at least one side of any stairway with four or more risers under the International Residential Code (IRC).
- Guardrail (guard): the barrier that prevents a fall off an open side. Required when the open side of a stair or landing is more than 30 inches above the floor below.
Many basement stairs need both: a wall-mounted handrail on the closed side and a guard with balusters on the open side. On an open-sided stair, the guard’s top rail can double as the handrail if it sits at the right height and has a graspable profile.
Code Requirements for Basement Stair Railings
Most US jurisdictions adopt some version of the IRC. Always confirm with your local building department because amendments vary, but these are the numbers you will typically see:
- Handrail height: 34 to 38 inches, measured vertically from the line connecting the tread nosings.
- Continuity: the handrail must run continuously from a point directly above the top riser to a point directly above the lowest riser.
- Wall clearance: at least 1-1/2 inches between the handrail and the wall.
- Grip size: round rails 1-1/4 to 2 inches in diameter; other shapes must meet specific graspability dimensions, so a flat 2×4 or 2×6 board does not qualify on its own.
- Returns: handrail ends should return to the wall or terminate in a newel post or safety terminal so sleeves and bag straps do not catch.
- Guard height: 34 inches minimum along the stair (measured from nosings) and 36 inches at landings and open floor edges.
- Baluster spacing: openings must not allow a 4-3/8-inch sphere to pass through on stairs.
- Load: handrails and guards must resist a 200-pound concentrated load applied in any direction at the top.
That last requirement is why a rail screwed only into drywall anchors will fail an inspection. Every bracket needs solid wood behind it.
Railing Material Options
Wood
Pine, poplar, and oak handrails are the go-to choice. A 12-foot length of pre-profiled pine handrail costs about $25 to $50; red oak runs $60 to $120. Wood is warm to the touch, easy to cut, and simple to stain or paint to match basement trim. In a damp basement, seal all surfaces, including cut ends, to limit moisture movement.
Metal
Black steel pipe rail (the industrial look using 3/4-inch or 1-inch threaded pipe and flanges) costs $80 to $200 in parts for a typical 13-step stair and suits unfinished or loft-style basements. Aluminum and powder-coated steel systems are durable and moisture-resistant, making them a smart pick for basements with humidity problems. Wrought-iron balusters for guards run $8 to $25 each.
Composite and vinyl
PVC and composite railing kits, originally designed for decks, work well in unfinished basements and walk-out entries. They will not rot or warp and never need paint, though they look more utilitarian indoors.
Rope or cable
Rope rails threaded through brass brackets have a nautical feel, but most do not meet graspability or strength requirements unless the rope is at least 1-1/4 inches thick and the brackets are anchored into studs. Treat them as decorative add-ons rather than a code handrail.
Typical Costs
| Project | DIY cost | Installed cost |
|---|---|---|
| Wall-mounted wood handrail, one side | $60 – $180 | $250 – $600 |
| Pipe-style metal handrail | $80 – $200 | $300 – $700 |
| Open-side guard with newel and balusters | $300 – $900 | $1,200 – $3,500 |
| Aluminum or steel railing system | $400 – $1,200 | $1,500 – $4,000 |
Labor for a carpenter usually falls between $60 and $100 per hour. A simple wall-mounted handrail is a two-to-three-hour job for a pro.
How to Install a Wall-Mounted Handrail
Adding a handrail on the wall side is a realistic DIY project for most homeowners with basic tools.
Tools and materials
- Handrail stock long enough to span top riser to bottom riser plus returns
- Handrail brackets rated for the load (typically three to five brackets, spaced no more than 48 inches apart)
- Stud finder, 4-foot level, chalk line or string
- Drill/driver and 2-1/2-inch or 3-inch structural screws
- Miter saw for return cuts, wood glue, and finish
Step-by-step
- Mark the height. At the top and bottom treads, measure 36 inches straight up from the front edge of the nosing. Snap a chalk line between those two marks. This line represents the top of the rail.
- Locate studs. Find and mark every stud along the line. If the wall is concrete block or poured foundation, use concrete sleeve anchors or Tapcon screws rated for the application instead.
- Set bracket positions. Place the top and bottom brackets within about 12 inches of each end, then add intermediate brackets at studs so no span exceeds 48 inches.
- Account for bracket drop. Most brackets hold the rail 2 to 3 inches above the mounting screw. Subtract that measurement so the rail top lands on your chalk line.
- Cut and fit the rail. Cut the ends so they return into the wall with a 45-degree miter and a small glued return piece. This keeps clothing from snagging.
- Attach and test. Screw the brackets to the studs, attach the rail, then hang your body weight on it at several points. It should not flex or creak.
- Finish. Sand to 180 grit and apply two coats of polyurethane or paint.
Adding a Guard on the Open Side
Open-sided basement stairs need a newel post at the bottom, a sloped top rail, and balusters or panels. The newel is the critical piece. Bolt it to the stair stringer or floor framing with a newel mounting kit or 1/2-inch lag bolts; a newel that only sits on the tread and is held by a few screws will loosen within months.
On a concrete basement floor, anchor the bottom newel with a steel base plate and wedge anchors, or set it in a surface-mount post base. Install balusters so the gap never exceeds the 4-3/8-inch sphere rule, which usually means two balusters per tread on a standard 10-inch-deep tread.
If your stairs have open risers (no backs), many jurisdictions now require that the opening between treads be small enough to block a 4-inch sphere. Screwing 1×8 riser boards onto the backs of the stringers fixes the problem and makes the stair feel much sturdier underfoot.
When to Call a Licensed Professional
Bring in a licensed contractor or carpenter if any of these apply:
- The stringers are cracked, sagging, rotted, or pulling away from the top header.
- Risers are uneven by more than 3/8 inch or taller than 7-3/4 inches, which means the stair itself may need rebuilding.
- You need to anchor into a foundation wall that shows cracks, efflorescence, or water intrusion.
- The basement is being finished under a permit, since inspectors will evaluate the whole stair.
- You plan to relocate light switches or wiring near the stair, which calls for a licensed electrician.
A professional can also confirm that your rail meets local amendments, which occasionally differ from the base IRC numbers.
Finishing Touches That Improve Safety
A good rail works best alongside a few inexpensive upgrades. Install three-way switches so lights can be turned on at both the top and bottom; the code requires stair illumination controlled from each level. Add anti-slip treads or grip tape to painted or bare wood steps, especially if the basement tends to be damp. Mark the leading edge of each step with a contrasting color if anyone in the household has limited vision. And if you are covering the stairs with carpet or vinyl, finish the flooring before the rail, since added tread thickness changes your measured handrail height.
A basement stairs railing is a small project with an outsized payoff. Get the height right at 34 to 38 inches, anchor every bracket into solid framing, return the ends to the wall, and guard any open side. Your basement becomes safer to use every day, and you remove one of the most common red flags home inspectors write up.