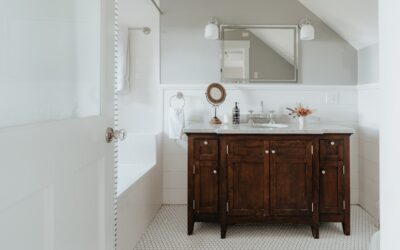
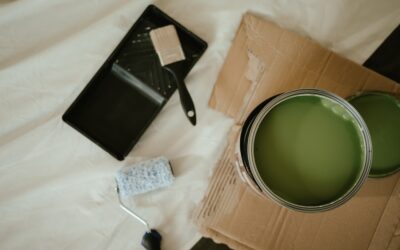
Painting a bathroom vanity is the single cheapest way to make a dated bathroom look renovated — and the single easiest project to botch if you grab the wrong can. Bathroom cabinet paint has to survive constant humidity, splashes, and the grabby handling of drawer fronts, which rules out the ordinary wall paint many homeowners reach for. Choose a moisture-tough finish and prep the surface correctly, and a $60 gallon can transform a vanity that looks straight out of 1995 into something that reads custom.
Part of our Bathroom Remodeling & Flooring guide — explore the full guide →
- Why Bathroom Cabinets Need Special Paint
- Best Paint Types for Vanities
- Choosing the Right Sheen
- Prep: Where the Finish Is Won or Lost
- Primer Matters More Than You Think
- Application for a Smooth Finish
- Cure Time and Handling
- Hardware and Finishing Touches
- Common Mistakes to Avoid
- How Much Paint and What It Costs
- Best Colors for a Bathroom Vanity
- Keeping the Finish Looking New
- Final Word
Why Bathroom Cabinets Need Special Paint
Bathrooms swing from bone-dry to shower-steamed several times a day. That humidity cycle is brutal on coatings — ordinary flat or eggshell wall paint absorbs moisture, softens, and peels near the sink and along the toe kick. Cabinet-grade paint is formulated to cure into a hard, non-porous film that repels water and wipes clean. The finish also has to resist the constant contact of hands, so it needs to be tougher than anything you’d roll onto a wall.
Best Paint Types for Vanities
A few product categories rise above the rest for bathroom cabinetry.
- Water-based (acrylic) alkyd enamel — the sweet spot for DIYers. It levels like oil paint for a smooth, brush-mark-free finish but cleans up with water and yellows far less. Benjamin Moore Advance is the benchmark.
- Urethane-fortified acrylic enamel — cabinet-specific paints like Sherwin-Williams Emerald Urethane Trim Enamel cure exceptionally hard and handle moisture beautifully.
- Traditional oil-based enamel — extremely durable and smooth, but slow-drying, high-odor, and prone to yellowing over white. Largely replaced by modern acrylic alkyds.
Skip chalk paint for bathrooms unless you’re topcoating it with a waterproof polyurethane — on its own it’s too porous for a wet room.
Choosing the Right Sheen
Sheen affects both durability and looks. In a bathroom, glossier is more washable.
- Satin — the minimum for a bathroom; wipeable and forgiving of surface flaws.
- Semi-gloss — the most popular vanity choice, balancing moisture resistance with a clean, slightly reflective look.
- Gloss — the most durable and easiest to wipe, but it highlights every dent and brush stroke, so it demands flawless prep.
Semi-gloss is the safe, versatile pick for most vanities.
Prep: Where the Finish Is Won or Lost
Paint failure on cabinets almost always traces back to skipped prep. Bathroom vanities carry hairspray overspray, hand oils, and toothpaste film that stop paint from bonding.
- Remove doors and drawers and label the hinges so everything goes back where it started.
- Degrease with a strong cleaner like TSP substitute, then rinse and let dry.
- Sand all surfaces with 150- to 220-grit to dull the existing finish so primer can grip.
- Fill any dents or grain with wood filler, then sand smooth.
- Wipe off all dust with a tack cloth. The surface must be spotless before primer.
Don’t shortcut the sanding on glossy factory finishes — paint will peel off a slick surface in sheets no matter how good the product is.
Primer Matters More Than You Think
A bonding primer is non-negotiable, especially over laminate, melamine, or previously varnished wood. Use a stain-blocking bonding primer such as Zinsser B-I-N shellac-based or a quality acrylic bonding primer. Primer does two jobs: it grips the slick old finish and it seals wood tannins or old stains that would otherwise bleed through your topcoat. Tint the primer toward your finish color when going dramatically darker or lighter to reduce the number of color coats.
Application for a Smooth Finish
The goal is a factory-smooth surface with no visible brush strokes. Technique and tools make the difference.
- Use a high-quality synthetic brush for edges and detail, and a foam or microfiber mini-roller for flat panels.
- Apply thin coats — two or three thin coats beat one thick coat every time and resist drips.
- Let each coat cure the full recommended time; acrylic alkyds often need a longer dry between coats than the can suggests for best hardness.
- Lightly sand with 320-grit between coats and wipe clean for glass-smooth results.
- Consider spraying with an HVLP sprayer if you want the absolute smoothest finish and have space to spray the doors flat.
Cure Time and Handling
Here’s the patience test: acrylic alkyd enamels are dry to the touch in a few hours but take up to 2 to 3 weeks to fully cure to their maximum hardness. Rehang doors after a day or two if you’re careful, but avoid heavy use, scrubbing, or setting wet toiletries on painted surfaces during that cure window. Rushing it leaves fingerprints and soft spots that never fully harden.
Hardware and Finishing Touches
New knobs and pulls are the exclamation point on a painted vanity, and they cost far less than replacing the cabinet. If the old hardware holes don’t line up with new pieces, fill and re-drill during prep. A fresh, moisture-rated caulk bead where the vanity meets the wall and backsplash cleans up the whole look and keeps water out of the seams.
Common Mistakes to Avoid
- Skipping the degrease step — hand oils cause fisheye and peeling.
- Using wall paint because it was on hand — it won’t survive the humidity.
- Loading the brush too heavily and creating runs on vertical drawer fronts.
- Reinstalling doors before the paint has cured enough to handle.
- Painting in a cold or damp bathroom — coat in a room at 65°F to 75°F with good airflow.
How Much Paint and What It Costs
A standard single-sink vanity — roughly the box, two doors, and a drawer or two — takes surprisingly little paint. Plan on one quart of bonding primer and one to two quarts of finish enamel, since you’re applying thin coats. A double vanity or a linen tower alongside it pushes you to a gallon of each. In dollars, a quality water-based alkyd enamel runs about $40 to $55 a quart, a shellac-based bonding primer around $25 a quart, and sandpaper, a good synthetic brush, foam mini-rollers, and painter’s tape add another $30 to $40. Most single-vanity jobs land under $100 in materials.
Compare that to $1,200 to $3,000 for a new stock-to-semi-custom vanity plus installation, and the value of painting is obvious. The one upgrade worth paying for is a small HVLP sprayer, roughly $100 to $150, if you want a truly factory-smooth, brush-mark-free finish on the doors.
Best Colors for a Bathroom Vanity
Color drives how the whole room reads, and a few palettes have proven durable in both style and resale. Soft whites and warm greiges keep a small bathroom feeling open and pair with almost any countertop. Deep navy, forest green, and charcoal have dominated recent remodels because they hide water spots and toothpaste better than white and read as high-end against brass or matte-black hardware. If your bathroom gets little natural light, lean lighter; a windowless powder room can carry a bold, saturated color that would overwhelm a large sunny bath.
Whatever you pick, buy a sample and paint a scrap door or a poster board, then look at it under the bathroom’s actual lighting at night. Vanity lighting is often warmer than daylight and shifts cool grays toward beige and blues toward gray.
Keeping the Finish Looking New
Once fully cured, a painted vanity is easy to live with if you treat it right. Wipe splashes and toothpaste promptly with a damp microfiber cloth — dried toothpaste is mildly abrasive and can dull a spot over time. Skip magic-eraser melamine pads and abrasive or bleach-heavy cleaners, which burnish and dull enamel; a little dish soap in warm water is all a cured finish needs. Run the exhaust fan during and after showers to pull humidity off the cabinet, and touch up chips early with a small artist’s brush before moisture creeps under the film and lifts a larger area.
Final Word
The right bathroom cabinet paint, backed by thorough prep and a bonding primer, delivers a durable finish that easily lasts 8 to 10 years in a busy family bathroom. Pick a water-based alkyd or urethane enamel in semi-gloss, sand and degrease every surface, and respect the cure time. Do that, and you’ll get a vanity that looks professionally refinished for the price of a couple of quarts and a weekend of work.