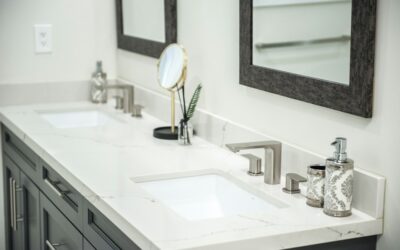
A dated bathroom vanity can drag down an otherwise nice room, and replacing it is expensive. Painting bathroom vanity cabinets is one of the highest-impact, lowest-cost updates a homeowner can tackle in a weekend, transforming honey oak or builder-grade laminate into a crisp, modern focal point for under $100 in materials. The catch is that bathrooms are humid, splash-prone environments, so the job lives or dies on preparation and the right products. This guide walks through every step to get a durable finish that will not peel or chip.
Part of our Bathroom Remodeling & Flooring guide — explore the full guide →
- Why Prep Matters More Than Paint
- Tools and Materials You'll Need
- Step 1: Remove Hardware and Doors
- Step 2: Clean Thoroughly
- Step 3: Sand and Repair
- Step 4: Prime with a Bonding Primer
- Step 5: Choose and Apply the Right Paint
- Step 6: Cure and Seal
- Common Mistakes to Avoid
- Cost and Time
- Optional Upgrades While You're At It
- Brush-and-Roll vs. Spraying
- Getting a Smooth, Grain-Free Finish on Oak
Why Prep Matters More Than Paint
The most common reason a painted vanity fails is skipped or rushed prep. Bathroom cabinets accumulate hand oils, soap residue, hairspray overspray, and moisture, and paint will not bond to a dirty, glossy, or slick surface. Nearly every peeling paint job traces back to inadequate cleaning, missing primer, or paint applied over a factory finish that was never scuffed. Invest your effort in cleaning, sanding, and priming, and the paint itself becomes almost foolproof. Rush the prep and even the best paint will chip within months.
Tools and Materials You’ll Need
- Degreasing cleaner (TSP substitute or a strong household degreaser)
- Sandpaper in 120 and 220 grit, or a sanding sponge
- A quality bonding primer, such as a shellac- or urethane-based product
- Durable cabinet or trim paint (see paint types below)
- A 2-inch angled sash brush and a small foam or microfiber roller
- Painter’s tape, drop cloths, a screwdriver, and wood filler
- Tack cloths and clean rags
Step 1: Remove Hardware and Doors
Start by emptying the vanity and taking off the doors and drawer fronts. Unscrew the hinges and pulls and bag the hardware, labeling which door came from where so everything realigns later. Painting doors flat on a workbench or a pair of sawhorses gives a smoother, drip-free finish than trying to coat them in place. Remove or thoroughly mask the countertop, sink, and backsplash, and protect the floor with a drop cloth.
Step 2: Clean Thoroughly
Wash every surface with a strong degreaser to strip away oils, soap film, and grime. This step is non-negotiable in a bathroom. Pay special attention to the areas around the pulls and the bottom edges of doors where hands touch most. Rinse with clean water if the cleaner requires it, and let everything dry completely. A clean surface is the single biggest predictor of whether your paint will last.
Step 3: Sand and Repair
Scuff-sand all surfaces with 120-grit paper to dull the existing finish and give the primer something to grip, then wipe away the dust with a tack cloth. You are not trying to remove the old finish entirely, just break its sheen. Fill any dents, gouges, or unwanted holes with wood filler, let it dry, and sand smooth. If you are painting laminate or thermofoil, sanding is even more critical since those slick surfaces resist adhesion; a thorough scuff plus a bonding primer is essential.
Step 4: Prime with a Bonding Primer
Primer is what makes the difference between a finish that lasts years and one that peels. Use a high-adhesion bonding primer, a shellac-based product or a quality urethane bonding primer, which grips glossy oak, laminate, and thermofoil far better than ordinary wall primer. Apply a thin, even coat with a brush for the detailed areas and a foam roller for flat panels. If your cabinet is oak with heavy grain and you want a smooth look, the primer coat is also when you can fill or minimize the grain. Let the primer cure fully per the label before sanding lightly with 220 grit and wiping clean.
Step 5: Choose and Apply the Right Paint
Not all paint holds up in a bathroom. Your best options are:
- Water-based acrylic-alkyd (hybrid) enamel: The top choice for cabinets. It levels like oil for a smooth, hard finish but cleans up with water and yellows less. Brands market these as cabinet or trim enamels.
- Acrylic urethane enamel: Very durable and moisture resistant, excellent for high-use vanities.
- Traditional oil-based enamel: Extremely hard and smooth but slow drying, strong odor, and prone to yellowing.
Avoid standard wall paint, which is too soft for a surface that gets wet and wiped constantly. Choose a satin or semi-gloss sheen; both wipe clean and resist moisture, with semi-gloss being the most durable and easiest to clean. Apply two thin coats rather than one thick one, brushing the recesses and rolling the flats, and let each coat dry fully. Thin coats level better and resist drips and brush marks.
Step 6: Cure and Seal
Paint is dry to the touch in hours but takes days to weeks to fully cure and reach maximum hardness. Wait as long as the label recommends, often several days, before rehanging doors and using the vanity, and be gentle with it for the first couple of weeks. Modern cabinet enamels are self-sealing and generally do not need a topcoat, but if you used a less durable paint or want extra protection in a splash-heavy bathroom, a clear water-based polyurethane or polycrylic topcoat adds moisture resistance. Apply it in thin coats and be aware that some clear coats can slightly yellow light colors.
Common Mistakes to Avoid
- Skipping the degreaser: Invisible oils cause peeling; always clean first.
- No bonding primer: Especially fatal on laminate and thermofoil.
- Thick coats: Cause drips, brush marks, and slow curing. Go thin.
- Rushing recoat times: Painting over paint that has not cured causes peeling and gumming.
- Using wall paint: Too soft for a wet, high-touch surface.
- Reinstalling hardware too soon: Fresh paint sticks and dents; let it cure.
Cost and Time
Painting a bathroom vanity is remarkably economical. Materials, primer, a quart of quality cabinet enamel, sandpaper, brushes, and tape, typically run $50 to $100, and a quart is usually plenty for a single vanity. Budget a weekend: a day for cleaning, sanding, and priming, and a day for two coats of paint plus curing time before reassembly. If you also swap the dated pulls for modern hardware, add $10 to $40. Compared with a new vanity, which can run $300 to $1,500 installed, painting delivers a dramatic transformation for a fraction of the cost.
Optional Upgrades While You’re At It
Since the vanity is apart, it is the perfect moment for small upgrades. New knobs or pulls instantly modernize the look, soft-close hinge adapters improve daily use, and a fresh bead of caulk where the vanity meets the wall and countertop cleans up the edges. If the countertop is also dated, a coordinating counter or a new sink faucet completes the refresh, though those add cost.
Brush-and-Roll vs. Spraying
You have two ways to apply the finish, and each has its place. Brushing and rolling is the accessible method for most homeowners: use a quality angled sash brush for the recessed panels, edges, and profiles, and a small dense-foam or microfiber roller for the flat faces to minimize brush marks. A self-leveling cabinet enamel helps the brush strokes flow out smooth as they dry. Spraying, using an HVLP or airless sprayer, produces the smoothest, most factory-like finish with no brush marks at all, which is why it is popular for doors laid flat. The downsides are the cost of the equipment, the need for careful masking to contain overspray, and a learning curve to avoid runs. For a single bathroom vanity, brush-and-roll with a good enamel gives excellent results without the setup, while spraying is worth it if you are doing a whole kitchen and bath at once.
Getting a Smooth, Grain-Free Finish on Oak
Oak vanities present a special challenge because their open, deep grain telegraphs through paint, leaving a striped texture even after several coats. If you want a smooth, contemporary look, plan to fill that grain. After cleaning and sanding, apply a thin skim coat of spackle or a dedicated grain filler across the oak, then sand it flush once dry so the pores are filled but the wood shows through only where it should. A high-build bonding primer, sanded smooth between coats with 220 grit, further levels the surface. It takes an extra step or two, but the payoff is a vanity that looks like smooth painted wood rather than obviously painted-over oak. If you actually like the grain texture, you can skip filling and let it show, which suits farmhouse and traditional styles just fine.
Painting a bathroom vanity is proof that a small project done carefully can rival a full remodel in visual impact. The whole job comes down to disciplined prep, degrease, sand, and prime with a bonding primer, followed by two thin coats of a durable cabinet enamel and patient curing. Respect those steps and you will turn a tired, dated vanity into a fresh, hard-wearing centerpiece that holds up to daily splashes for years, all for the price of a couple quarts of paint and a weekend of work.