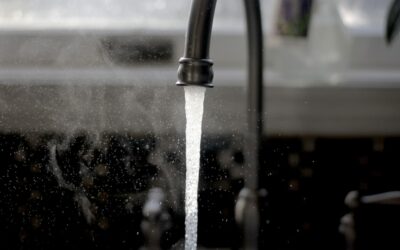
A faucet that drips once a second wastes over 3,000 gallons a year, enough to fill a small swimming pool, and it usually signals a worn part that costs a few dollars to replace. A bathroom faucet leaking is almost never a reason to buy a new fixture; it is a reason to find the failed component and swap it. The location of the leak tells you exactly what went wrong, so diagnosis is half the battle. Here is how to trace it and fix it yourself.
Part of our Bathroom Remodeling & Flooring guide — explore the full guide →
First, Read Where the Leak Is Coming From
The source of the drip points straight to the culprit. Take a minute to observe before you grab tools.
- Dripping from the spout tip: A worn cartridge, washer, or valve seat inside the handle.
- Water pooling around the base of the spout or handle: A failed O-ring or seal.
- Leaking underneath the sink: A loose supply line, cracked hose, or bad connection.
- Seeping from the handle when running: A deteriorated packing washer or O-ring on the stem.
Once you know the location, you know which repair path to take, and you can buy the right part on the first trip.
Shut Off the Water and Prep
Every faucet repair starts the same way. Close the shutoff valves under the sink by turning them clockwise, then open the faucet to drain the lines and confirm the water is truly off. Plug the drain with a rag so no small screws vanish down it, and lay a towel in the basin to protect the finish and catch parts. Take a phone photo of the faucet before you start so reassembly is foolproof.
Fixing a Drip From the Spout
A spout drip is the most common leak, and the fix depends on your faucet type. Modern single-handle and many two-handle faucets use a cartridge. Pry off the decorative handle cap, remove the handle screw, lift the handle, and pull out the retaining clip. Grip the cartridge and pull it straight up — sometimes a cartridge puller tool helps. Bring the old one to the store to match brand and model, since cartridges are not universal, then reinstall the new one in the same orientation.
Older compression faucets use a rubber washer at the base of the stem. Unscrew the stem, replace the flattened washer and, while you are there, the packing washer, and reseat it. If the valve seat under the washer feels rough, dress it with a seat wrench or a reseating tool so the new washer can form a tight seal.
Stopping a Leak at the Base
When water gathers around the spout base rather than dripping from the tip, an O-ring has failed. Remove the spout or handle to expose the O-rings riding on the valve body, roll off the old ones, and slip on exact-size replacements. Coat the new O-rings with a thin film of plumber’s grease before reassembly so they seat smoothly and last longer. This inexpensive fix solves the majority of base leaks.
Repairing Leaks Under the Sink
Drips beneath the vanity usually trace to the supply lines. Feel along each braided hose with a dry paper towel to pinpoint the wet spot. If a compression or threaded connection is loose, snug it a quarter turn with a wrench — do not overtighten. If a hose itself is cracked or corroded, replace it entirely; braided stainless supply lines cost only a few dollars and install in minutes. Wrap threaded connections with plumber’s tape before reconnecting.
Reassemble and Test
Put the faucet back together in the reverse order, referring to your photo. Reopen the shutoff valves slowly and let the faucet run for a minute, checking the spout, base, and under-sink connections for any remaining drips. Cycle the handle through hot, cold, and off several times. A repair that holds under a few minutes of running water will hold for years.
Preventing Future Leaks
Once you have fixed the drip, a little maintenance keeps it from returning. Hard water is the biggest enemy of faucet parts, because mineral scale builds up on cartridges and seats and grinds down rubber components faster. If you have hard water, unscrew and soak the aerator in white vinegar every few months, and consider a whole-house softener if scale plagues every fixture. Grease the O-rings with plumber’s grease whenever you have a faucet apart, since dry rubber cracks and leaks sooner.
Handle habits matter too. Cranking a faucet handle hard to stop a small drip only accelerates wear on the very part that is failing; if it drips, repair it rather than muscling it shut. When you replace a cartridge or washer, buy a full repair kit for that model so you swap every wear part at once instead of chasing one leak after another. These small steps stretch the life of a faucet from a few years to well over a decade.
When to Replace Instead of Repair
Repair is the right call most of the time, but a few situations justify a new faucet. Replace the fixture if the body is cracked, if the finish is heavily corroded and pitting, if replacement cartridges are discontinued for an old model, or if you have already rebuilt it twice and it keeps failing. A quality mid-range faucet runs $80 to $200 and installs in about an hour, which beats endlessly chasing leaks on a worn-out unit.
Most of the time, though, a bathroom faucet leaking simply needs a $5 cartridge or O-ring and twenty minutes of your afternoon. Read the leak’s location, match the part, and you will stop both the drip and the slow drain on your water bill.