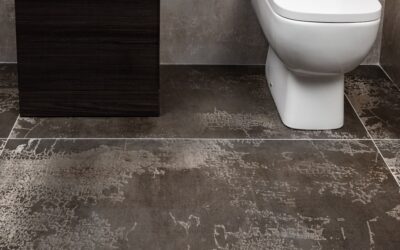
Stepping onto a warm tile floor on a cold morning is one of the small luxuries that makes a bathroom remodel feel worth it. Bathroom floor heating is no longer a high-end-only feature; a modern electric system fits under most tile jobs for a few hundred dollars in materials, and it doubles as a gentle room heater.
Part of our Bathroom Remodeling & Flooring guide — explore the full guide →
That said, the details matter. Choosing between electric and hydronic, sizing the wattage, wiring a GFCI thermostat, and embedding the elements correctly in thin-set all determine whether the floor lasts 20 years or fails in two. Here is how a tile contractor approaches the job.
Electric vs Hydronic: Which System Fits a Bathroom
Two technologies dominate radiant floor heating, and for a single bathroom the answer is almost always electric.
Electric Radiant
Electric systems use thin resistance cables, either loose cable you snake yourself or pre-spaced cable stitched onto a mesh mat. Popular products include SunTouch mats, WarmlyYours TempZone, and Schluter DITRA-HEAT, which combines an uncoupling membrane with heating cable in one layer. Electric is cheap to install, adds little floor height, and is ideal for the small square footage of a typical bath.
Hydronic Radiant
Hydronic systems pump warm water through PEX tubing, fed by a boiler or water heater. They cost far more to install and require a manifold and pump, so they only make financial sense for whole-house heating or large additions, not a single 40-square-foot bathroom. For most remodels, skip hydronic and go electric.
Sizing the System: Watts Per Square Foot
Electric radiant floor systems draw roughly 12 to 15 watts per square foot. That figure tells you both the heat output and the electrical load you need to plan for. A 40-square-foot bathroom floor, for example, pulls about 480 to 600 watts, well within a dedicated 15-amp or 20-amp circuit at 120 volts.
Measure only the open floor you will actually walk on. You never install heating cable under the toilet, the vanity, the tub, or any fixed cabinet, both because it wastes energy and because heat trapped under a fixture can damage it. Subtract those footprints before you order a mat, since these systems cannot be cut to length in the field. You lay the mat, and where you need to turn it, you cut the mesh backing only, never the cable itself.
The Thermostat and GFCI Requirement
Every electric floor heating system must be protected by ground-fault circuit interrupter (GFCI) protection because it lives under a wet-area floor. Most dedicated floor-heating thermostats, such as the Schluter DITRA-HEAT-E-WiFi or the SunTouch SunStat, have a Class A GFCI built into the unit, so you do not need a separate GFCI breaker.
The thermostat also reads a floor sensor, a thin probe you weave between the cable loops during installation. Always install a second sensor as a spare, run in the same conduit, because replacing a failed sensor buried in thin-set is nearly impossible. Program the thermostat to warm the floor before your morning routine; most people run the floor between 80°F and 85°F for comfort, with the room settling several degrees warmer.
Installing Under Tile With Thin-Set
Radiant heat works best under tile and natural stone because those materials conduct and store heat efficiently. It can go under engineered wood or luxury vinyl with a temperature-limited thermostat, but tile is the ideal partner.
- Prep the subfloor. Confirm it is clean, flat, and structurally sound. Test the cable resistance with a multimeter and record the reading before, during, and after install.
- Lay the mat or membrane. Roll out the heating mat or install DITRA-HEAT membrane, keeping cable at least 2 to 3 inches from walls and fixtures.
- Set the sensor. Place the floor sensor centered between two cable runs, never touching the cable.
- Embed in thin-set. Trowel a polymer-modified thin-set over the cables, fully encapsulating them with no air pockets. Air gaps cause hot spots that can burn out the cable.
- Set the tile. Tile directly into the thin-set that covers the cable, or add a second layer, depending on the system.
- Wait to power on. Let the thin-set and grout cure per the mortar bag, typically 2 to 4 weeks, before energizing. Turning it on early can crack the bond.
What Bathroom Floor Heating Costs
Materials for an electric system run about $8 to $15 per square foot, which includes the mat or cable and the thermostat. For a 40-square-foot bathroom, budget roughly $350 to $600 in materials. If you hire an electrician to run a dedicated circuit and wire the thermostat, add $200 to $500 depending on how far the panel is. A tile setter who installs the mat as part of the tile job may charge $3 to $7 per square foot in labor for that portion.
All in, a professionally installed heated tile floor in a standard bathroom typically lands between $700 and $1,500. Doing the tile and heating yourself and hiring only the electrician can cut that nearly in half.
Energy Use and Running Costs
Because you heat a small area intermittently, operating cost is modest. A 500-watt floor running four hours a day uses about 2 kWh daily. At a national average around 16 cents per kWh, that is roughly $0.32 a day, or under $10 a month. A programmable thermostat that only warms the floor during your morning and evening windows keeps costs at the low end. Adding an insulating underlayment beneath the cable, such as a cork or synthetic board, drives the floor to temperature faster and trims energy waste by sending heat up instead of down into the subfloor.
Common Installation Mistakes to Avoid
Most floor-heating failures trace back to a handful of avoidable errors. The most damaging is nicking the heating cable with a trowel, a utility knife, or a dropped tile during install. A single break kills the whole run, and you cannot splice it in the field. Check the cable resistance with a multimeter at three points, before layout, after layout, and after the thin-set goes down, and stop immediately if the reading changes.
- Overlapping cable: Never let cable cross over itself. The doubled heat load creates a hot spot that burns out the element.
- Cable under fixtures: Keep heat away from the toilet flange, vanity, and tub footprint to avoid trapped heat and wasted energy.
- Skipping the sensor spare: Run two floor sensors so a failed one does not mean tearing up tile.
- Energizing too early: Powering the system before the mortar cures cracks the bond and can void the warranty.
Take photos of the cable layout before you cover it. If you ever need to drill into the floor later, for a new toilet or a grab bar, those photos show you exactly where the cable runs so you do not slice through it.
Is It Worth It
For a bathroom you use every day, heated floors deliver comfort out of proportion to their cost, and they can serve as the room’s primary heat source in mild climates. The best time to add it is during a tile remodel, when the floor is already open and the incremental labor is small. Match the system to your finish flooring, size the wattage honestly, and respect the cure time, and you will enjoy warm tile for the life of the floor.
Prefer to explore on your own?
See how new flooring looks in your actual room in seconds — free, no signup.
Try the free Floor Studio →