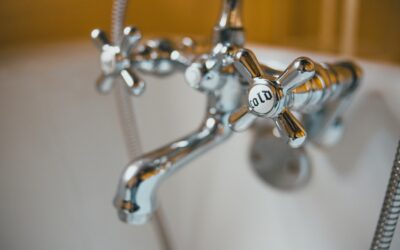
Nothing dates a bathroom faster than a bulky deck-mounted faucet crowding a small vanity, and nothing modernizes one faster than moving that faucet up onto the wall. A bathroom wall faucet mounts through the wall above the sink rather than through the countertop, freeing up counter space, making the basin far easier to clean, and delivering the spa-like look that dominates high-end bathroom design. The trade-off is that installation requires planning the plumbing rough-in before the wall is closed, so it is best tackled during a remodel.
Part of our Bathroom Remodeling & Flooring guide — explore the full guide →
Why Homeowners Choose Wall-Mount
The visual payoff is the main draw. With no faucet base or handles cluttering the counter, a vessel sink or a floating vanity reads as clean and intentional. Practically, wiping down the countertop becomes effortless because there is no faucet footprint trapping water and grime around its base.
Wall-mount faucets also pair naturally with vessel sinks that sit high on the counter, where a standard deck faucet would be too short to clear the bowl rim. Mounting on the wall lets you set the spout at the perfect height above any basin.
Key Measurements to Get Right
The single most important dimension is spout reach and height relative to your sink. The water stream should land in the center of the drain, not against the back of the basin or over the front edge. Plan the faucet height so the spout clears the sink rim by 3 to 5 inches for comfortable hand washing.
- Spout reach: how far the spout projects from the wall, typically 5 to 9 inches
- Mounting height: the spout usually sits 4 to 6 inches above the basin rim
- Handle spread: single-handle or widespread two-handle, matching your valve rough-in
- Drain alignment: the stream must hit the drain, so center the faucet over it
The Rough-In Is Everything
Because the valve body and supply lines live inside the wall, the rough-in must be set before you drywall and tile. The valve is mounted to blocking between the studs at the planned height, and the escutcheon plates on the finished wall hide the connections. Get the height and spacing wrong at rough-in and correcting it means opening the wall back up.
For this reason, wall-mount faucets are ideal in new construction or a full gut remodel. Retrofitting one into a finished wall is possible but involves cutting open drywall, adding blocking, and re-tiling, which erases much of the convenience.
Single-Handle vs Widespread
Single-handle wall faucets use one lever for both temperature and flow, feeding from a single valve body. They are the simplest to install and the most common in modern designs. Widespread wall faucets place two handles on either side of the spout, requiring three separate wall penetrations and precise spacing, usually 8 inches on center. Widespread models suit traditional bathrooms but demand more careful rough-in.
What a Wall Faucet Costs
Quality single-handle wall faucets from brands like Kohler, Delta, and Moen run $150 to $500, while designer widespread models from luxury makers reach $600 to $1,500. Budget import faucets start around $80, but the internal valve cartridge is where cheap models fail, so paying for a name-brand ceramic disc valve is worth it on a fixture buried in your wall. Add $200 to $500 for professional installation if it is part of a remodel where the wall is already open.
Installation Overview
- During framing, mount the valve body to blocking at the planned height and set the spout stub-out.
- Connect hot and cold supply lines to the valve and pressure-test before closing the wall.
- Drywall and tile over the rough-in, leaving openings for the spout and handle.
- Install the finished spout, handle, and escutcheon plates, sealing around each with silicone.
- Turn the water on and check every connection for leaks.
Because a leak inside the wall can go undetected until it causes real damage, this is a job where pressure-testing before closing up is non-negotiable.
Matching the Drain and Sink
A wall faucet changes how you think about the sink and drain below it. Because the faucet no longer sits on the counter, a vessel sink or a low-profile basin becomes the natural pairing. Whatever basin you choose, confirm the drain position lines up under the spout so the stream hits center. Vessel sinks often use a grid drain or a pop-up without an overflow, since many vessels have no overflow hole, so buy a drain rated for overflow-less basins to avoid leaks. Coordinate the drain finish with the faucet, matching brushed nickel to brushed nickel or matte black to matte black, so the visible fittings read as a set.
Water Pressure Considerations
Wall-mount faucets can feel different in flow than deck models because the valve and spout geometry vary. Most modern faucets include a flow-restricting aerator that caps output at 1.5 to 1.8 gallons per minute to meet water-efficiency standards, which is plenty for hand washing. If your home has low water pressure, choose a faucet known for a strong stream and confirm your supply lines are not undersized. A single-handle valve generally delivers a more forceful flow than a widespread setup, another reason single-handle models dominate modern installs.
Is It Right for Your Bathroom?
A bathroom wall faucet is the right call when you are remodeling and want a clean, modern look with easy counter cleanup, especially over a vessel or floating sink. If your walls are finished and you are not opening them, a deck-mounted faucet will save you real money and hassle. Plan the rough-in carefully, buy a faucet with a proven ceramic valve, and you will get a fixture that looks custom and performs for decades. One practical way to reduce the risk of a retrofit is to plan the project around an accessible wall, such as one backing onto a closet or an unfinished space, so the plumbing can be reached from behind if it ever needs service. Whenever the wall is open, take clear photos of the valve, blocking, and supply routing before you close it up, and keep them with your home records. Those pictures make any future repair or remodel far less of a mystery.