Stepping over a slippery tub wall is one of the riskiest moves most people make every day, and the CDC reports that the bathroom is where a large share of older adults’ home injuries happen. Properly placed bathtub grab bars turn that step into a controlled, supported transfer. The catch is that a bar is only as good as its anchoring and its location: one screwed into drywall or placed at the wrong height can fail exactly when someone leans on it. Here is how to choose, place, and install bars that actually hold.
Part of our Bathroom Remodeling & Flooring guide — explore the full guide →
- Why Bathtub Grab Bars Matter More Than Shower Bars
- Where to Place Bathtub Grab Bars
- Choosing the Right Bar
- Anchoring: Studs, Blocking, and Wall Anchors
- Installing on Tile, Fiberglass, and Acrylic Tubs
- Costs of Adding Bathtub Grab Bars
- Other Tub Safety Upgrades to Pair With Grab Bars
- Bathtub Grab Bars FAQ
Why Bathtub Grab Bars Matter More Than Shower Bars
A tub adds challenges a walk-in shower does not. The rider must lift one leg over a 14- to 16-inch wall, balance on a wet, curved surface, lower down to sit, and later push back up from the tub floor. Each phase needs a different handhold. A single towel-bar-style rail on the back wall rarely covers all of them.
Bathtub grab bars help with:
- Entering and exiting: A vertical bar at the tub’s entry end gives a steady hold while stepping over the rim.
- Standing showers in the tub: A horizontal bar on the back wall steadies you while washing hair with eyes closed.
- Sitting down and standing up: Bars within reach of a seated bather make it possible to rise without pushing off the slick tub edge.
Towel bars, soap dishes, and shower-door frames are not substitutes. They are typically rated for a fraction of the load a person generates while catching a slip.
Where to Place Bathtub Grab Bars
ADA guidelines for public bathtubs are the most widely used reference for homes, even though private residences are not required to follow them. For a standard 60-inch tub with a back wall and two end walls, the ADA layout looks like this:
- Back wall: Two horizontal bars, each at least 24 inches long. One mounts 33 to 36 inches above the bathroom floor, and the lower one mounts 8 to 10 inches above the tub rim. Each should extend to within 12 inches of the control-end wall and within 24 inches of the head-end wall.
- Control end wall (faucet end): A horizontal bar at least 24 inches long, 33 to 36 inches above the floor, starting at the front edge of the tub.
- Head end wall (opposite the faucet): A horizontal bar at least 12 inches long, 33 to 36 inches above the floor, at the front edge of the tub.
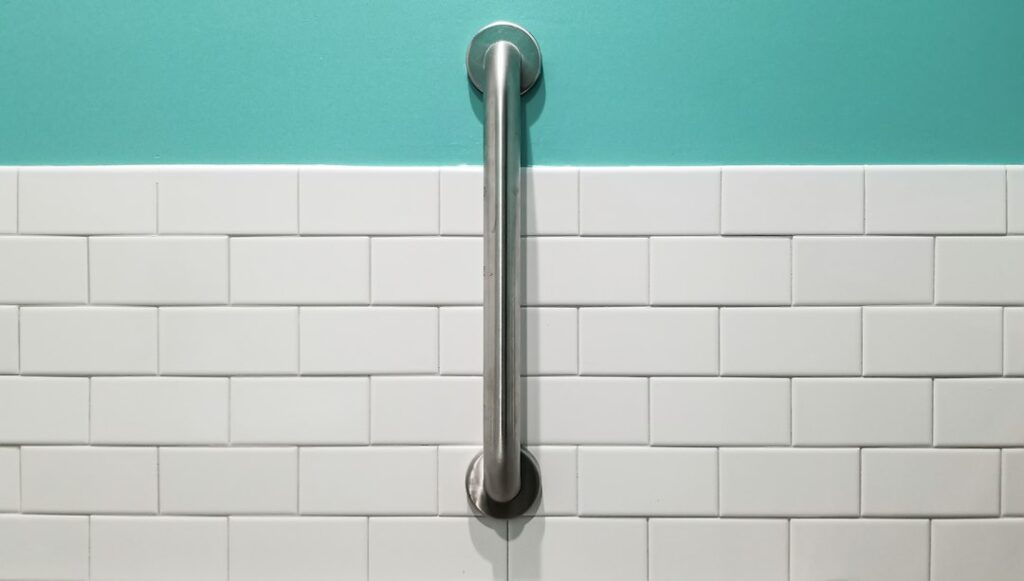
Many occupational therapists also add a vertical entry bar, 18 to 24 inches long, mounted on the control-end wall near the front of the tub with its bottom about 32 to 38 inches above the floor. People naturally grab vertically when stepping over something, so this single bar often gets the most use. An angled bar on the back wall is another option for people who push up from a seated position.
Because every body is different, have the primary user stand in the dry tub and mime getting in, sitting down, and standing up. Mark with painter’s tape where their hands naturally go, then adjust the standard heights to fit. An occupational therapist home-safety evaluation, often covered by Medicare Part B when ordered by a doctor, can refine placement for people with specific conditions.
Choosing the Right Bar
Grab bars come in a range of sizes and finishes, but the functional specs matter most.
| Spec | Recommended | Why it matters |
|---|---|---|
| Diameter | 1 1/4 to 1 1/2 inches | Allows a full, secure grip |
| Wall clearance | 1 1/2 inches | Room for fingers, not enough for an arm to slip through |
| Load rating | 250 lb minimum (ADA), 500 lb preferred | Handles sudden fall loads |
| Surface | Knurled or textured | Better grip with wet, soapy hands |
| Material | Stainless steel, 18-gauge or heavier | Resists corrosion in wet areas |
Common lengths are 12, 16, 18, 24, 32, and 36 inches. A 24-inch bar mounted horizontally usually spans two studs at 16-inch spacing, which makes it easier to anchor securely. Expect to pay $20-$60 for a quality stainless bar and $60-$150 for designer finishes such as matte black, brushed nickel, or oil-rubbed bronze. Dual-purpose bars that double as towel bars or toilet-paper holders are available and look less clinical, but make sure they carry the same load rating.
Anchoring: Studs, Blocking, and Wall Anchors
How the bar attaches to the wall is the most important safety decision. You have three sound options:
- Screw into studs: Use #10 or #12 stainless screws at least 2 inches long into the center of a wood stud. Locate studs with a stud finder and confirm with a small test hole in a grout line.
- Install blocking during a remodel: If the wall is open, add 2×6 or 2×8 horizontal blocking between studs at 33 to 36 inches and in the vertical-bar zone. This lets you mount bars anywhere later. Adding 3/4-inch plywood backing across the entire tub surround is even more flexible. Mark the locations in photos before the tile goes up.
- Use rated hollow-wall anchors: Where a stud is not available, specialty grab bar anchors that expand behind the wall and are tested for grab bar loads can be used in drywall, cement board, or tiled walls. Ordinary plastic plugs and toggle bolts are not acceptable.
Suction-cup grab bars are not safe support. They can release without warning, especially on textured tile or after temperature changes. Treat them as balance aids for travel at most, never as the main bar in a bathroom.
Installing on Tile, Fiberglass, and Acrylic Tubs
Wall material changes the technique:
- Ceramic or porcelain tile: Use a carbide or diamond tile bit, start slowly without hammer mode, and keep the bit cool with water. Drill through the tile, then switch to a wood bit for the stud. Painter’s tape on the tile keeps the bit from skating.
- Fiberglass or acrylic surrounds: These thin shells often have a gap between the panel and the studs. Drilling and tightening can crack the panel. Use anchors designed specifically for fiberglass tub walls, or have blocking added behind the surround.
- Tub-mounted clamp bars: Bars that clamp onto the tub rim require no drilling and can help with stepping in, but check that the rim profile is compatible. Some acrylic tubs are too thin or flexible.
Before drilling any wall, check for hidden plumbing. The supply lines and valve body sit behind the control-end wall, usually centered on the faucet, and a drain vent may run up the back wall. Stay a few inches clear of the valve’s centerline, and if an access panel exists on the other side of the wall, open it to see what is there. When a wall is thin, cracked, or clearly soft, stop and call a contractor; a bar anchored to failing tile backer is not safe.
Seal every screw penetration and the mounting flange with 100% silicone caulk so water cannot reach the wall cavity. Once installed, test each bar by pulling hard in every direction with your full body weight before anyone relies on it.
Costs of Adding Bathtub Grab Bars
DIY installation of two or three bars typically costs $60-$200 in hardware plus a tile bit. Professional installation by a handyman or certified aging-in-place specialist commonly runs $100-$250 per bar, with the first bar costing the most due to trip time. Adding blocking by opening the wall behind a tiled surround is a bigger job and can reach $500-$1,500 depending on tile repairs. When you are already renovating, blocking costs very little extra, so ask your contractor to install it throughout the tub area even if you do not need bars yet.
Other Tub Safety Upgrades to Pair With Grab Bars
Grab bars work best as part of a complete bath-safety plan:
- Non-slip surface: Adhesive treads or a professional anti-slip coating on the tub floor
- Transfer bench: Lets someone sit outside the tub and slide in without stepping over the wall, $40-$150
- Handheld shower on a slide bar: Allows seated bathing; note a slide bar is not a grab bar unless rated as one
- Slip-resistant floor: Textured porcelain tile or a rubber-backed bath mat outside the tub
- Better lighting and a nightlight: Reduces nighttime falls
- Anti-scald valve: Limits water temperature to around 120°F
If getting over the tub wall becomes too difficult even with bars, a tub-to-shower conversion or a tub cut-out insert that lowers the entry to a few inches may be the next step. An occupational therapist can help decide when it is time.
Bathtub Grab Bars FAQ
What height should bathtub grab bars be?
Horizontal wall bars are typically 33 to 36 inches above the bathroom floor, with a lower back-wall bar 8 to 10 inches above the tub rim. Adjust to the user’s reach for the best result.
Can grab bars be installed without studs?
Yes, with specialty anchors rated for grab bar loads. Standard plastic anchors, drywall toggles, and suction cups are not safe for grab bars.
How much weight should a grab bar hold?
ADA guidance requires bars and mounts to resist 250 pounds of force. Many quality residential bars are rated to 500 pounds when anchored into studs or blocking.
Are clamp-on tub rail bars safe?
They can be helpful for stepping over the tub wall when properly tightened on a compatible rim, but they do not replace wall-mounted bars for sitting down and standing up.