Most falls at home happen in two places — the bathroom and the bedside — and in both spots the nearest wall is often too far away to help. That is exactly the problem floor mounted grab bars exist to solve. Instead of hunting for a stud or opening drywall to add blocking, floor mounted grab bars anchor into the subfloor or slab (or wedge floor-to-ceiling) and put a solid handhold right where a person actually stands up: beside the toilet, at the tub step-over, next to the bed. Done right, a floor-anchored bar or pole will hold 250 to 500 pounds of sudden load. Done wrong — screwed into flooring instead of framing — it will let go at the worst possible moment. Here is how to choose, place, and install them correctly.
When Floor Mounting Beats Wall Mounting
A wall-mounted grab bar is only as strong as what is behind it, and behind most bathroom drywall there is nothing for 14-1/2 inches at a stretch. If the studs do not land where the bar needs to go, your options are opening the wall to add 2×8 blocking, using oversized toggle anchors that top out around 250 pounds in 1/2-inch drywall, or skipping the wall entirely. Floor mounting skips the wall. The floor framing under you — joists, subfloor, or a concrete slab — is structurally stronger than any wall in the house, and it is always exactly where the user is standing.
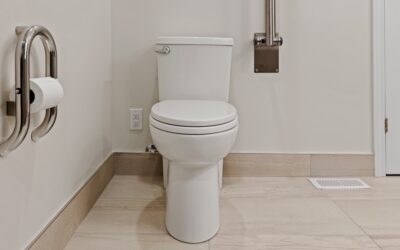
Floor-anchored supports shine in three situations. First, the toilet: a swing-up rail bolted to the floor beside the bowl gives push-down support for sitting and standing, then folds up out of the way — no wall required on the open side of the toilet. Second, mid-room transfers: a floor-to-ceiling pole beside a bed, recliner, or tub lets someone pull to a stand in open space where no wall exists at all. Third, rentals and tile-over-slab bathrooms where the owner cannot or will not cut into finished walls. The trade-offs are honest ones: a floor bar is a permanent floor penetration (except tension poles), it can crowd a small bathroom footprint, and it collects mop water at the base flange, so stainless or coated aluminum matters.
The Three Main Types
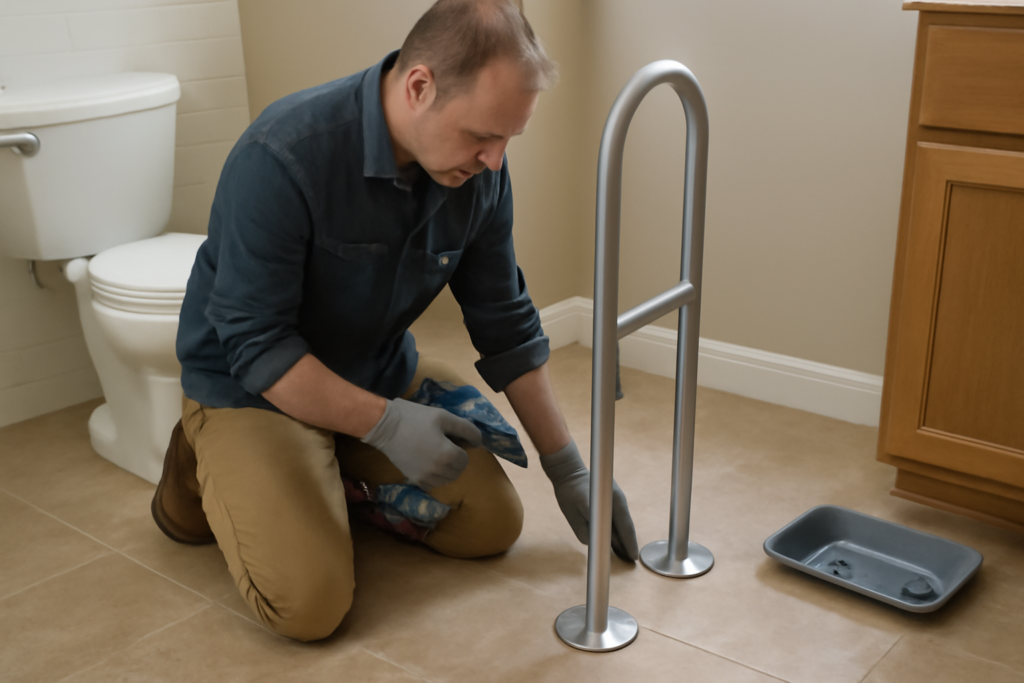
Floor-to-ceiling security poles are the most versatile. The Stander Security Pole (about $160, or $230 with the pivoting curve grab handle) is a tension-mounted steel pole rated to 300 pounds that wedges between the floor and any flat ceiling from 7 to 10 feet — no screws into the floor at all, though it must sit under a joist or solid blocking above, never bare drywall mid-span. The HealthCraft SuperPole (roughly $250 to $350, options like the SuperBar swing handle extra) works the same way but jack-screws to higher clamping force and carries a 300-pound rating with hardware-grade build quality; HealthCraft also sells ceiling and floor plates for permanent fastening.
Toilet-side swing-up rails are the second category. Units like the Moen R8960FD Flip-Up rail or HealthCraft’s dependa-bar bolt a steel flange to the floor (and often the wall behind the tank) and put a horizontal fold-down arm 28 to 32 inches beside the bowl; expect $80 to $250 and ratings of 250 to 300 pounds. Third are true floor-to-floor bars and toilet safety frames — freestanding steel frames such as the Vaunn or Drive Medical stand-alone toilet rails ($45 to $90) that surround the bowl with two armrests and either bolt to the floor or clamp to the toilet seat hinge. Bolted beats clamped for anyone who pulls sideways.
Heights and Clearances That Follow ADA Guidance
You are not legally bound by the ADA in a private home, but its numbers encode decades of ergonomics research, so borrow them. Horizontal grab surfaces belong 33 to 36 inches above the finished floor — that band works for seated push-off at a 17-to-19-inch toilet seat and for standing support. On a vertical pole, position any horizontal add-on handle in that same 33-to-36-inch window, and remember the pole itself gives grip at every height, which is why poles suit couples of different statures.
Clearances matter as much as height. Keep 1-1/2 inches minimum between a bar and any wall or obstruction so knuckles clear. Set a bedside pole 10 to 12 inches from the mattress edge — close enough to reach from seated, far enough to swing legs out. Beside a toilet, the support arm should sit 11 to 12 inches from the bowl centerline so the forearm lands naturally. And leave a clear 30-inch pathway past any floor-mounted unit; a safety device that becomes a shin-height obstacle course has traded one fall risk for another. Grip diameter should run 1-1/4 to 1-1/2 inches with a knurled or powder-coated surface — glossy chrome is the slipperiest finish sold.
Anchoring Into Concrete
A slab is the best anchor bed you will ever get. Mark the flange holes, confirm with a pipe/cable scanner or the builder’s plans that you are not over a radiant heat loop or plumbing run, and drill with a hammer drill and carbide bit sized to your anchor — typically 3/8 inch or 1/2 inch, at least 2-1/2 inches deep. Blow the dust out with a bulb blower; dusty holes cut anchor strength nearly in half. Drive 3/8-inch wedge anchors (Red Head or Hilti Kwik Bolt, about $2 to $4 each) through the flange, then torque the nuts to roughly 25 to 30 foot-pounds. Four 3/8-inch wedge anchors in sound 3,000 psi concrete hold thousands of pounds in shear — far past any human load. Going through tile over slab, drill the tile first with a carbide or diamond tile bit and no hammer action, then switch to hammer mode once you reach concrete, and snug the flange gently so you do not crack the tile; a bead of silicone under the flange keeps mop water out of the penetration.
Anchoring Into a Wood Subfloor
Wood floors demand more thought because 3/4-inch plywood or OSB alone is not enough for a hard yank at the top of a 40-inch lever arm. The gold standard is landing at least two flange bolts in a joist: find the joists with a stud finder or a test hole, and drive 5/16-inch x 3-inch lag screws with washers through the flooring and subfloor into the joist center, with pilot holes at 3/16 inch. A 5/16 lag gets over 200 pounds of withdrawal resistance per inch of thread in the joist, so two of them embedded 1-1/2 inches are comfortably past the bar’s own rating.
When the flange lands between joists, add blocking. From below (basement or crawlspace), screw and glue a 2×8 flat between the joists under the flange location, then through-bolt the flange with 5/16-inch carriage bolts, fender washers, and nylock nuts. No access from below? Use lag screws into the subfloor with a 12-inch square of 3/4-inch plywood laminated to the underside if you can reach it, or shift the flange a few inches to catch framing — moving the bar 2 inches is always better than trusting screws in bare OSB. Never anchor into floating laminate or LVP; drill an oversized clearance hole through floating flooring so the lags clamp subfloor, not planks, and the floor can still move.
Weight Ratings and What They Really Mean
Most quality units are rated 250 to 300 pounds; heavy-duty models like HealthCraft’s bariatric SuperPole configurations reach 450 to 500 pounds. Treat the rating as a static number and remember that a falling body multiplies its weight — a 180-pound person catching themselves mid-fall can spike loads well past 400 pounds for a fraction of a second. Buy at least a 300-pound rating for anyone over 200 pounds, and understand that the printed rating assumes correct anchoring. A 500-pound bar held by drywall screws is a 40-pound bar. The anchor, not the steel, is almost always the failure point.
Install Steps, Start to Finish
A typical bolted floor install runs 60 to 90 minutes:
- Have the user sit and stand where the support will go; mark where their hand naturally lands. Real reach beats catalog drawings.
- Locate framing (wood) or scan for embedded lines (slab). Adjust the flange position to hit structure.
- Mark flange holes, verify the pole is plumb or the rail arm sits level at 33 to 36 inches, and drill pilot or anchor holes.
- Bed the flange in silicone in wet areas, then drive lags to snug plus a quarter turn, or torque wedge anchor nuts to spec.
- Assemble the pole or arm, then load-test: push, pull, and lean with your full body weight in every direction the user will. Any flex or flange lift means stop and re-anchor.
- Re-check tension poles after 48 hours and monthly thereafter; ceilings relax and jack pressure drops slightly at first.
Hiring it out, a handyman or CAPS-certified aging-in-place contractor charges $100 to $250 per unit installed on top of hardware. That is cheap insurance compared to the alternative — the average fall-related ER visit for an older adult runs north of $10,000. Put solid steel where the hand reaches, bolt it to real structure, and test it like a life depends on it, because eventually one will.
Prefer to explore on your own?
See how new flooring looks in your actual room in seconds — free, no signup.
Try the free Floor Studio →