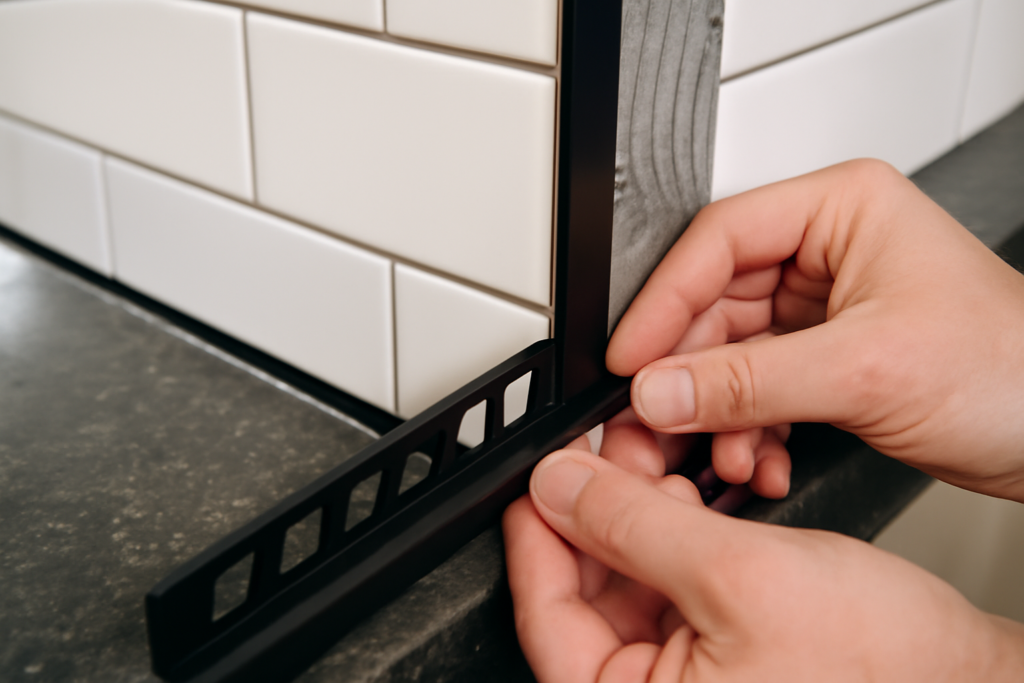
A clean tile job lives or dies at its edges, and black tile trim has become the go-to finishing detail for homeowners chasing a modern, high-contrast look. Whether it frames a white subway backsplash, caps a shower niche, or protects the exposed edge of a floor, black tile trim hides raw tile edges while adding a crisp, intentional border. This guide covers the trim types, materials, sizing, pricing, and installation so your finished edges look professional instead of improvised.
What Tile Trim Actually Does
Tile has a raw, unglazed edge on its sides that looks unfinished and can chip if left exposed. Trim, sometimes called edge profile or edging, solves three problems at once: it covers that raw edge, it protects the corner from impact, and it creates a clean transition between tile and an adjacent surface like paint, another tile, or a countertop.
Choosing black instead of matching or metallic trim is a deliberate design move. Black outlines a tiled area the way a picture frame defines art, and it pairs especially well with white, gray, marble-look, and terrazzo tile where the contrast reads as sharp and contemporary rather than busy.
Types of Black Tile Trim
Trim comes in several profiles, and each solves a specific edge situation. Knowing the shapes helps you order the right pieces the first time.
- Square-edge (straight) profile: A flat, modern L-shaped strip that sits flush with the tile face for a squared, minimalist edge. The most popular choice in current designs.
- Round-edge (bullnose) profile: A gently curved lip that softens the transition, common in traditional and family bathrooms where a rounded edge is safer.
- Quarter-round and pencil liners: Slim decorative strips used as accent borders between fields of tile.
- Outside-corner trim: Pre-formed corner pieces that wrap a 90-degree edge without an awkward miter.
- Bullnose tile: Actual ceramic or porcelain tile with one finished, glazed edge in black, used where you want the trim material to match the tile itself.
Trim Materials and Finishes
The material determines durability, cost, and how the black reads under light. Compare the common options before you commit.
- Anodized aluminum: Lightweight, rust-resistant, and available in matte black. The most common metal trim, priced moderately, and easy to cut.
- Stainless steel: Comes in black powder-coated or PVD finishes, extremely durable, and ideal for high-traffic floors and commercial looks. Costs more than aluminum.
- PVC and composite: The budget option, fine for dry walls and low-impact areas, though the black can look flatter and may scuff over time.
- Brass and solid metal: Premium, with a matte-black or gunmetal finish for designer projects at a higher price.
- Glazed ceramic bullnose: Matches black tile exactly and gives a seamless, all-tile edge.
Finish matters as much as material. Matte black hides fingerprints and reads soft and modern, while glossy or powder-coated black pops more but shows smudges and water spots, especially in showers.
Sizing Trim to Your Tile
Metal edge profiles are sold by the height of the vertical leg, which must match your tile thickness plus the thinset bed. Standard sizes run from 3/8 inch up to 1/2 inch and 5/8 inch for thicker porcelain plank and stone.
Measure your actual tile thickness with calipers or a ruler, then add roughly 1/8 inch for the adhesive layer and pick the next size up. A profile that is too short will leave the tile edge proud of the trim, and one that is too tall will stand above the tile and catch dirt. Trim usually comes in 8-foot or roughly 98-inch lengths, so calculate your linear footage and add 10 percent for cuts and corners.
Black Tile Trim Pricing
Cost varies with material and length. Use these general ranges to budget:
- PVC edge trim: about $4 to $8 per 8-foot piece.
- Anodized aluminum: roughly $10 to $20 per 8-foot length.
- Stainless steel: about $18 to $35 per length depending on finish.
- Brass and premium metal: $30 to $60-plus per length.
- Glazed ceramic bullnose: $3 to $10 per piece depending on size.
For a standard kitchen backsplash needing 20 to 25 linear feet of edging, expect to spend $30 to $80 in aluminum trim. That small line item has an outsized effect on how finished the whole project looks, so it is not the place to cut corners.
How to Install Black Tile Trim
Metal and PVC profiles set into the thinset at the same time as the tile, which means you plan for them before you start laying the field. Here is the sequence:
- Cut the trim to length with a hacksaw and a miter box, or a metal-cutting blade, for straight and 45-degree corner cuts.
- Spread thinset along the edge where the trim goes, then press the perforated anchoring leg of the profile into the wet mortar.
- Set your tile against the vertical face of the trim, leaving a normal grout-joint gap between the tile and the trim’s lip.
- For outside corners, either miter two pieces at 45 degrees or use a pre-formed corner piece for a cleaner result.
- Let everything cure, then grout the joint between tile and trim just as you would any other joint.
Pro tip: dry-fit the trim and a few tiles before spreading any mortar to confirm the profile height matches the tile face. Adjusting after the thinset sets is nearly impossible without a full redo.
Retrofitting Trim on Finished Tile
Adding trim to an already-tiled edge is trickier because you cannot embed the anchoring leg. In that case, use surface-mount L-channel trim designed to adhere with construction adhesive or silicone directly over the exposed edge. Clean the surface thoroughly, run a bead of adhesive, press the trim in place, and tape it until cured. It is not as seamless as embedded trim, but it rescues an edge that was left raw.
Alternatively, some homeowners use black silicone caulk or a black grout line as a minimal edge treatment, though these do not protect the corner from impact the way a rigid profile does. Surface-mount trim also tends to sit slightly proud of the wall, so run your fingers along the edge afterward to confirm there is no sharp lip that could catch a towel or a shoulder.
Matching Black Trim to Different Tile Styles
Black trim behaves differently depending on the tile it borders, so plan the pairing rather than assuming any black works everywhere. Against glossy white subway tile, matte black square-edge trim delivers the clean bistro or farmhouse look that has dominated kitchens for years. Beside marble-look porcelain, a slim brushed-black or gunmetal profile echoes the veining without competing with it. On terrazzo or heavily patterned encaustic tile, keep the trim understated and square so it frames the busy field rather than adding more visual noise.
Grout color plays into this too. Pairing black trim with a charcoal or true-black grout ties the edge into the joints and makes the whole layout read as one deliberate composition. Pairing it with bright white grout instead creates a graphic, high-contrast grid. Neither is wrong, but choosing on purpose is what separates a designed room from a default one.
Design Tips for a Cohesive Look
Carry the black through the room so the trim reads as intentional rather than random. Coordinate it with black fixtures, faucets, a black window frame, or dark grout so the edge belongs to a larger palette. Keep the profile style consistent throughout one space; mixing square-edge and bullnose in the same room looks accidental.
With the right material, correct sizing, and clean corners, black tile trim turns a good tile installation into a sharp, finished design feature. Measure your tile thickness carefully, buy 10 percent extra, and match matte or gloss to the rest of your fixtures for a result that looks like a professional did it.
Prefer to explore on your own?
See how new flooring looks in your actual room in seconds — free, no signup.
Try the free Floor Studio →