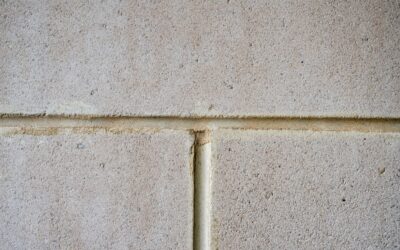
That thin line of sealant where your tub meets the floor is doing more work than almost anything else in the bathroom. When it fails, water seeps into the subfloor and framing, and the damage often stays hidden until it becomes a costly repair. Caulking around tub and floor is one of the highest-value hour-long jobs a homeowner can do, and it requires no special skill, just the right materials and a patient hand. Done properly, a fresh bead of caulk seals out moisture, prevents mold, and gives the whole bathroom a crisp, finished edge. Done poorly, it peels, mildews, and lets water through within months.
Part of our Paint & Walls guide — explore the full guide →
Why Caulk Instead of Grout
A common mistake is filling the tub-to-floor and tub-to-wall joints with grout. Grout is rigid, and these are the exact spots where two different surfaces move independently. The tub flexes slightly when filled with water and a person, the floor and walls stay put, and rigid grout cracks under that repeated movement. Caulk is flexible by design and absorbs that movement without breaking its seal.
That flexibility is the whole point. Any joint where two dissimilar planes meet, tub to floor, tub to wall, or the internal corners of a tiled surround, should be caulked, not grouted. Understanding this one principle prevents the most frequent cause of leaks in an otherwise well-built bathroom.
Choosing the Right Caulk
Not all caulk belongs in a wet area. Skip general-purpose acrylic and reach for a product rated for bathrooms:
- 100% silicone caulk: The gold standard for tubs. It is fully waterproof, extremely flexible, and long-lasting, though it cannot be painted and is a bit harder to tool smoothly.
- Siliconized acrylic (latex plus silicone): Easier to apply and paintable, but less durable and less waterproof than pure silicone. A reasonable choice for lower-moisture edges.
- Mold-resistant tub-and-tile caulk: Look for a formula with mildewcide and a “kitchen and bath” or “tub and tile” label. This resists the pink and black mold that thrives in damp joints.
Match the color to your existing grout or fixture, usually white, almond, or clear. One 10-ounce cartridge or squeeze tube is plenty for a standard tub. Buy a caulk that specifically lists mold and mildew resistance; it costs a dollar or two more and saves you a repeat job.
Tools and Materials You Need
Gather everything before you start so you are not hunting for a tool with wet caulk on your hands:
- A quality caulk, silicone recommended for the tub-to-floor joint
- A utility knife or dedicated caulk-removal tool
- A caulk gun if using a cartridge
- Rubbing alcohol or a mildew cleaner, plus rags
- Painter’s tape for clean edges
- A plastic caulk-smoothing tool or a gloved finger
- Paper towels and a small bucket of water
Removing the Old Caulk First
New caulk will not bond to old caulk, dirt, or soap film, so a thorough removal is non-negotiable. Rushing this step is the number one reason a fresh bead fails early.
- Cut it loose. Run a utility knife or caulk-removal tool along both edges of the old bead and peel it out. Silicone often comes away in long strips once you get an edge started.
- Scrape the residue. Remove every trace of leftover caulk. A plastic scraper protects the tub and tile finish from scratches.
- Kill any mold. If you see black or pink mildew, clean the joint with a mildew remover or a diluted bleach solution and let it work, then rinse.
- Clean and dry completely. Wipe the joint with rubbing alcohol to strip soap scum and oils, then let it dry fully. Silicone will not adhere to a damp or greasy surface.
For the best possible bond, fill the tub with water before caulking. The added weight pulls the tub down to its loaded position so the joint is at its widest, and the cured caulk then flexes rather than tears when the tub is used.
Applying a Clean Bead of Caulk
With the joint clean, dry, and the tub filled, you are ready for the main event of caulking around tub and floor:
- Tape both sides. Run painter’s tape along the tub and along the floor, leaving a consistent gap the width you want your finished bead. This is the single easiest way to get a straight, professional line.
- Cut the nozzle small. Snip the tip at a 45-degree angle with a modest opening, about 1/8 to 1/4 inch. You can always cut more; you cannot uncut.
- Lay the bead in one motion. Hold the gun at 45 degrees and apply steady, even pressure while moving at a consistent pace. Aim for one continuous pass rather than stopping and starting.
- Tool it immediately. Smooth the bead with a caulk tool or a wet gloved fingertip in one firm stroke, pressing the caulk into the joint. This forces good contact and creates a slightly concave, water-shedding surface.
- Pull the tape while wet. Remove both strips of tape before the caulk skins over, pulling away from the bead. This leaves razor-sharp edges.
Wipe excess caulk from your tool onto a paper towel between strokes rather than smearing it back onto the surface. Less is more; a tidy, modest bead outlasts a thick, sloppy one.
Common Mistakes That Cause Early Failure
Even a careful homeowner can undermine the job with a few predictable errors. Applying caulk over old caulk is the biggest one; the new bead only bonds to what it touches, so any leftover residue guarantees peeling within weeks. Caulking a wet or soapy joint is nearly as bad, because silicone will not stick to moisture or oils. Cutting the nozzle too large produces a thick, messy bead that traps water at its base rather than shedding it.
Another frequent misstep is choosing the wrong product entirely, such as a general-purpose acrylic caulk with no mildewcide, which molds quickly and shrinks as it dries. Finally, using the tub or shower before the caulk has fully cured breaks the seal before it ever sets. Slow down, respect the cure time, and you avoid the most common reasons a fresh bead fails.
How Often to Recaulk
Even a perfect installation does not last forever. In a busy family bathroom, expect to inspect the tub-to-floor joint every year and recaulk roughly every three to five years, sooner if you see cracking, gaps, or mildew that will not scrub away. Silicone generally outlasts siliconized acrylic, so a quality 100% silicone bead on the low end of that range often reaches the longer end. Catching a failing joint early, before water works its way into the subfloor, is what separates a $10 tube of caulk from a four-figure repair bill.
Curing and Aftercare
Patience at the end protects all your work. Most silicone caulks need 24 hours to cure fully before exposure to water, and some require longer, so check the label and keep the joint dry the entire time. If you filled the tub, leave it filled until the caulk has skinned over, then drain it once the surface is firm.
Going forward, wipe the joint down after showers to discourage mildew, and inspect it once or twice a year. When you notice cracking, peeling, or dark staining that will not clean off, it is time to recaulk. A proactive reseal every few years is far cheaper than repairing a water-damaged subfloor.
Final Thoughts on Caulking Around Tub and Floor
The job of caulking around tub and floor rewards preparation more than speed. Choose a mold-resistant silicone, strip out every trace of the old sealant, clean and dry the joint completely, fill the tub for a loaded fit, and tool a single clean bead with taped edges. Give it a full day to cure and keep it dry while it sets. Follow those steps and you will have a flexible, waterproof seal that keeps moisture out of your floor and framing for years, all from an inexpensive tube of caulk and an afternoon of careful work.
Prefer to explore on your own?
See how new flooring looks in your actual room in seconds — free, no signup.
Try the free Floor Studio →