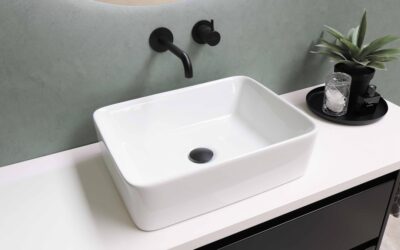
A chipped or cracked basin does not always mean buying a new fixture, and a ceramic sink repair kit is often all you need to make the damage disappear. These affordable kits let you fill chips, seal hairline cracks, and restore a smooth, color-matched finish in an afternoon, saving the cost and disruption of replacing a sink. This guide explains what comes in a typical kit, how to use one for a durable repair, how to nail the color match, what they cost, and when the damage is serious enough that replacement is the smarter call.
Part of our Tile & Grout guide — explore the full guide →
What a Ceramic Sink Repair Kit Includes
Kits vary by brand, but most contain the same core components designed to rebuild and refinish a damaged area. A typical kit includes:
- Two-part epoxy or filler that hardens into a durable, water-resistant patch.
- Color tints or pre-matched compounds to blend the repair into the surrounding glaze, usually in white and a few common shades.
- Applicators such as small spatulas, sticks, or mixing trays.
- Fine abrasive or sandpaper for smoothing the cured patch flush with the surface.
- A glaze or sealing coat in some kits to restore shine and protect the repair.
The same general kits often work on porcelain, enamel, and other glazed surfaces, since the repair chemistry is similar. Read the package to confirm it suits your sink material before buying.
When a Repair Kit Is the Right Choice
Repair kits excel at cosmetic and small structural damage. They are a great fit when you have:
- Surface chips from a dropped pot, glass, or heavy utensil.
- Small, shallow hairline cracks that have not spread.
- Worn or scratched spots in the glaze.
- Minor edge or rim damage that needs rebuilding.
They are less suited to deep structural cracks that run through the basin, leaks behind the wall, or extensive crazing across the whole surface. For those, repair may be a temporary fix at best, and replacement is usually wiser. Knowing the limits keeps you from investing effort in a patch that will not last.
Step-by-Step: Using the Kit
Always follow the specific instructions in your kit, since cure times and mixing ratios differ, but the general process is consistent and beginner-friendly:
- Clean and dry the area. Scrub the chip or crack with a non-abrasive cleaner, rinse, and dry completely. Any grease or moisture weakens the bond.
- Prep the surface. Lightly sand the damaged spot and a small margin around it so the filler grips, then wipe away dust.
- Mix the filler. Combine the two-part epoxy and tint to match your sink color, mixing thoroughly per the directions.
- Apply the filler. Press it into the chip or crack with the applicator, slightly overfilling so you can sand it flush later.
- Let it cure. Allow the full cure time before touching or sanding; rushing this step ruins the repair.
- Smooth and finish. Gently sand the patch flush, then apply the glaze or sealing coat if your kit includes one.
- Wait before use. Keep the sink dry and unused for the time the directions specify so the repair fully hardens.
Getting the Color Match Right
Color matching is what separates an invisible repair from an obvious one. White sinks come in many subtle shades, from bright white to cream and off-white, so resist assuming yours is pure white. Mix small amounts of tint into the filler and test the color against an inconspicuous area before applying it to the visible chip. It is easier to gradually darken or warm a mix than to lighten it, so add tint sparingly.
Lighting affects how the match reads, so check it in the same light where the sink lives. For a near-perfect blend, feather the patch slightly into the surrounding glaze rather than leaving a hard edge, and apply the glaze coat smoothly so the repaired spot reflects light like the rest of the surface.
Tips for a Durable Repair
A few habits make repairs last longer. Work in a ventilated space, since epoxies can have strong fumes, and wear gloves to keep the resin off your skin. Do not overwork the filler once it begins to set, as disturbing it weakens the patch. Build up deep chips in thin layers rather than one thick glob, letting each cure, which reduces shrinkage and cracking. And keep the repaired area dry well beyond the minimum cure time when you can, especially for repairs near the drain or in the basin bottom that face constant water.
For repairs in the wet zone of the basin, understand that even a good patch faces heavy exposure. It will hold up better on a rim or backsplash chip than on a high-wear spot under the faucet, so set expectations accordingly.
What It Costs
Repair kits are inexpensive compared with replacement, which is their main appeal. These are estimates that vary by brand and contents. A basic ceramic or porcelain repair kit commonly runs roughly $10 to $30, while more complete kits with multiple tints and glaze coats may run roughly $25 to $50. Compare that to the cost of a new sink plus plumbing labor, which can easily reach several hundred dollars, and a kit is an easy first thing to try for minor damage.
When to Replace Instead
Sometimes a patch is not enough. Consider replacement if the sink has a crack that goes all the way through the basin, leaks underneath, shows widespread crazing, or has damage so large that a repair would be visibly patched and structurally weak. A through-crack in a sink can also harbor moisture and worsen over time. If you are unsure whether a crack is structural, or if the sink is part of a one-piece countertop or pedestal that complicates removal, consult a plumber before deciding.
The Bottom Line
For chips, shallow cracks, and worn glaze, a ceramic sink repair kit is a low-cost, satisfying fix that can make damage vanish and extend the life of your fixture for years. Success comes down to thorough cleaning and prep, patient curing, careful color matching, and building deep repairs in layers. Save replacement for through-cracks, leaks, and extensive damage. Match the fix to the problem and you will keep your sink looking its best without an unnecessary remodel.
Prefer to explore on your own?
See how new flooring looks in your actual room in seconds — free, no signup.
Try the free Floor Studio →