A finished basement bedroom without a legal escape route is not a bedroom in the eyes of a home inspector, an appraiser, or a fire marshal. An egress window kit bundles the major components needed to create that escape route, usually a code-sized window, a prefabricated window well, and the hardware to tie them together. Kits simplify ordering and help ensure the parts are sized to work as a system. They do not, however, make cutting a hole in a foundation wall a casual weekend project, so it pays to understand exactly what you are buying and what the job really involves.
Part of our Windows & Doors guide — explore the full guide →
- What an Egress Window Kit Includes
- Code Requirements You Must Meet
- Choosing the Right Window Style
- Egress Window Kit Cost Breakdown
- The Installation Process Step by Step
- When to Call a Licensed Professional
- Window Well and Cover Selection
- Maintenance and Long-Term Performance
- Frequently Asked Questions
What an Egress Window Kit Includes
Contents vary by manufacturer, but most egress window kit packages contain some combination of the following:
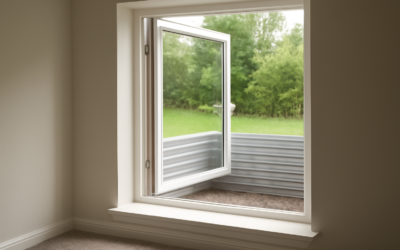
- The window unit: Usually a vinyl casement or sliding window sized to meet the net clear opening requirement. Casements are popular because they deliver the most clear opening per square foot of wall.
- Window buck or frame: A pressure-treated wood, vinyl, or composite frame that lines the rough opening in the concrete and gives the window something to fasten to.
- Window well: A corrugated galvanized steel, polyethylene, or composite well that holds back soil outside the window. Higher-end kits use molded wells with a stone or terraced look.
- Well cover: A polycarbonate or steel grate cover that keeps out leaves, snow, animals, and children while still opening from the inside without tools.
- Fasteners and flashing: Concrete screws, well anchors, flashing tape, and sometimes a sealant kit.
- Ladder or steps: Required when the well is deeper than 44 inches. Many modern wells have steps molded right in.
Most kits do not include gravel, drain tile, a concrete saw, lintel material, or interior trim. Budget separately for those items.
Code Requirements You Must Meet
The International Residential Code (IRC) section R310 sets the baseline most US jurisdictions adopt, though local amendments are common. An emergency escape and rescue opening generally must meet these minimums:
| Requirement | IRC Minimum |
|---|---|
| Net clear opening area | 5.7 sq ft (5.0 sq ft allowed at grade-floor level) |
| Net clear opening height | 24 inches |
| Net clear opening width | 20 inches |
| Sill height above finished floor | 44 inches maximum |
| Window well area | 9 sq ft, with 36-inch minimum projection and width |
| Ladder or steps | Required when well depth exceeds 44 inches |
A window that measures 24 by 20 inches clear does not meet the requirement, because it only yields 3.3 sq ft. You must satisfy both the minimum dimensions and the total area. Always compare the kit’s published net clear opening, not the rough opening or the frame size. Your local building department has the final word, and nearly every jurisdiction requires a permit for this work.
Choosing the Right Window Style
Style directly affects how big an opening you have to cut. A casement window swings fully open, so a unit around 30 by 48 inches often meets the 5.7 sq ft minimum. A horizontal sliding window only opens halfway, so it needs a much wider rough opening, typically 48 by 48 inches or more, to deliver the same clear area. Single-hung windows are rarely practical below grade for the same reason.
Look for these features when comparing kits:
- Low-E insulated glass with a U-factor of 0.30 or lower for colder climates
- Tempered glass if the window is within 18 inches of the floor or near a stair, as code may require
- Crank hardware that folds flat so it does not snag during an emergency exit
- Welded vinyl frames, which resist the constant moisture of a below-grade location better than wood
Egress Window Kit Cost Breakdown
Prices depend on window size, well material, and how much of the labor you perform yourself. Typical ranges look like this:
- Basic egress window kit (vinyl slider or casement plus steel well): $700 to $1,500
- Premium kit (casement, composite terraced well, polycarbonate cover): $1,500 to $3,000
- Concrete wall cutting by a sawing contractor: $500 to $1,200 per opening
- Excavation for the well: $300 to $1,000 by hand or mini-excavator
- Permit fees: $100 to $400 in most areas
- Full professional installation, turnkey: $3,000 to $6,500 per window, and more if a block wall needs a new steel lintel or the drainage requires tying into existing drain tile
Homeowners who hire out the excavation and concrete cutting but set the buck, window, and well themselves often land around $2,000 to $3,500 per opening.
The Installation Process Step by Step
Understanding the sequence helps you decide which parts to handle and which to hire out.
- Locate utilities: Call 811 at least three business days before digging. Gas lines, electrical feeds, and irrigation often run exactly where a window well wants to go.
- Excavate: Dig a hole roughly 12 inches deeper and 12 inches wider on each side than the well, down to about 8 inches below the planned sill.
- Cut the opening: A walk-behind or handheld concrete saw with a diamond blade cuts poured walls. Block walls are cut and the cores filled with concrete to form solid jambs. Engineers often specify a steel or precast lintel above the opening.
- Install the buck: Fasten the pressure-treated or composite buck into the opening with concrete screws and seal it with polyurethane sealant.
- Set the window: Shim the window plumb and level, fasten through the frame, and flash the exterior with self-adhered membrane lapped shingle-style.
- Provide drainage: Place 4 to 6 inches of washed gravel at the bottom of the well. Ideally connect a vertical perforated pipe to the footing drain tile so water cannot pool against the glass.
- Install the well: Bolt the well to the foundation, backfill in lifts, and grade the soil away from the house at a slope of at least 6 inches over 10 feet.
- Finish the interior: Insulate the buck, then trim with drywall returns or a cellular PVC jamb that will not rot if condensation forms.
When to Call a Licensed Professional
Cutting into a foundation is structural work. Stop and bring in a licensed contractor or structural engineer if any of these apply:
- The opening is wider than about 4 feet, or it sits below a beam pocket, a point load, or a bearing wall above.
- Your foundation is hollow concrete block, rubble stone, or shows existing cracks wider than 1/8 inch.
- You see signs of water intrusion, efflorescence, or a high water table in the area.
- Electrical, gas, or plumbing lines run through the section of wall you plan to cut.
Concrete cutting also creates crystalline silica dust, a known lung hazard. Professionals use wet-cutting saws and proper respirators; if you rent a saw, use water suppression and an N95 or better respirator at minimum. Many municipalities require the cutting and structural portion to be inspected before the window is installed, so coordinate with your permit office.
Window Well and Cover Selection
The well is what you look at from the inside, so it is worth thinking beyond the minimum. Galvanized corrugated steel is the cheapest option at $150 to $400, but it looks utilitarian and can rust in 15 to 20 years. Polyethylene and composite wells cost $400 to $1,200 and come in stone or sand finishes that brighten the basement view. Terraced wells with built-in steps can double as planters and meet the ladder requirement without a separate ladder.
Covers deserve equal attention. A clear polycarbonate dome lets in light while shedding snow and rain, but check that it is rated for your region’s snow load if people might step on it. Steel grate covers support more weight but let water in. Any cover must be removable from inside the basement without keys, tools, or special knowledge, and it should never be screwed shut.
Maintenance and Long-Term Performance
Once installed, an egress window needs a few minutes of attention each season. Clear leaves and debris from the well every fall, check that the gravel base still drains after heavy rain, and inspect the exterior sealant around the buck for cracks every spring. Lubricate casement cranks and hinges annually with a silicone spray so the window operates smoothly in an emergency.
Test the escape route with every person who sleeps in that room. Children in particular should practice opening the window and climbing the ladder or steps. A legal egress window only saves lives if the occupants know how to use it quickly in the dark.
Handled with the right permits and the right help for the structural steps, an egress window kit turns a dim, windowless basement into a bright, legal living space and can add meaningful square footage to your home’s appraised value.
Frequently Asked Questions
Can I install an egress window kit myself?
Many homeowners handle the window, buck, and well themselves, but the concrete cutting and any lintel work is best left to licensed pros. Most jurisdictions require a permit and inspection regardless of who does the work.
What size egress window do I need for a basement bedroom?
Under the IRC, the window must provide at least 5.7 sq ft of net clear opening, with a minimum 24-inch height and 20-inch width, and a sill no higher than 44 inches from the finished floor.
How long does an egress window installation take?
A professional crew typically completes one opening in one to two days. DIY projects often take a week or more when you factor in excavation, concrete cutting, inspections, and backfill.
Does an egress window add value to a home?
Yes. It allows a basement room to be legally marketed as a bedroom, which usually raises appraised value and buyer interest, and it improves natural light and safety in the lower level.