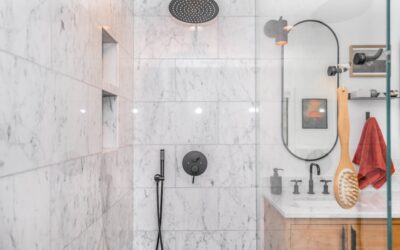
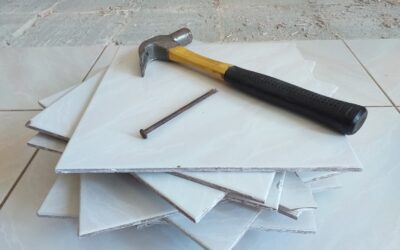
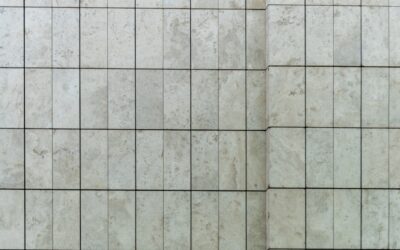
The most common reason a tiled shower fails is not the tile, it is the water that got behind it. A ceramic tile shower looks clean and lasts for decades when it is waterproofed correctly, but skip or botch that hidden layer and you get mold, rot, and a costly tear-out within a few years. Waterproofing, not the tile itself, is the heart of a shower that lasts, and understanding the system is the most important thing a homeowner can learn before starting or hiring out the job.
Part of our Bathroom Remodeling & Flooring guide — explore the full guide →
This guide walks through substrate preparation, waterproofing methods, choosing the right tile, the installation sequence, and how to keep the finished shower in good shape.
Waterproofing Is Everything
Behind every long-lasting tile shower is a continuous waterproof layer that keeps moisture from reaching the framing. Grout is not waterproof, and tile by itself is not enough; water passes through grout joints over time, so the assembly behind the tile must stop it. There are two modern approaches, and a shower should use one of them consistently throughout.
- Surface waterproofing membranes: A sheet or liquid membrane applied over a backer board, sealing the surface before tile goes on. Seams, corners, and pipe penetrations are sealed with bands and sealant.
- Foam waterproof building panels: Pre-formed waterproof panels and pre-sloped shower trays that create a sealed substrate ready to tile.
Both approaches work when installed correctly and consistently. Mixing methods or skipping seam treatment is where leaks begin.
Substrate Preparation
Tile and waterproofing need a sound, flat, properly built substrate. Standard drywall does not belong in a wet shower area. Use cement backer board or a waterproof foam board rated for showers on the walls. The shower floor needs a proper slope toward the drain, typically about a quarter inch per foot, so water flows out rather than pooling. A pre-sloped tray or a correctly built mortar bed creates that slope. Get the substrate flat and the slope right before any waterproofing, because tile only follows what is underneath it.
Choosing the Tile
Ceramic tile works well throughout a shower, but a few choices improve safety and ease.
- Walls: Glazed ceramic in nearly any size works; larger tiles mean fewer grout lines to maintain.
- Floor: Use smaller tiles or mosaics on the shower floor, because more grout lines and the texture provide better slip resistance, and small tiles conform to the slope toward the drain.
- Finish: Lean toward matte or textured finishes on the floor for traction; glossy floor tile is slippery when wet.
Check the tile’s suitability for wet areas, and remember porcelain offers even lower water absorption if you want maximum durability.
Installation Sequence
The order of operations protects the waterproofing and produces clean results.
- Build and prep the substrate: backer board on walls, sloped base on the floor.
- Install the waterproofing system, sealing all seams, corners, and the drain per the manufacturer.
- Test the pan for leaks where applicable before tiling.
- Set wall tile in thinset, maintaining consistent grout lines and keeping the surface flat.
- Set floor tile following the slope to the drain.
- Grout the joints after the thinset cures.
- Apply silicone, not grout, at changes of plane like inside corners and the floor-to-wall joint, since these move and would crack rigid grout.
Grout and Sealing
Grout choice affects maintenance. Cement-based grout should be sealed once cured and resealed periodically to resist staining and water penetration. Epoxy grout costs more and is harder to work with but is naturally stain-resistant and does not need sealing, which many homeowners prefer in a shower. Either way, the silicone at the corners and floor-wall joints is essential; using grout there is a common mistake that leads to cracking and leaks.
Common Shower Tiling Mistakes
A handful of errors account for most leaking, cracking, and moldy showers, and avoiding them is more important than any decorative choice. The first is using regular drywall or unsuitable backer behind the tile in a wet area; only cement board or a waterproof panel belongs there. The second is treating tile and grout as the waterproof layer, when in fact the membrane behind them does that job. The third is grouting the inside corners and the floor-to-wall joint, which flex and crack; those joints need flexible silicone instead. A fourth is an improper or missing slope on the shower floor, which leaves water pooling and finding its way into seams. Skipping the leak test before tiling is another costly omission, since a problem caught at the pan stage is far cheaper to fix than one discovered after the tile is set. Finally, rushing the cure times for thinset, grout, and sealant undermines the whole assembly. Slow, sequential, and waterproof-first is the recipe for a shower that lasts.
Care and Maintenance
Keeping a tile shower healthy is mostly about managing moisture and grime. Squeegee the walls after showering to cut down on soap scum and mineral buildup. Run the bathroom exhaust fan during and after showers to control humidity and discourage mold. Clean with a pH-neutral cleaner and avoid harsh acids on grout and any natural stone accents. Reseal cement grout on schedule, and re-caulk the silicone joints when they show wear. With proper waterproofing underneath and consistent care on top, a ceramic tile shower can look great and stay dry for decades.
DIY or Hire a Pro?
Deciding whether to tile a shower yourself comes down to one question: are you confident you can build a continuous, leak-free waterproof layer? The decorative tiling is the visible and satisfying part, but the hidden waterproofing is where the project succeeds or fails, and a mistake there can mean hidden rot and a full tear-out down the road. Confident DIYers who study the waterproofing system, build the proper slope, seal every seam and corner, and follow the manufacturer’s instructions can produce an excellent shower, especially with a modern foam-panel kit that simplifies the waterproofing. If you are unsure about the slope, the pan, or sealing the penetrations, a wet area is the place to hire an experienced tile installer rather than learn on the job. The cost of professional installation is far less than the cost of repairing water damage behind a failed shower. Whichever path you take, treat waterproofing as the non-negotiable core of the project, and the tile on top will reward you with years of clean, dry service.
Prefer to explore on your own?
See how new flooring looks in your actual room in seconds — free, no signup.
Try the free Floor Studio →