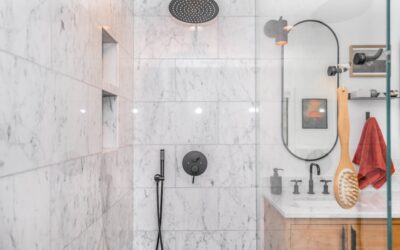
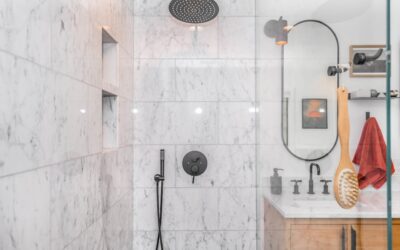
Most shower leaks I get called out to fix have nothing to do with the tile. They start behind it, in a waterproofing layer that was rushed or skipped entirely. A well-built tile shower surround is a system: substrate, waterproofing membrane, thinset, tile, and grout, each layer doing one job. Get the hidden layers right and the surface can last 25 years or more. Cut corners on them and you will be tearing out moldy drywall in three.
Part of our Bathroom Remodeling & Flooring guide — explore the full guide →
This guide walks through what actually goes into a durable shower wall, from framing to the final bead of caulk, with the numbers you need to budget and the mistakes that sink most DIY jobs.
What Goes Behind the Tile
Never tile directly over standard drywall in a wet area. The layer that carries your tile is called the substrate, and you have two solid choices. Cement backer board like Durock or HardieBacker comes in 1/4-inch and 1/2-inch sheets, screws to the studs, and shrugs off water. It is cheap, running about $12 to $15 for a 3-by-5-foot sheet, but it is heavy and dusty to cut.
The other route is foam board such as Schluter Kerdi-Board or Wedi. These panels are lightweight, cut with a utility knife, and are waterproof out of the box, which can eliminate a separate membrane step. Expect to pay $50 to $90 per panel. For a standard three-wall alcove, foam board saves a full day of labor even though the material costs more up front.
Waterproofing Is Non-Negotiable
Backer board resists water but does not stop it. Vapor and liquid will pass through the joints and screw holes over time, so you need a dedicated waterproofing membrane. There are two common systems.
- Liquid membrane — RedGard or Laticrete Hydro Ban rolls on like thick paint in two coats. Watch the color change from pink to red as it cures. A gallon covers roughly 55 square feet at the required thickness and runs about $60 to $70.
- Sheet membrane — Schluter Kerdi is an orange fabric-backed sheet you bond to the wall with unmodified thinset. It is bulletproof once installed but takes practice to lap the seams correctly with a 2-inch overlap.
Whichever you choose, treat every inside corner, pipe penetration, and the curb with preformed corners and banding. Those transitions are where 90 percent of failures begin.
Choosing the Right Tile
Porcelain is my default recommendation for a tile shower surround because it absorbs less than 0.5 percent water and stands up to daily use. Ceramic works on walls too and costs a bit less, but skip natural stone unless you are ready to seal it two or three times a year. Marble and travertine are gorgeous and high-maintenance in a shower.
For walls, 12-by-24-inch large-format tile has become the go-to look and means fewer grout lines to clean. On shower floors, drop down to 2-inch mosaics; the extra grout joints give your feet grip and let the tile follow the slope to the drain. Budget $2 to $8 per square foot for a decent porcelain, more for designer lines.
Building a Niche and Bench
A recessed niche keeps shampoo bottles off the floor and looks custom. Prefab foam niches from Schluter or Kerdi drop between studs and come pre-waterproofed, saving hours over framing one from scratch. Set the bottom shelf at a slight pitch so water drains out rather than pooling.
If you want a bench, build it from foam blocks or mortar and slope the top 1/4 inch per foot toward the drain. A wobbly, flat bench that holds standing water is a future repair, so take the time to get the pitch right.
What a Tile Shower Surround Costs
Pricing varies by region and tile grade, but here is a realistic breakdown for a standard 3-by-5-foot alcove with roughly 100 square feet of wall area.
- DIY materials only — $600 to $1,200 including backer board, membrane, thinset, tile, and grout.
- Professional labor — $10 to $25 per square foot installed, so $1,000 to $2,500 for the tile work alone.
- Full remodel — with a new pan, valve, glass door, and demo, most homeowners land between $4,500 and $9,000.
Large-format tile and intricate patterns like herringbone push labor to the top of that range because they take longer to lay out and cut. Simple stacked or offset layouts keep costs down.
The Installation Sequence
Order of operations matters more than speed. Rushing a step forces you to redo it later. Here is the sequence I follow on every shower.
- Frame and set the shower pan or base first, then hang and fasten the substrate with a 1/8-inch gap at the base.
- Apply and cure the waterproofing membrane completely before any tile goes up. Do a 24-hour flood test on the pan if you can.
- Dry-lay your tile pattern, snap level lines, and start the second row up using a ledger board so gravity does not pull your first course down.
- Spread thinset with the correct notched trowel, back-butter large tiles, and keep grout joints consistent with spacers.
- Let thinset cure 24 hours, then grout, wait another 24 to 72 hours, and seal.
A determined homeowner can complete a shower surround over a long weekend, but plan for cure times to stretch the real timeline to a full week before first use.
Grout, Sealing, and Long-Term Care
Grout choice affects maintenance for years. Cement grout is traditional and cheap but porous, so seal it with a penetrating sealer 48 to 72 hours after installation and reapply annually. Epoxy grout like Laticrete SpectraLOCK costs three times as much and is harder to work, but it is stain-proof and never needs sealing. In a heavy-use family shower, I think the epoxy premium pays for itself.
One detail that trips up nearly every first-timer: never grout the inside corners or the joint where the wall meets the pan. Those movement joints get flexible silicone caulk instead. Grout in a corner will crack within a season because the two planes expand and contract independently. Color-matched caulk from the same manufacturer keeps it looking seamless.
Tools, Materials, and Common Mistakes
Gathering everything before you start keeps a shower project from stalling halfway through a cure window. At minimum, plan on a wet saw or angle grinder with a diamond blade, a 1/4-by-3/8-inch notched trowel for large tile, a margin trowel, a level, a chalk line, a grout float, tile spacers, and a bucket for mixing. On the materials side, order 10 to 15 percent more tile than your square footage to cover cuts and future repairs, and keep the dye lot number written down, since a replacement tile from a different lot rarely matches. Round out the list with modified thinset for the walls, unmodified thinset if you are bonding Kerdi membrane, waterproofing, grout, sealer, and color-matched silicone.
The failures I see repeat themselves. Homeowners tile over green board thinking it is waterproof, forget to slope the niche and bench, or skimp on membrane at the corners. Another frequent error is grouting too soon, before the thinset has set, which drags tiles out of alignment. A cheap laser level pays for itself by keeping your first course dead straight and heading off most of these problems.
Plenty of homeowners tackle a shower surround successfully, but a few situations call for a tile setter. If the framing is out of plumb, the drain needs relocating, or you are running a complex pattern across a curbless entry, the labor premium buys you a leak-free result and a warranty. A pro also flood-tests the pan and documents the waterproofing, which matters if you ever sell the home. Weigh the $1,000 to $2,500 labor cost against the far higher price of tearing out a failed shower down the road.
Take your time on the layers nobody sees. A tile shower surround is only as reliable as its waterproofing, and no amount of pretty tile will save a shower that leaks behind the wall. Build the system correctly once and you buy yourself decades of worry-free use.
Prefer to explore on your own?
See how new flooring looks in your actual room in seconds — free, no signup.
Try the free Floor Studio →