Dingy, stained, or simply dated grout can make an otherwise good tile floor or backsplash look tired, and ripping out perfectly sound tile to fix it makes no sense. The far smarter move is to change grout color with a stain or colorant, a weekend project that transforms the entire look of your tile for a fraction of the cost of re-tiling. Going from grimy off-white to a crisp charcoal, or from a builder-grade gray to a clean bright white, can make the tile look brand new. Here is exactly how it works, what it costs, and how to get a professional result.
Why Change Grout Color Instead of Re-Tiling
Grout is the frame around every tile, and its color has an outsized effect on the overall look. Light grout that has yellowed or absorbed years of grime drags down the whole surface, while updating to a darker, richer color instantly modernizes it and hides future staining far better. The alternative, demolishing and replacing tile, costs thousands and takes days. Changing grout color costs $30 to $100 in materials for most rooms and takes an afternoon. It is one of the highest-return, lowest-effort updates in home improvement.
Grout Stain vs. Grout Colorant vs. Regrouting
There are three distinct ways to change grout color, and choosing the right one depends on your grout’s condition.
- Grout stain (colorant): A pigmented epoxy-based product you brush onto existing grout lines. It coats and seals the grout in a new color and is the most common DIY method. Works only on cement grout, not epoxy grout.
- Grout refresh pens and paints: Marker-style applicators best for small touch-ups or a single backsplash, less durable than full colorant for floors.
- Regrouting: Physically removing the top layer of old grout and applying new grout in a different color. More labor but the best route if the existing grout is cracked, crumbling, or missing.
For sound grout that is simply the wrong color or stained, a grout colorant is the go-to. If the grout itself is failing, regrout instead so you fix the structural problem at the same time.
What You’ll Need
Gather your supplies before you start so you can work in one continuous session. You will want grout colorant in your chosen shade, a stiff grout brush or an old toothbrush, a grout cleaner, painter’s tape if you want to protect adjacent surfaces, clean rags, a bucket of water, and gloves. Choose a colorant color deliberately, dark gray and charcoal hide dirt best and read modern, while bright white refreshes but shows grime and requires a good sealer.
Step-by-Step: How to Change Grout Color
- Deep clean the grout. Scrub every grout line with a grout cleaner to remove grease, soap scum, and dirt, then rinse and let it dry fully. Colorant will not bond to dirty grout.
- Test a small area. Apply colorant to an inconspicuous spot to confirm the color and check adhesion before doing the whole room.
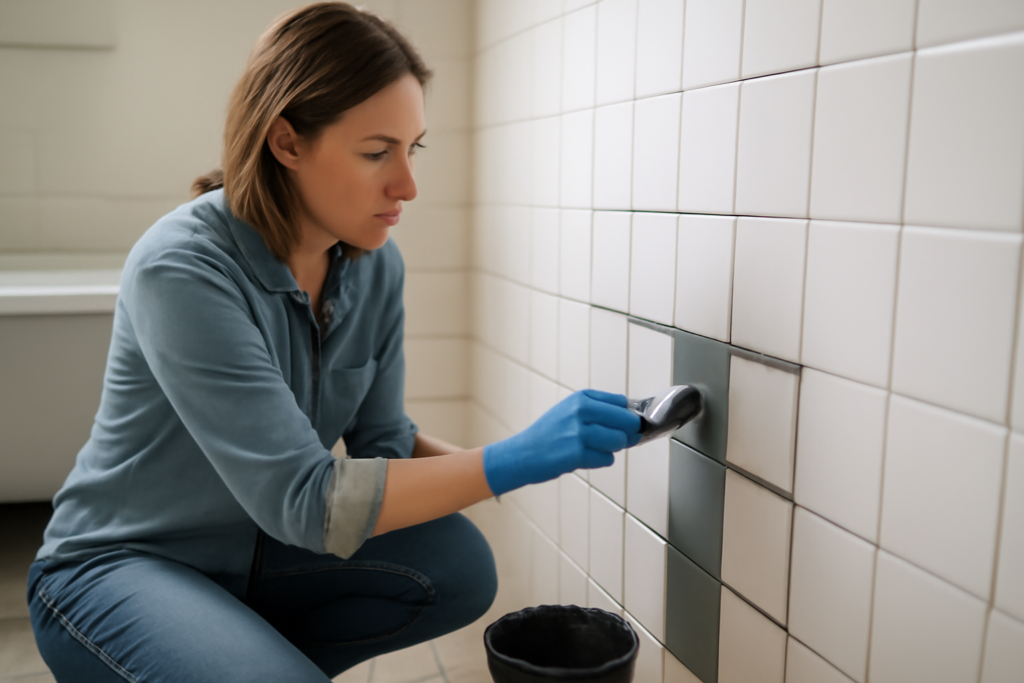
- Apply the colorant. Using the grout brush, work the colorant into the grout lines in small sections, following the line and keeping the coverage even. A steady hand keeps it off the tile.
- Wipe excess off the tile. Before the colorant dries, wipe any that strayed onto the tile face with a damp rag. On textured or porous tile, wipe promptly and carefully so it does not stain the surface.
- Let it cure. Allow the colorant to dry and cure per the product instructions, typically 24 hours, before walking on a floor or exposing it to water.
- Seal if needed. Many colorants seal the grout as they cure; if yours does not, apply a grout sealer once cured, especially for light colors.
Working Around Tile Types
The tile you have affects your approach. Smooth, glazed ceramic and porcelain make cleanup easy, since stray colorant wipes right off. Porous, textured, or natural stone tile is trickier, because colorant can lodge in the surface texture and stain it, so tape edges, work carefully, and wipe immediately. Never assume you can colorant over epoxy grout, colorant is designed for cement-based grout and will not adhere properly to epoxy. If you are unsure what grout you have, test a hidden area first.
Cost and Time Expectations
A bottle or kit of grout colorant runs $20 to $40 and covers a typical bathroom or kitchen backsplash, with larger floors needing two. Add brushes and cleaner and most projects stay under $100 in materials. Time-wise, expect two to four hours of active work for a backsplash or small floor, plus a day of curing before normal use. Compared to the $1,500 to $5,000 cost and multi-day disruption of re-tiling, the value is obvious.
Choosing the Right New Color
Picking the new grout color is where the whole project’s success is decided, and it pays to think beyond your first instinct. Darker grout, medium gray through charcoal, is the most practical choice for floors and busy kitchens because it hides dirt, coffee drips, and foot traffic that would show instantly on white. It also reads as modern and outlines each tile crisply, which can make even plain tile look intentional and current. The tradeoff is that very dark grout with light tile is high contrast, so any unevenness in your application shows, meaning you need a steady hand and clean lines.
Lighter and matching grout colors have their place too. Refreshing yellowed grout back to a clean bright white or a soft greige restores an airy, seamless look, particularly with white or marble-look tile, though light grout demands good sealing and more frequent cleaning to stay looking fresh. A grout color that closely matches the tile makes the individual tiles blend into a continuous surface, which flatters large-format tile and calms a busy patterned tile. Before committing to the whole room, buy a small amount and test your chosen shade on a hidden section, then live with it for a day, because grout color looks different dry than wet and different again under your room’s actual lighting.
Making the Change Last
A colored-grout job holds up well when you prep properly and maintain it. The most important factors are a thorough initial cleaning so the colorant bonds, and adequate curing time before the surface gets wet. Once cured, clean the tile with pH-neutral cleaners rather than harsh acids that can wear the colorant, and reseal light grout periodically. Done right, changing grout color gives you years of refreshed, uniform grout lines and a floor or backsplash that looks like you spent far more than a weekend afternoon on it.
Prefer to explore on your own?
See how new flooring looks in your actual room in seconds — free, no signup.
Try the free Floor Studio →