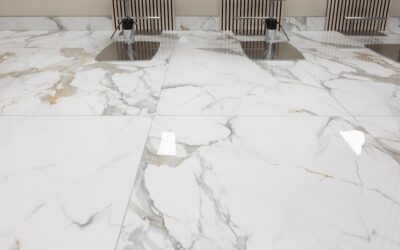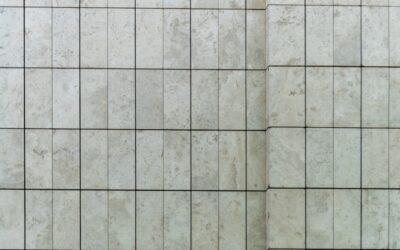
Tile polish is how you bring back the deep, reflective shine that tile loses over years of foot traffic, cleaning, and dulling residue. Whether you have glossy porcelain that has gone flat, natural stone that needs to glow again, or a floor clouded by old cleaner buildup, the right polish and technique can restore a like-new luster and add a layer of protection.
This guide explains what tile polish does, which products suit each tile type, how to apply it correctly, and how to keep that shine going. Choosing the wrong polish for your tile can do more harm than good, so matching product to material is the first rule.
What Tile Polish Actually Does
Tile polish serves two purposes: it restores shine and it adds a protective layer. Some polishes work by cleaning away the dull film of soap scum, hard water, and cleaner residue that masks the tile’s natural gloss. Others lay down a thin protective coating that fills micro-scratches and reflects light, deepening the shine. For natural stone, true polishing can mechanically refine the surface to a high sheen.
The right approach depends on whether your tile is dull because it is dirty, because the finish is worn, or because the surface itself needs refinishing. Diagnosing that first saves you from applying a coating over grime or polishing a tile that just needed a good clean.
Matching Polish to Tile Type
This is the most important decision, because the wrong product can etch, cloud, or fail to bond. Identify your tile before buying anything.
- Glazed ceramic and porcelain: the glaze is the shine. These usually need a thorough cleaning and a polish or sealer formulated for glazed tile, not aggressive abrasives.
- Natural stone (marble, granite, travertine, slate): use a stone-specific polish. Marble and other calcium-based stones are acid-sensitive, so never use vinegar or acidic cleaners on them.
- Polished porcelain: benefits from a polish and sealer designed for it to maintain the factory shine and resist staining.
- Quarry and unglazed tile: often finished with a topical sealer or finish that provides sheen and protection.
When in doubt, check the tile or grout manufacturer’s recommendations and test any product in an inconspicuous spot first.
Step-by-Step: Polishing Glazed Tile
For glazed ceramic and porcelain, restoring shine is mostly about deep cleaning and then applying the right finish.
- Clear and sweep. Remove furniture and vacuum or sweep all grit, which would otherwise scratch during polishing.
- Deep clean. Wash with a pH-neutral tile cleaner to strip soap film and residue. For stubborn buildup, use a cleaner made to remove film, then rinse thoroughly.
- Dry completely. Let the floor dry so no moisture is trapped under the polish.
- Apply polish. Following the product directions, apply an even, thin coat with a clean mop or applicator, working in sections.
- Buff and cure. Buff to a shine if directed, and allow the polish to cure before walking on it.
Thin, even coats outperform one heavy coat, which can streak or stay tacky.
Polishing Natural Stone
Stone is a different animal. Light maintenance polishing uses a stone-safe polish to refresh sheen, but a truly dull or etched stone floor may need mechanical polishing with diamond pads or polishing powders, which is often best left to a professional. For everyday upkeep, clean with a stone-specific pH-neutral cleaner, apply a stone polish made for your specific stone, and buff as directed.
Crucially, keep acids away from calcium-based stones like marble and travertine. Acidic cleaners, vinegar, and many general-purpose products will etch the surface, leaving dull marks that polish cannot easily fix. Sealing stone separately also helps protect the polished finish and resist stains.
Dealing With Common Problems
A few recurring issues dull tile, and each has a targeted fix.
- Hazy film: usually leftover cleaner or grout haze. Remove it with the appropriate haze or film remover before polishing, or you will just seal the haze in.
- Hard water spots: dissolve with an appropriate cleaner; on stone, use only stone-safe products.
- Scratches in glaze: minor ones can be reduced by polish that fills them; deep scratches in the glaze itself generally cannot be polished out.
- Etching on stone: requires re-polishing the stone, not just a topical product.
Diagnosing the cause prevents wasted effort, like polishing over a haze that needed removing first.
Maintaining the Shine
A fresh polish lasts longer with the right routine. Good daily habits do more for long-term shine than frequent re-polishing.
- Sweep or dust-mop regularly so grit does not scratch the surface underfoot.
- Clean with a pH-neutral cleaner; avoid harsh, acidic, or ammonia-based products that strip polish and etch stone.
- Wipe spills promptly, especially acidic liquids on stone.
- Use mats at entries to catch grit and use felt pads under furniture.
- Avoid wax-based products on glazed tile, which can build up and yellow over time.
Re-polish as needed when the shine fades, following the same prep-first principle each time.
When to Call a Professional
Many tile-polishing jobs are DIY-friendly, but some are not. Heavily etched or worn natural stone, large floors that need mechanical diamond polishing, or surfaces where you are unsure of the material are good reasons to bring in a pro. Stone restoration specialists have the equipment and experience to refinish a floor without damaging it, which can be cheaper than ruining the tile with the wrong product.
Sealing vs Polishing
People often confuse sealing and polishing, but they do different jobs and frequently work together. Polishing restores or enhances shine and smooths the surface, while sealing penetrates porous materials to block stains and moisture without necessarily adding gloss. Glazed ceramic and porcelain are already nonporous through the glaze, so they generally need polishing or a topical finish rather than a penetrating sealer, though the grout between them does benefit from sealing. Natural stone and unglazed tile, by contrast, usually need both: a penetrating sealer to protect against stains and a polish to bring up the sheen. Knowing which your tile requires keeps you from sealing a surface that cannot absorb it or polishing one that really needed stain protection first.
The Bottom Line
Tile polish can transform a dull, tired floor back into a bright, reflective surface, but success depends entirely on matching the product to your tile and prepping the surface first. Deep clean before you polish, keep acids off stone, apply thin even coats, and maintain the result with gentle, pH-neutral care. Do that, and your tile will hold a clean, lasting shine that makes the whole room look refreshed.
Prefer to explore on your own?
See how new flooring looks in your actual room in seconds — free, no signup.
Try the free Floor Studio →