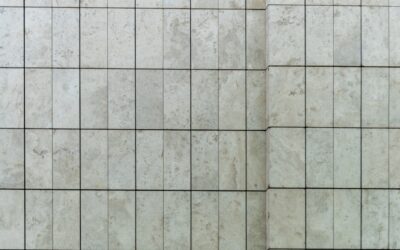
The elongated 3×12 tile has become a designer favorite for backsplashes, shower walls, fireplace surrounds, and accent features. Choosing the right 3×12 tile patterns is what turns a simple stack of skinny rectangles into a surface with real rhythm and character. The proportion is dramatic, so the layout you pick dramatically changes the mood, from crisp and modern to cozy and handcrafted.
- Why the 3×12 Format Is So Popular
- The Critical Offset Rule for 3×12 Tile
- Running Bond (One-Third Offset)
- Stacked (Grid) Pattern
- Herringbone
- Vertical Stack and Vertical Offset
- Cost of 3×12 Tile and Installation
- How Pattern Affects How Much to Buy
- Grout Joint Size and Spacers
- Choosing the Right Pattern for Your Space
- Final Thoughts
This guide covers every popular layout for 3×12 tile, the critical offset rule that prevents lippage, realistic costs, and how to buy the right quantity for your chosen pattern.
Why the 3×12 Format Is So Popular
At 3 inches tall and 12 inches long, this tile reads as a refined, stretched subway. The extra length compared to a standard 3×6 creates fewer grout lines across a wall, giving a cleaner, more contemporary feel. The long horizontal line visually widens a space, which is why designers love it on narrow backsplashes and small shower walls.
You will find 3×12 tile in ceramic, porcelain, glass, and natural stone, from makers like Daltile, MSI, and Emser. Many are rectified, meaning the edges are precision-cut for tight grout joints as narrow as 1/16 inch. That precision makes the pattern lines razor-sharp, but it also raises the stakes on flatness, which matters when you pick your layout.
The Critical Offset Rule for 3×12 Tile
Before diving into patterns, understand the single most important rule for long tiles. The Tile Council of North America (TCNA) recommends that for tiles with any side 15 inches or longer, and especially for long rectangular tiles, the running-bond offset should not exceed 33 percent unless the manufacturer specifically approves 50 percent.
Why does this matter? Long tiles almost always have a slight bow or crown in the center. When you offset by the classic 50 percent, the high center of one tile lands against the low end of its neighbor, producing “lippage,” where edges sit at different heights and catch your fingernail. Sticking to a one-third offset keeps adjacent tiles closer to the same plane and hides that natural warp. Keep this rule in mind as you evaluate the patterns below.
Running Bond (One-Third Offset)
The most common and reliable 3×12 layout staggers each row so the joints fall at the one-third point of the tile below, roughly 4 inches over. This brick-style pattern is forgiving, classic, and respects the lippage rule.
Run the tiles horizontally to stretch a space wider, which suits most backsplashes and shower walls. Run them vertically to draw the eye upward and make a low ceiling feel taller, a striking choice behind a vanity or as a shower accent column.
Stacked (Grid) Pattern
Aligning the 3×12 tiles in perfectly straight rows, with continuous horizontal and vertical grout lines, creates a crisp, architectural grid. Stacked layouts feel modern and minimalist and let a beautiful tile face or color take center stage without pattern distraction.
The trade-off is unforgiving alignment. Because every joint lines up, any wall that is out of plumb or any tile set even slightly high shows immediately. Reserve stacked patterns for flat, well-prepped surfaces and hire a careful installer.
Herringbone
Turning 3×12 tiles on a 45- or 90-degree angle so they interlock in a zigzag produces one of the most dramatic 3×12 tile patterns available. The long format exaggerates the herringbone’s directional energy, making it a spectacular feature wall, fireplace surround, or statement backsplash.
Herringbone demands more cuts at the edges and generates more waste, so order extra material. It also requires patience because each tile must sit at a precise angle. The payoff is a high-end, custom look that instantly elevates a room.
Vertical Stack and Vertical Offset
Standing the tiles upright changes the entire feel of a space. A vertical stacked pattern uses straight columns of upright 3×12 tiles for a sleek, gallery-like effect that emphasizes height. A vertical running bond staggers those columns for a softer version of the same lift.
Vertical layouts pair beautifully with contemporary flat-panel cabinets and tall windows. They are especially effective in a walk-in shower, where the vertical lines make the enclosure feel more spacious and airy.
Cost of 3×12 Tile and Installation
Material and labor both vary with the pattern you choose. Use these figures to build a budget.
- Ceramic 3×12: $3 to $8 per square foot.
- Porcelain 3×12: $5 to $12 per square foot.
- Glass or handmade zellige-style: $12 to $30 per square foot.
- Natural stone (marble, limestone): $10 to $25 per square foot.
Installation labor runs $8 to $15 per square foot for straightforward running bond or stacked layouts. Complex patterns like herringbone add 25 to 50 percent to labor because of the extra cuts and setting time. Factor in thin-set, grout, and edge trim (bullnose or a Schluter profile) at $2 to $5 per square foot.
How Pattern Affects How Much to Buy
Different layouts waste different amounts of tile, so buy accordingly. A simple guideline: order enough to cover your measured area plus a waste allowance based on the pattern.
- Stacked grid: add 10 percent for cuts and breakage.
- Running bond (one-third offset): add 10 to 15 percent.
- Herringbone or diagonal: add 15 to 20 percent for angled edge cuts.
Always buy all your tile from the same dye lot at once and keep a few spare pieces after the job for future repairs. Dye lots shift between production runs, and a mid-project reorder may not match.
Grout Joint Size and Spacers
The width and color of your grout joints shape a 3×12 installation as much as the pattern itself. Rectified tiles allow tight joints of 1/16 to 1/8 inch, which gives the cleanest, most modern lines. Non-rectified or handmade tiles have slightly irregular edges and need a wider joint, usually 1/8 to 3/16 inch, to absorb the variation and look intentional.
Never go below the manufacturer’s minimum joint, and never below 1/16 inch on any tile, because a joint that tight leaves no room for the natural size variation between pieces or for slab movement. Use quality spacers or a leveling clip system, especially on stacked and vertical patterns where a single misaligned tile is obvious. Leveling clips also pull adjacent tiles into the same plane, which directly fights the lippage problem that plagues long tiles.
Choosing the Right Pattern for Your Space
Match the layout to the room’s proportions and your style. For a small backsplash where you want understated elegance, horizontal running bond is nearly foolproof. To make a cramped shower feel taller, go vertical. When you want a single wall to be the star, herringbone earns its extra cost. And when you have a flat, professionally prepped surface and crave modern minimalism, a stacked grid delivers.
Grout color amplifies whichever pattern you choose. A tight tonal grout that matches the tile softens the pattern and reads seamless; a contrasting grout turns every rectangle into a bold graphic line. Sample both before committing, because the same tile can look completely different depending on that decision.
Final Thoughts
The best 3×12 tile patterns balance the look you want with the practical realities of a long, slightly bowed tile. Respect the one-third offset rule to avoid lippage, choose a stacked grid only on flat walls, and budget extra material and labor for herringbone. Whether you run the tiles horizontally to widen a backsplash or stand them vertically to lift a shower, thoughtful pattern selection turns an affordable rectangle into a design centerpiece.
Prefer to explore on your own?
See how new flooring looks in your actual room in seconds — free, no signup.
Try the free Floor Studio →