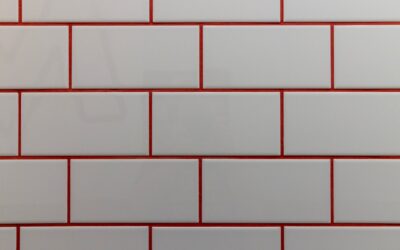
Subway tile has been a design staple since it lined New York City stations in 1904, and its enduring popularity hides a secret: the same simple rectangle can look traditional, modern, or boldly contemporary depending entirely on how you arrange it. Knowing the ways to lay subway tile lets you transform a basic 3×6-inch white tile into anything from a classic farmhouse backsplash to a striking herringbone feature wall. The pattern you choose costs nothing extra in materials but completely changes the personality of the room. Here are the layouts worth considering and where each one shines.
Part of our Tile & Grout guide — explore the full guide →
- Classic Running Bond (Brick Offset)
- Stacked (Grid) Pattern
- Vertical Stack and Vertical Offset
- Herringbone
- Basketweave
- Diagonal (Diamond)
- Crosshatch and Other Statement Patterns
- How Grout Color Changes the Look
- Planning Your Layout and Waste
- Tile Size, Spacers, and Finish
- Choosing the Right Pattern for Your Space
Classic Running Bond (Brick Offset)
The default and most popular layout. Each row is offset from the one below by half a tile, mimicking a traditional brick wall. It’s timeless, forgiving of slightly imperfect walls, and works in virtually any kitchen or bathroom.
The 50 percent offset is the standard, but you can shift it. A one-third offset (33 percent) gives a slightly more contemporary, less repetitive look and helps prevent the “lippage” issues that long, narrow tiles can have when offset exactly halfway. If you’re new to tiling, running bond is the most beginner-friendly starting point.
Stacked (Grid) Pattern
Stacking tiles directly on top of one another in straight horizontal or vertical lines creates a clean, modern grid. This minimalist look is having a major moment in contemporary kitchens and is the simplest pattern to install since every joint lines up.
The catch: a stacked layout shows every flaw. Misaligned grout lines and uneven walls stand out dramatically, so it demands careful leveling, consistent spacers, and a flat substrate. Use a laser level and check your work constantly.
Vertical Stack and Vertical Offset
Turning the tiles on end changes everything. A vertical stack draws the eye upward and makes a room feel taller, ideal for low-ceiling kitchens or short backsplash runs. A vertical offset (running bond rotated 90 degrees) keeps the staggered brick feel while still adding height.
Vertical orientations feel fresh and intentional precisely because most people default to horizontal. They’re a great way to make standard subway tile look custom without any extra cost.
Herringbone
Herringbone arranges the rectangles in an interlocking V-shaped zigzag, and it’s the showstopper of the bunch. It adds movement, texture, and a high-end, designer feel that elevates an otherwise plain tile. It works beautifully on backsplashes, accent walls, and even floors.
It’s also the most labor-intensive and wasteful pattern, generating more cuts and roughly 10 to 15 percent more tile waste, so order extra. The 45-degree herringbone is the classic version, while a 90-degree (straight) herringbone is slightly easier to lay and reads a touch more modern.
Basketweave
Basketweave groups tiles in pairs and alternates their direction, creating a woven, over-and-under appearance. It’s a traditional, almost vintage look that suits classic kitchens and period-style bathrooms. It takes more planning than running bond but less cutting than herringbone.
Diagonal (Diamond)
Laying subway tile at a 45-degree angle creates a diagonal or diamond effect that feels dynamic and draws the eye across the surface. It’s less common, which makes it stand out, but it produces a lot of triangular edge cuts and demands precision to keep the diagonals consistent.
Crosshatch and Other Statement Patterns
For a true feature wall, crosshatch (alternating horizontal and vertical pairs in a grid) and chevron (mitered tiles forming clean continuous V’s) push subway tile into bold, contemporary territory. Chevron in particular, where each tile is cut at an angle so the points meet in a seamless line, is dramatic but requires precise miter cuts and the most skill. Reserve these for a focal point rather than an entire room.
How Grout Color Changes the Look
The pattern is only half the story; grout choice dramatically affects the result.
- Matching grout (white grout with white tile) creates a seamless, subtle surface that emphasizes the tile’s sheen over the layout.
- Contrasting grout (dark gray or black with white tile) highlights every line and makes the pattern the star, a popular farmhouse and industrial look.
- Mid-tone gray is the practical compromise: it shows the pattern gently and hides dirt better than bright white.
Decide on grout color before you commit to a pattern, because a busy layout with high-contrast grout can overwhelm a small space.
Planning Your Layout and Waste
Before you spread a drop of adhesive, dry-lay a section to confirm the pattern, joint spacing, and how cuts fall at the edges. Find the center of your wall or focal point and work outward so partial tiles land symmetrically at the ends rather than leaving an awkward sliver on one side. A few minutes of planning here separates a professional-looking job from an amateurish one.
Order extra tile to cover cuts, breakage, and future repairs. Plan on 10 percent overage for running bond and stacked patterns, and 15 percent or more for herringbone, chevron, and diagonal layouts, which generate far more cuts and waste. Buying all your tile in one order keeps the dye lot consistent, and stashing a few spares means a cracked tile years from now is a quick swap, not a hunt for a discontinued match.
Tile Size, Spacers, and Finish
Subway tile isn’t limited to the original 3×6-inch format. Modern versions come in 2×4, 4×8, 4×12, and longer planks, and the proportions you choose change the feel of every pattern. Larger formats read more contemporary and install faster with fewer grout lines, while the classic 3×6 keeps a traditional look.
Spacer size sets your grout-line width, typically 1/16 to 1/8 inch for subway tile, and consistency here is what makes any pattern look crisp. Finish matters too: a glossy glaze bounces light and brightens small spaces, while a matte or handmade-look tile with subtle variation adds depth and hides minor surface imperfections. Decide tile size, spacing, and finish together with your pattern, since they all interact.
Choosing the Right Pattern for Your Space
Match the layout to the room and your skill level. For a safe, timeless backsplash, go running bond. For a modern, minimalist kitchen, try a stacked or vertical layout. For a designer statement, herringbone or chevron deliver maximum impact. In small spaces, vertical orientations add perceived height, while busy diagonal and crosshatch patterns can feel cramped.
Always dry-lay a section first, buy 10 to 15 percent extra tile for cuts and future repairs, and use consistent spacers for clean grout lines. Whichever of the many ways to lay subway tile you choose, the humble rectangle is one of the most versatile materials in design, and the right pattern turns it into something that looks anything but basic.
Prefer to explore on your own?
See how new flooring looks in your actual room in seconds — free, no signup.
Try the free Floor Studio →