Subway tile has been the safe default in bathrooms for over a century, but the way you orient it completely changes the room. A vertical stacked subway tile shower takes the same familiar rectangular tile, turns it on end, and lines up the grout joints in clean columns instead of the traditional offset brick pattern. The result draws the eye upward, makes a low ceiling feel taller, and reads as distinctly modern rather than nostalgic. This guide covers when the layout works, how to plan it, and what to watch during installation.
Part of our Bathroom Remodeling & Flooring guide — explore the full guide →
If you love the crisp, contemporary look of straight grout lines but worry the pattern is trickier than it seems, you are right to plan carefully. Vertical stacking is beautiful precisely because it is unforgiving, and a little foresight is what separates a stunning wall from a wavy one.
- Why Choose a Vertical Stacked Layout
- Choosing the Right Tile Size and Finish
- Grout Color and Joint Width
- Planning the Layout Before You Set a Tile
- Installation Basics and Common Mistakes
- Maintenance and Long-Term Care
- Pairing Vertical Stack With Accents and Trim
- How Much It Costs
- Frequently Asked Questions
Why Choose a Vertical Stacked Layout
Orientation is a free design upgrade. The same box of tile can look traditional or cutting-edge depending on how you set it, so the decision costs nothing but rewards you with a very different room.
- Makes ceilings feel taller: Vertical lines lead the eye up, which is a genuine advantage in a standard 8-foot bathroom or a shower with a low soffit.
- Clean, modern geometry: Stacked joints create a grid, which suits minimalist, Scandinavian, and contemporary designs far better than the classic offset.
- Emphasizes a feature wall: Running tile vertically behind a shower niche or on a single accent wall frames the space intentionally.
- Elongates a narrow shower: In a tight stall, vertical stacking keeps the walls from feeling boxed in.
Choosing the Right Tile Size and Finish
Classic subway tile is 3 by 6 inches, and stacked vertically it produces a tall, slim column that is the safest starting point. But the stacked pattern opens the door to other proportions. A 2 by 8 or 4 by 12 tile stacked vertically exaggerates the height even more and gives a more current, oversized look that hides grout lines. Larger tiles also mean fewer joints to keep straight, which is a real installation advantage on a big wall.
For finish, glossy glazed ceramic bounces light and keeps a small shower bright, while a matte or handmade zellige-style tile adds texture and hides water spots. If you want subtle dimension, a beveled edge subway tile catches light along each vertical seam and reinforces the columnar effect.
Grout Color and Joint Width
Grout is where a stacked layout lives or dies. Because every joint lines up, any color contrast turns the grout into a bold graphic grid. Decide early what you want:
- Matching grout (white grout with white tile) makes the wall read as one smooth surface and downplays the pattern.
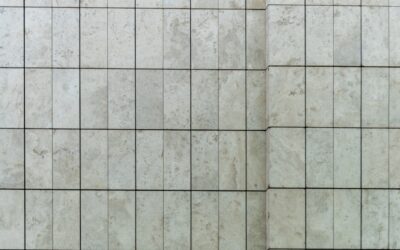
- Contrasting grout (gray or charcoal grout with white tile) turns the vertical and horizontal lines into a deliberate design feature.
- Warm gray is the practical middle ground; it hides soap scum and mildew far better than bright white and still looks intentional.
Keep joints tight and consistent, typically 1/16 to 1/8 inch. Use tile spacers on every tile, and because stacked joints reveal any variation, buy tiles that are rectified (machine-cut to a uniform size) rather than cushion-edged. Seal cement-based grout after it cures, or choose a single-component urethane grout that resists staining and never needs sealing in a wet shower.
Planning the Layout Before You Set a Tile
Dry-lay and measure before mixing thinset. Find the center of the wall and plan your columns so you avoid a sliver of tile in a corner or at the ceiling. Aim to end with at least a half tile at the edges. Snap a level plumb line for your first vertical column and a level horizontal line for your starting row, because on a stacked pattern the human eye instantly catches a line that drifts even a fraction of an inch over four feet.
Check your walls for plumb with a 4-foot level first. Old bathrooms are rarely square, and a wall that leans will make perfectly set tile look crooked. If the wall is badly out, you may need to float it flat before tiling. Plan your niche and any accent bands into the grid so a full tile lands cleanly at their edges.
Installation Basics and Common Mistakes
Vertical stacking is more demanding than a brick offset because there is no staggering to disguise a lippage problem, where one tile edge sits proud of its neighbor. Follow these practices:
- Start over a waterproof backer such as a foam board or cement board with a liquid membrane, never plain drywall or greenboard in a wet area.
- Use a quality unmodified or modified thinset rated for wall tile, and back-butter each tile for full coverage.
- Set tiles to your plumb and level reference lines, checking every few tiles with a level in both directions.
- Use tile leveling clips, not just spacers, to keep adjacent tile faces flush and eliminate lippage on the long vertical seams.
- Work in small sections so you can adjust before the thinset skins over.
The most common mistakes are letting the columns drift off plumb, uneven grout joints, and lippage catching the light. All three come from rushing the layout. Take the extra thirty minutes to snap accurate lines and dry-fit, and the finished wall will look professionally installed.
Maintenance and Long-Term Care
A tiled shower is low maintenance if you seal it and clean it gently. Squeegee the walls after showers to cut down soap scum on the grout, and avoid harsh acidic cleaners that erode cement grout and dull the glaze. Reseal cement grout once a year in a heavily used shower. If you chose contrasting dark grout, occasional spot cleaning keeps the crisp grid looking sharp.
Done well, a vertical stacked subway tile shower delivers a high-end, architectural look for the price of ordinary tile. The pattern costs nothing extra, asks only for careful layout, and pays you back every day with a shower that feels taller, brighter, and thoroughly modern.
Pairing Vertical Stack With Accents and Trim
A field of vertical stacked tile provides a calm, orderly backdrop, which makes it the perfect canvas for a well-placed accent. A recessed niche lined in a contrasting mosaic or a slab of marble breaks up the grid and gives you a functional spot for bottles. A horizontal band of the same tile turned sideways, or a thin pencil-liner in metal or a complementary color, can define the top of a wainscot line if you carry the tile only partway up.
For trim, plan how the vertical columns terminate at outside corners and the top edge. A metal edge profile such as a brushed-nickel or matte-black Schluter strip gives a crisp, modern finish that suits the stacked look far better than a rounded bullnose. Carry the same metal finish through your shower fixtures, drain, and niche edging so the whole shower reads as one coordinated design rather than a collection of parts.
How Much It Costs
Because the tile itself is standard subway, material cost stays low. Basic ceramic subway runs about $2 to $4 per square foot, while porcelain, larger formats, and handmade zellige climb to $8 to $20 per square foot. The stacked layout does not raise the tile price, though it can add slightly to labor because the installer must keep every joint perfectly plumb, which is more exacting than a forgiving brick offset. Professional shower tile installation typically runs $10 to $25 per square foot in labor. For an average shower, budget roughly $1,500 to $3,500 installed depending on tile choice and whether you add a niche, bench, or accent wall.
Frequently Asked Questions
Does vertical stacked tile really make a room look taller?
Yes. The aligned vertical grout lines draw the eye upward, which creates a sense of added height, especially valuable in a standard 8-foot bathroom or a shower with a low soffit. It is a genuine visual effect designers rely on.
Is a stacked pattern harder to install than a brick offset?
Slightly, because there is no stagger to hide imperfections. Every joint lines up, so any drift off plumb or any lippage between tiles is immediately visible. Careful layout lines, tile leveling clips, and rectified tiles make it very achievable.
Prefer to explore on your own?
See how new flooring looks in your actual room in seconds — free, no signup.
Try the free Floor Studio →