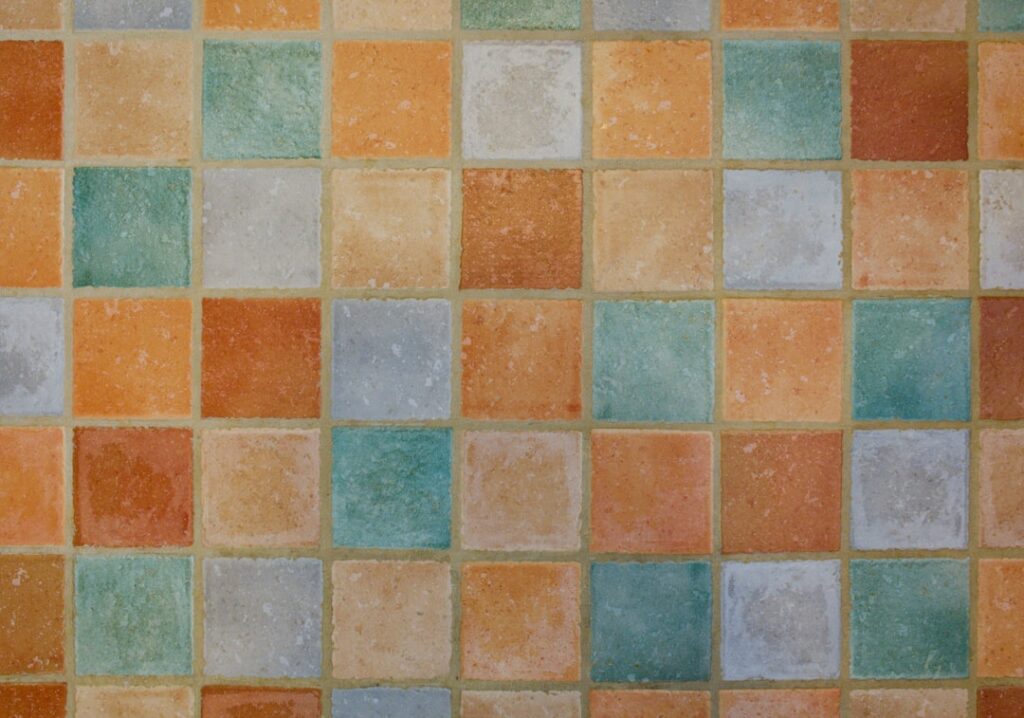
A stacked tile pattern lines tiles up in a rigid grid, with every joint aligning perfectly both horizontally and vertically. The result is one of the cleanest, most contemporary looks you can install, and it has become a go-to for kitchens, bathrooms, and feature walls where a calm, orderly surface matters.
Part of our Tile & Grout guide — explore the full guide →
Unlike the traditional offset brick layout, a stacked arrangement hides nothing. That precision is exactly its appeal, but it also means the installation demands care. This guide walks through the layout options, sizing, grout choices, cost, and the rooms where a stacked look shines.
- What Is a Stacked Tile Pattern?
- Where a Stacked Layout Works Best
- Choosing Tile Size and Shape
- Grout Color and Joint Width
- How to Install a Stacked Tile Pattern
- Cost of a Stacked Tile Installation
- Pros and Cons at a Glance
- Care and Maintenance
- Vertical Versus Horizontal Stacking
- Common Mistakes to Avoid
- Design Ideas by Room
- Best Tile Materials for a Stacked Look
What Is a Stacked Tile Pattern?
In a stacked layout, tiles sit directly on top of and beside one another so all four corners meet at a single point. Every grout line runs in an uninterrupted straight line across the whole surface. Designers sometimes call it a straight lay, grid, or vertical stack depending on orientation.
There are two main directions:
- Vertical stack — rectangular tiles stand on end, drawing the eye upward and making low ceilings feel taller.
- Horizontal stack — rectangular tiles lie on their side, widening a narrow wall and creating a sense of calm horizontal flow.
- Square grid — square tiles produce a symmetrical checkerboard grid that reads as classic and understated.
Because there is no offset to disguise irregularities, the stacked pattern rewards tiles that are perfectly rectified, meaning their edges are machine-cut for uniform size.
Where a Stacked Layout Works Best
The grid look suits any space where you want architecture to feel intentional and modern:
- Kitchen backsplashes — a vertical stack of subway tiles behind a range feels fresh and current versus the expected brick offset.
- Bathroom walls and showers — large-format stacked tiles reduce grout lines, which means fewer places for mildew to gather.
- Fireplace surrounds and accent walls — a floor-to-ceiling vertical stack becomes a striking focal point.
- Floors — square tiles in a grid give an open, uncluttered foundation for minimalist and mid-century interiors.
If your style leans traditional or cottage, an offset or herringbone pattern may feel warmer. The stacked look is deliberately architectural.
Choosing Tile Size and Shape
Size dramatically changes how a stacked pattern reads. Common choices include:
- 3×6 or 3×12 subway tiles — the most popular for vertical backsplashes; the elongated 3×12 exaggerates the vertical effect.
- 4×4 squares — a retro grid that has returned to fashion in bathrooms and kitchens.
- 12×24 large format — minimizes grout lines on floors and shower walls for a seamless feel.
- 2×2 mosaics — sheet-mounted squares that keep the grid crisp on shower floors and niches.
Larger tiles need a flatter substrate. Any hump or dip in the wall will telegraph through as lippage, where one tile edge sits proudly above its neighbor. For 12×24 and up, plan on a leveling clip system during installation.
Grout Color and Joint Width
Grout is not an afterthought with a stacked pattern; the continuous straight lines make grout part of the design. You have two strategies:
- Blend it in — match grout to the tile for a nearly seamless, monolithic surface. This suits large-format stone-look porcelain.
- Contrast it — a darker grout against white tile emphasizes the grid geometry and gives a graphic, tailored look.
Keep joints tight, typically 1/16 to 1/8 inch, but never go fully grout-free. Tiles need a small joint to accommodate slight size variation and movement. Rectified tiles allow the narrowest joints; standard tiles need a touch more room.
How to Install a Stacked Tile Pattern
Precision is everything here. A crooked line stands out far more than it would in an offset layout. The general process:
- Prep and level the substrate. Use cement backer board on walls and a flat, deflection-free subfloor for floors.
- Find your center and snap chalk reference lines both vertically and horizontally so the grid stays square to the room.
- Dry-lay a row to plan cuts, aiming to avoid slivers at the edges by shifting the starting point.
- Comb thinset with a notched trowel, back-butter large tiles, and set each piece using tile spacers or leveling clips.
- Check alignment constantly with a level; because joints run continuously, a small drift compounds across the wall.
- Let thinset cure, then grout, wipe at an angle to avoid pulling grout from the joints, and seal if using cement grout or natural stone.
Many homeowners handle a small backsplash themselves, but large-format floors and full showers are worth hiring out for the flat, lippage-free result the pattern demands.
Cost of a Stacked Tile Installation
Material and labor vary with tile choice and room, but useful ranges include:
- Ceramic or porcelain tile — $2 to $15 per square foot for the tile itself.
- Professional installation — $8 to $20 per square foot, with large-format and detailed showers at the higher end.
- Backsplash project — often $600 to $1,500 installed for a standard kitchen run.
- Bathroom or shower surround — commonly $1,500 to $4,000 depending on size and tile grade.
Large-format tile can raise labor cost because it requires leveling systems and sometimes two installers to handle each sheet safely, but it often uses less grout and cleans up faster over its life.
Pros and Cons at a Glance
Before committing, weigh the trade-offs of the stacked look:
- Pros: clean modern aesthetic, easy-to-clean straight joints, makes rooms feel taller or wider, works with large format for minimal grout.
- Cons: shows any installation imperfection, less forgiving of unlevel walls, can feel stark in traditional homes, requires precise layout work.
Care and Maintenance
Once installed, a stacked tile surface is low maintenance. Wipe glazed porcelain and ceramic with a pH-neutral cleaner and warm water. Reseal cement grout once or twice a year in wet areas to keep it stain- and mildew-resistant. If you chose natural stone, seal the tile itself on the manufacturer’s schedule. Because the continuous joints are easy to sight down, you will spot any grout that needs a refresh quickly, which makes upkeep straightforward.
Vertical Versus Horizontal Stacking
The orientation you choose changes how a room feels, so pick with the space in mind:
- Vertical stack — draws the eye upward and makes a low ceiling feel taller; ideal behind a range or on a shower wall to add perceived height.
- Horizontal stack — widens a narrow wall and creates a calm, grounded flow; good for making a cramped bathroom feel broader.
- Square grid — reads as symmetrical and classic, neither stretching nor widening, and suits floors and understated walls.
Think about the proportion you want to correct or emphasize, then let the tile direction do that work for you.
Common Mistakes to Avoid
Because the stacked pattern is so precise, small errors show badly. Avoid these pitfalls:
- Installing over an uneven substrate — any bump telegraphs as lippage along the continuous joints; flatten the surface first.
- Using non-rectified tiles for tight joints — standard-edge tiles vary slightly in size and cannot line up perfectly in a grid.
- Skipping layout lines — without square reference lines, the grid drifts and the drift compounds visibly.
- Grouting joints too narrow — even a stacked pattern needs a small joint to absorb size variation and movement.
- Rushing large-format tiles without leveling clips — clips are essential to keep edges flush.
Design Ideas by Room
The stacked look adapts to nearly every space with a slightly different effect:
- Kitchen backsplash — a vertical stack of glossy subway tile feels fresh and current versus the expected brick offset.
- Shower and bath — large-format stacked porcelain minimizes grout lines and the mildew that gathers in them.
- Fireplace or accent wall — a floor-to-ceiling vertical stack becomes a bold architectural focal point.
- Floors — a square grid gives an open, minimalist foundation that lets furniture and finishes stand out.
Best Tile Materials for a Stacked Look
Some materials suit the exacting grid better than others:
- Rectified porcelain — machine-cut edges give the uniform sizing the pattern demands; the top choice.
- Glazed ceramic subway tile — affordable and reliable for backsplashes at smaller sizes.
- Glass tile — reflective and modern, excellent for a crisp stacked backsplash.
- Large-format stone-look porcelain — delivers a seamless, monolithic surface with matched grout.
Whatever the material, prioritize consistent sizing, since the grid reveals any variation instantly.
A stacked tile pattern is a smart choice when you want a modern, deliberate surface that feels architectural rather than busy. Pick rectified tiles, prep a dead-flat substrate, and decide early whether your grout will disappear or define the grid. Get those three things right and the stacked look delivers a crisp, timeless finish that elevates kitchens, baths, and feature walls alike.
Prefer to explore on your own?
See how new flooring looks in your actual room in seconds — free, no signup.
Try the free Floor Studio →