If you want a permanent outdoor cooking space that survives decades of weather without rotting, warping, or burning, concrete masonry is hard to beat. A cinder block outdoor kitchen uses standard concrete blocks as the structural skeleton, then hides them behind stone, stucco, or tile for a finished look. Building a cinder block outdoor kitchen is one of the most DIY-friendly outdoor projects because the blocks are cheap, forgiving, and stack into a strong frame. This guide walks through the footing, layout, reinforcement, finishing, and realistic costs.
Part of our Kitchen Remodeling guide — explore the full guide →
Why Choose a Cinder Block Outdoor Kitchen
Concrete block, technically CMU or concrete masonry unit, offers a combination of strength, fire resistance, and low cost that steel-stud or wood-frame kitchens cannot match. The blocks will not burn near a grill, they shrug off rain and freeze-thaw cycles when built correctly, and they support heavy stone countertops without special engineering.
They are also affordable and widely available. A standard 8-by-8-by-16-inch block costs about $1.50 to $3.00 each, so the structural material for a full kitchen island might total only a few hundred dollars. The finish material and appliances, not the blocks, drive most of the budget.
Block construction is forgiving for a first-time builder, which is a big part of its appeal. The modular 16-inch units stack in predictable courses, so you can dry-lay the whole island to check the fit and appliance openings before mixing a single bag of mortar. If you make a mistake in the dry layout, you simply restack. That trial-and-error freedom, combined with materials you can carry and cut yourself, is why so many homeowners tackle a cinder block kitchen as a weekend-scale project rather than hiring a mason for the structure.
Planning the Layout and Footings
Start with a scaled drawing that locates the grill, side burner, sink, storage, and counter runs. A common straight-run island measures about 8 to 10 feet long and 30 inches deep, with the counter at a standard 36-inch height. An L-shape adds prep and dining space if you have room.
A cinder block kitchen is heavy, so it needs a proper foundation. Pour a reinforced concrete slab at least 4 inches thick, or 6 inches for large islands, with wire mesh or rebar, extending footings below the frost line in cold climates. Never build directly on pavers or bare soil, which will settle and crack your masonry.
Stacking and Reinforcing the Blocks
Lay the first course in a bed of mortar, checking constantly for level and square because every course above depends on this base. Then stack the walls following your layout, leaving openings for the grill, access doors, and appliance cutouts.
- Run vertical rebar through the block cavities at corners and openings, then fill those cavities with concrete grout to lock the structure together.
- Mortar each joint, or for a faster DIY approach, use surface-bonding cement over dry-stacked blocks for added strength.
- Leave gaps or knockouts for gas lines, electrical conduit, and drain plumbing before you finish the walls.
- Add a masonry lintel or angle iron across the grill opening to carry the load above it.
Confirm every appliance cutout against the manufacturer’s spec sheet; a grill that does not fit its opening is a costly mistake to fix after the mortar sets.
Running Utilities
Rough in utilities while the block cavities are open. A gas grill needs a properly sized supply line run by a licensed plumber or gas fitter, with a shutoff valve inside the island. Electrical for lights, a refrigerator, and outlets requires GFCI-protected circuits and weatherproof conduit, ideally handled by a licensed electrician.
If the kitchen includes a sink, plan the water supply and drainage before finishing. In freezing climates, install shutoffs and slope the lines so you can drain them for winter. Ventilation is critical too; built-in grills require vent panels in the enclosure walls to release trapped gas.
Finishing the Exterior
Bare block is structural but ugly, so the finish transforms it. You have several attractive, durable options that bond well to masonry.
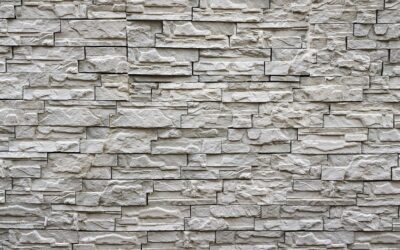
- Stone veneer: natural or manufactured stone gives a high-end look; $10 to $30 per square foot installed.
- Stucco: a smooth or textured cement coating, economical and clean; $5 to $12 per square foot.
- Tile: porcelain or stone tile over cement board for a modern finish.
- Brick veneer: classic and durable, matching many home exteriors.
Apply veneer over a scratch coat of mortar or a bonding agent so it adheres permanently. Seal porous finishes to resist grease, water, and staining from cooking.
Choosing the Countertop
The countertop must handle sun, rain, freezing, and heat. Granite is the most popular for outdoor kitchens because it resists UV fading, scratches, and heat far better than quartz, which can discolor in direct sun. Concrete counters, poured in place or precast, suit a DIY build and match the masonry aesthetic.
Whatever you choose, set it on a solid substrate such as a poured concrete cap or cement board over the block, so the surface is fully supported. Overhang the counter 1 to 2 inches past the block face for a finished edge and comfortable seating if you add a bar.
If you pour your own concrete countertop to match the masonry aesthetic, build a sturdy melamine form, reinforce it with rebar or wire mesh, and use a mix rated for at least 5,000 psi. Cast it in place on top of the block or precast it and set it once cured, then grind and seal the surface. A cast concrete counter roughly 2 inches thick is strong enough to span the island and cantilever a modest bar overhang, and it costs a fraction of stone if you supply the labor. Seal it well, because bare concrete stains from oil and wine almost instantly.
Budgeting the Build
A DIY cinder block outdoor kitchen can be surprisingly affordable on the structure and pricey on the extras. Expect the block, mortar, rebar, and slab to run $500 to $1,500. Finish material adds $1,000 to $4,000 depending on veneer choice and size, and the countertop another $1,000 to $3,000.
Appliances are the wild card: a decent built-in gas grill runs $800 to $3,000, and adding a refrigerator, side burner, and sink can double that. All told, a solid mid-range DIY build lands around $4,000 to $9,000, well below the $15,000-plus of a fully contracted outdoor kitchen.
Weatherproofing for Your Climate
Concrete block is durable, but water is its enemy over the long haul, especially where freeze-thaw cycles pry apart anything that has absorbed moisture. In cold climates, the footing must reach below the frost line, and the finished surfaces must be sealed so water cannot soak into the block and expand when it freezes. Cracked veneer and spalling stucco almost always trace back to trapped moisture.
Cap the top of the island with a solid, sloped concrete cap or a sealed countertop so rain sheds away rather than pooling in the block cavities. Seal the veneer, grout, and any exposed masonry with a quality masonry sealer, and reapply every few years. In hot, dry climates the concern shifts to UV and thermal expansion, so choose fade-resistant granite counters and let mortar cure slowly under damp burlap to avoid shrinkage cracks.
Common DIY Mistakes to Avoid
Most first-time masonry kitchens fail in predictable ways, and each is avoidable. Building on an inadequate foundation tops the list; a thin or unreinforced slab settles and cracks the whole structure. Skipping the rebar and grout at corners and openings leaves the walls able to shift and separate over time.
- Do not forget appliance ventilation cutouts; trapped gas from a built-in grill is a serious hazard.
- Confirm every cutout against the exact appliance spec before mortaring, since fixes afterward mean demolition.
- Rough in all gas, water, and electrical before finishing, not after.
- Do not use quartz for an exposed outdoor countertop; direct sun can discolor and warp it.
Take the extra day to get the foundation, reinforcement, and rough-ins right, and you avoid the expensive rework that plagues rushed builds.
Build It to Last
The keys to a cinder block outdoor kitchen that lasts are a proper reinforced slab, level first course, rebar and grout at the corners and openings, code-compliant utilities, and a sealed weatherproof finish. Take your time on the foundation and layout, rough in the utilities before finishing, and choose heat- and UV-tolerant surfaces. Do that, and you will have a rugged, handsome outdoor kitchen that hosts cookouts for the next thirty years.