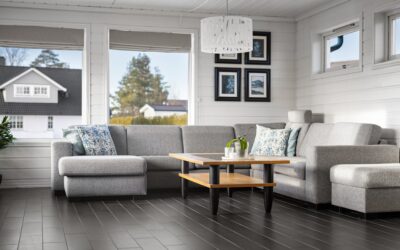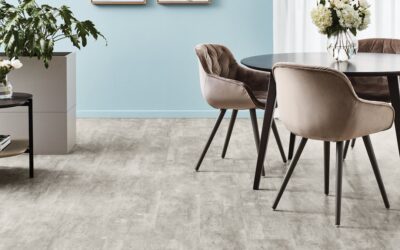
Click LVT (luxury vinyl tile) has transformed the flooring industry by making professional-looking vinyl flooring accessible to DIY homeowners. Instead of gluing tiles to the subfloor, click LVT planks and tiles snap together with interlocking edges, creating a floating floor that installs quickly over almost any existing surface.
- What Is Click LVT?
- SPC vs WPC Core: What Is the Difference?
- How Click Systems Work
- How to Install Click LVT
- Tools Needed
- Step 1: Prepare the Subfloor
- Step 2: Acclimate the Flooring
- Step 3: Install Underlayment
- Step 4: Plan the Layout
- Step 5: Install the First Row
- Step 6: Continue Row by Row
- Step 7: Install the Last Row
- Step 8: Finish Up
- Click LVT vs Glue-Down LVT
- Best Rooms for Click LVT
- Design Options
- Cost of Click LVT
- Final Thoughts
This guide covers how click LVT works, the difference between SPC and WPC cores, installation steps, how it compares to glue-down LVT, design options, best rooms for installation, and realistic costs.
What Is Click LVT?
Click LVT is a rigid-core luxury vinyl plank or tile product that uses a mechanical click-lock system to join planks together without adhesive. Each plank has a tongue on one side and a groove on the other. When you angle the tongue into the groove and press down, the joint clicks into place and locks tightly.
Unlike traditional flexible LVT (which is thin and requires adhesive), click LVT has a rigid core layer that gives it structural integrity. This rigidity is what makes the click-lock connection possible — the core holds the joint in place without the need for glue or the support of a perfectly flat subfloor.
Key Benefits
- DIY-friendly installation: No special tools, no adhesive, no mess. Most homeowners can install a room in a day.
- Floating floor: Click LVT sits on top of the subfloor without being fastened to it. This means it can go over concrete, plywood, existing tile, and even existing vinyl in most cases.
- Waterproof: The vinyl surface and rigid core do not absorb water, making click LVT suitable for bathrooms, kitchens, laundry rooms, and basements.
- Durable: Commercial-grade wear layers (12 to 20+ mils) resist scratches, dents, and wear from foot traffic and pets.
- Realistic designs: Modern printing technology creates stone and wood looks that are remarkably convincing, with textured surfaces that mimic the feel of real materials.
SPC vs WPC Core: What Is the Difference?
Click LVT comes in two main core types: SPC and WPC. Understanding the difference helps you choose the right product for your specific needs.
SPC (Stone Plastic Composite)
SPC flooring has a core made from limestone powder (calcium carbonate) mixed with PVC and stabilizers. The result is an extremely dense, rigid, and thin core.
- Density: Very high. SPC feels solid and heavy underfoot.
- Thickness: Typically 3.5 to 5.5 mm total (thinner than WPC)
- Rigidity: Very rigid. SPC handles temperature changes well and resists expansion and contraction better than WPC.
- Comfort: Harder underfoot due to the dense stone core. Can feel cold on bare feet without underlayment.
- Dent resistance: Excellent. The rigid core resists denting from heavy furniture and high heels.
- Best for: High-traffic areas, commercial spaces, rooms with heavy furniture, areas with temperature fluctuations (sunrooms, entryways), and anywhere you need maximum durability.
- Price: $2.00 to $5.00 per square foot
WPC (Wood Plastic Composite)
WPC flooring has a core made from wood flour (fine wood dust) mixed with PVC and foaming agents. The foaming process creates tiny air pockets in the core, making it softer and more cushioned than SPC.
- Density: Lower than SPC. The foamed core makes WPC feel softer and warmer.
- Thickness: Typically 5.5 to 8 mm total (thicker than SPC)
- Rigidity: Moderately rigid. More flexible than SPC, which means it conforms slightly more to subfloor imperfections.
- Comfort: Noticeably softer and warmer underfoot. The foam core provides built-in cushioning.
- Sound dampening: Better than SPC. The foam core absorbs more impact sound.
- Best for: Bedrooms, living rooms, family rooms, and any area where comfort underfoot is a priority.
- Price: $2.50 to $6.00 per square foot
Which Should You Choose?
Choose SPC for durability, stability, and high-traffic areas. Choose WPC for comfort, sound reduction, and living spaces where you spend time standing or walking barefoot. Both are waterproof and suitable for any room in the house.
How Click Systems Work
Click LVT uses patented interlocking joint systems that snap planks together without adhesive. The two most common systems are:
Unilin Click (Drop-Lock)
Developed by the Belgian company Unilin (now part of Mohawk), this system uses a profile that allows planks to be dropped straight down and locked into place. The long side angles in, and the short end drops down with a click. This is one of the most user-friendly systems because you do not need to angle the entire plank.
Valinge Click (Angle-Angle)
Developed by the Swedish company Valinge, this system requires you to angle the long side into the previous row and then fold the plank down to engage the short-end lock. It creates a very tight, strong joint but requires a bit more technique during installation.
Other Systems
Many manufacturers have developed their own proprietary click systems or licensed variations of Unilin and Valinge technology. Most work similarly: angle one edge in, press or tap the plank down, and the joint locks. Always follow the specific installation instructions for your product.
How to Install Click LVT
Click LVT installation is straightforward. Here are the steps for a successful installation.
Tools Needed
- Tape measure and pencil
- Utility knife with fresh blades (for cutting planks)
- Straight edge or T-square
- Rubber mallet and tapping block
- Pull bar (for the last row against the wall)
- Spacers (most products include them; 1/4-inch typical)
- Underlayment (if not attached to the planks)
Step 1: Prepare the Subfloor
The subfloor must be clean, dry, and reasonably flat. Click LVT tolerates minor imperfections better than glue-down LVT, but significant dips or humps will cause click joints to separate over time. The general rule: no more than 3/16-inch variation over 10 feet.
Fill low spots with floor leveling compound and sand or grind high spots. On concrete, test moisture levels and install a vapor barrier if needed.
Step 2: Acclimate the Flooring
Bring the planks into the room 48 hours before installation and let them adjust to the room temperature. This is especially important for WPC products, which are more sensitive to temperature changes than SPC. Keep the room between 65 and 85 degrees Fahrenheit.
Step 3: Install Underlayment
If your click LVT does not have an attached underlayment pad, install a thin underlayment designed for rigid-core vinyl (1 to 1.5 mm). Do not use thick foam underlayment meant for laminate — it is too soft and will cause click joints to flex and fail. On concrete, use underlayment with a built-in vapor barrier.
Step 4: Plan the Layout
Measure the room width and divide by the plank width to calculate how many rows you need. If the last row would be less than 2 inches wide (which looks awkward and is hard to install), reduce the width of the first row to balance both sides.
Start along the longest, most visible wall. Run planks parallel to the longest wall or toward the room’s main light source for the most natural appearance.
Step 5: Install the First Row
Place spacers against the starting wall (1/4-inch gap for expansion). Lay the first plank with the groove side toward the wall. Click the next plank into the short end of the first plank. Continue until you reach the opposite wall. Cut the last plank to fit, leaving a 1/4-inch gap.
Step 6: Continue Row by Row
Start the second row with a cut piece to stagger the end joints. Most manufacturers recommend at least 6 inches of offset between end joints in adjacent rows. Angle the long side of the plank into the groove of the first row and fold it down until it clicks. Then connect the short end to the previous plank in the same row.
Step 7: Install the Last Row
Measure and cut the last row of planks to width, accounting for the 1/4-inch expansion gap. Use a pull bar to engage the click joint since there is not enough room to angle the plank by hand.
Step 8: Finish Up
Remove all spacers. Install baseboards or quarter-round molding to cover the expansion gaps. Install transition strips at doorways where the click LVT meets other flooring. Do not fasten transition strips through the click LVT — attach them to the subfloor only.
Click LVT vs Glue-Down LVT
Both products are luxury vinyl, but they differ significantly in installation, performance, and cost.
Installation
Click: Floating installation, no adhesive, DIY-friendly. Can be installed over most existing floors. Glue-down: Requires full-spread adhesive, smooth subfloor preparation, and more skill. Generally not DIY-friendly.
Subfloor Tolerance
Click: The rigid core bridges minor subfloor imperfections (up to 3/16 inch over 10 feet). Glue-down: Every subfloor imperfection telegraphs through the thin, flexible vinyl. Requires a nearly perfect subfloor.
Comfort
Click (WPC): Comfortable underfoot with built-in cushioning. Click (SPC): Harder underfoot but can add underlayment for cushion. Glue-down: Thin and firm. Feels like the subfloor beneath it.
Durability
Click: Rigid core resists denting. Thicker construction absorbs more impact. Glue-down: Thinner and more vulnerable to denting from chair legs and heavy furniture.
Replaceability
Click: Individual damaged planks can be replaced by disassembling the floor back to the damaged plank. Glue-down: Damaged tiles must be cut out and re-glued, which can be visible.
Cost
Click: $2.00 to $6.00 per square foot for materials. Minimal installation cost if DIY. Glue-down: $1.50 to $5.00 per square foot for materials plus $1.00 to $3.00 per square foot for professional installation and adhesive.
Best Rooms for Click LVT
Click LVT’s waterproof construction and easy installation make it suitable for virtually every room. Here are the best applications.
- Kitchens: Waterproof, easy to clean, comfortable for standing. Stone-look click LVT is a popular alternative to real tile.
- Bathrooms: Fully waterproof. Warmer and more comfortable underfoot than ceramic tile. Make sure to caulk around toilets and tub bases.
- Basements: Waterproof and installs over concrete without concern for moisture (with a vapor barrier underlayment). SPC handles temperature fluctuations in unconditioned basements better than WPC.
- Living rooms and bedrooms: WPC click LVT provides comfort and warmth. Wide-plank wood-look designs create a convincing hardwood appearance.
- Laundry rooms: Waterproof and easy to clean. Handles washing machine leaks without damage.
- Entryways and mudrooms: SPC click LVT handles heavy foot traffic, tracked-in dirt, and wet shoes without issue.
Design Options
Click LVT is available in an enormous range of designs. The most popular categories are:
- Wood looks: Oak, hickory, walnut, maple, and reclaimed wood designs. Available in wide plank (7 to 9 inches) and standard plank (5 to 6 inches) widths. Embossed-in-register (EIR) textures align the surface texture with the printed grain for maximum realism.
- Stone looks: Travertine, marble, slate, and concrete designs. Typically sold in larger tile formats (12×24 or 18×18). A fraction of the cost and weight of real stone.
- Tile looks: Ceramic and porcelain tile patterns including subway tile, hexagonal, and encaustic designs. Popular for bathrooms and kitchens.
Cost of Click LVT
Here is a complete cost breakdown for a 200-square-foot room.
- Click LVT material (SPC): $400 to $1,000 ($2 to $5/sqft)
- Click LVT material (WPC): $500 to $1,200 ($2.50 to $6/sqft)
- Underlayment (if needed): $40 to $100 ($0.20 to $0.50/sqft)
- Transition strips: $10 to $30 each
- DIY installation tools: $20 to $50 (if you do not already own them)
- Professional installation (if hiring out): $300 to $600 ($1.50 to $3.00/sqft)
Total DIY cost for 200 square feet: approximately $470 to $1,380. Total with professional installation: approximately $740 to $1,930.
Final Thoughts
Click LVT is one of the most versatile, practical, and attractive flooring options available today. The click-lock system makes it genuinely DIY-friendly, the waterproof construction lets you install it anywhere in your home, and the design options rival real wood and stone at a fraction of the cost. Whether you choose SPC for durability or WPC for comfort, click LVT delivers excellent performance and value.
Prefer to explore on your own?
See how new flooring looks in your actual room in seconds — free, no signup.
Try the free Floor Studio →