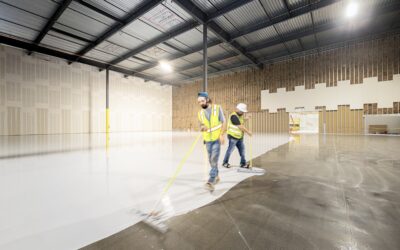
A bare garage slab takes a beating that few surfaces endure: hot tires, dropped tools, road salt, oil drips, and freeze-thaw cycles that crack untreated concrete from the inside out. Upgrading your concrete garage flooring protects that slab, makes the space easier to clean, and turns a dingy parking spot into a usable room. This guide compares the real options, their costs, and which ones survive daily abuse.
- Why the Bare Slab Isn’t Enough
- Epoxy Coatings: The Popular Workhorse
- Polyaspartic and Polyurea: The Premium Upgrade
- Interlocking Tiles and Mats: The No-Prep Route
- Stains and Sealers: The Budget Path
- Cost Comparison at a Glance
- DIY Versus Hiring a Pro
- Surface Prep: The Step That Makes or Breaks the Job
- Climate Considerations
- Choosing the Right Floor for Your Garage
Why the Bare Slab Isn’t Enough
Concrete looks tough, but it’s porous. Untreated slabs soak up oil and grease that never fully wash out, and road salt tracked in over winter accelerates surface spalling, the flaking that leaves pits and dust. Moisture moving up through the slab also feeds mildew under stored items.
A coating or covering seals that porosity, blocks stains, and creates a wipe-clean surface. The right choice depends on your climate, how hard you use the garage, and whether you’re hiring out or doing it yourself.
If you’re running out of room even with a clean garage floor, a backyard shed takes the overflow — seasonal gear, tools, lawn equipment. And if you’re parking outside while the garage doubles as a workshop, a carport keeps your car covered without needing a second garage.
We may earn a commission when you purchase through our links.
Epoxy Coatings: The Popular Workhorse
Epoxy is the best-known garage floor finish for good reason. It bonds chemically to prepared concrete, resists most chemicals, and comes in solid colors or flaked finishes. A quality two-part 100-percent-solids epoxy creates a hard, glossy shell that handles hot tires and dropped wrenches.
Material for a DIY epoxy kit runs $2 to $5 per square foot, while professional installation lands at $5 to $12. The catch is prep and cure time. The slab must be ground or acid-etched, fully dry, and free of any prior sealer, and the coating needs several days to fully harden before you park on it.
Polyaspartic and Polyurea: The Premium Upgrade
Polyaspartic coatings have overtaken epoxy in many pro installs. They cure in hours instead of days, tolerate colder install temperatures, and resist UV yellowing that can dull epoxy near garage-door light. A polyaspartic system with a vinyl-flake broadcast is the gold standard for a one-day garage floor.
Expect $5 to $8 per square foot for the material and $7 to $12 installed by professionals. The faster cure and superior durability justify the premium for homeowners who want a floor that lasts 15 to 20 years with minimal fuss.
Interlocking Tiles and Mats: The No-Prep Route
If you can’t commit to grinding and coating, interlocking PVC or polypropylene tiles snap together over the existing slab with no adhesive. They hide minor cracks, allow moisture to evaporate underneath, and can be lifted for cleaning or to access the slab.
- Rigid PVC tiles: $3 to $6 per sq ft, support vehicle weight
- Flexible rubber mats: $2 to $4 per sq ft, great for workshop comfort
- Roll-out vinyl flooring: $1.50 to $3 per sq ft, fast and renter-friendly
Tiles are the easiest DIY option and forgiving of an imperfect slab, though they cost more over large areas and can shift under heavy point loads from a jack.
Stains and Sealers: The Budget Path
For the lowest cost, a penetrating concrete sealer or an acid stain protects the slab without a thick film. Sealers run $0.50 to $2 per square foot and block moisture and minor staining, though they don’t deliver the showroom look or chemical resistance of epoxy.
Acid and water-based stains add color by reacting with the concrete itself, creating a marbled, permanent finish. They’re popular for finished garages and basements but offer less abrasion protection than a topcoat, so most installers seal over the stain.
Cost Comparison at a Glance
- Penetrating sealer: $0.50 to $2 per sq ft
- DIY epoxy kit: $2 to $5 per sq ft
- Professional epoxy: $5 to $12 per sq ft
- Polyaspartic system: $7 to $12 per sq ft installed
- Interlocking tiles: $3 to $6 per sq ft
For a standard two-car garage around 400 to 500 square feet, a pro polyaspartic floor typically totals $3,000 to $6,000, while a DIY epoxy kit can come in under $1,000.
DIY Versus Hiring a Pro
The hardest part of any coated garage floor is surface prep. Renting a concrete grinder, fixing cracks, and testing for moisture takes a full day before you open a single can. If your slab is newer, dry, and crack-free, a DIY epoxy or tile install is achievable over a weekend.
For older slabs with moisture issues or extensive cracking, a professional polyaspartic crew earns its fee. They diagnose the slab, grind properly, and warranty the bond. A coating that peels in two years because of a moisture problem costs far more to strip and redo than it would have to hire out the first time.
Surface Prep: The Step That Makes or Breaks the Job
Every coated garage floor lives or dies on preparation. The slab has to be profiled so the coating can grip, which means either mechanical grinding with a diamond cup wheel or, for smaller DIY jobs, acid etching to open the concrete’s pores. Grinding is more reliable and what pros use, since etching can leave residue that weakens the bond.
Before any of that, the slab must pass a moisture test. Tape a square of plastic sheeting to the floor overnight; if condensation forms underneath, the slab is pushing vapor and a film coating will eventually peel. In that case, choose a moisture-tolerant system or a covering like tiles instead. Cracks and pits get filled with a patching compound and the whole surface vacuumed dust-free before the first coat.
Climate Considerations
Where you live shapes the best choice. In northern states with freeze-thaw cycles and road salt, a chemically resistant polyaspartic or epoxy with an anti-slip additive sheds salt brine and resists the spalling that destroys bare slabs. In hot southern garages, UV-stable polyaspartic avoids the yellowing that can dull epoxy near the door.
Humidity matters too. Slabs in damp basements-turned-garages or coastal regions are more likely to fail a moisture test, pushing you toward interlocking tiles that breathe. Matching the system to your climate keeps the floor bonded and looking good for its full expected lifespan.
Choosing the Right Floor for Your Garage
Match the surface to how you use the space. A weekend mechanic wants chemical-resistant polyaspartic or epoxy; a home gym benefits from rubber mats; a renter or budget upgrade leans on tiles or a sealer. Whatever you choose, smart concrete garage flooring starts with a clean, dry, properly prepped slab, because no coating outperforms its bond to the concrete beneath it.