Drivers slow down for exactly one reason: because not slowing down is uncomfortable. Concrete speed bumps enforce that discomfort more durably than any other traffic-calming device — a properly built one outlasts three or four generations of rubber bumps and never walks out of position under traffic. They show up in parking lots, private roads, HOA communities, and long residential driveways with cut-through problems. Before pouring or buying one, though, you need to get three things right: the profile geometry, the legal side, and the anchoring. Botch any of the three and you get liability instead of traffic calming.
Speed Bump vs. Speed Hump: Get the Terms Straight
These are different devices with different jobs. A speed bump is short and abrupt — typically 6 inches to 3 feet of travel length and 3 to 4 inches tall — and forces traffic down to 2 to 5 mph. It belongs in parking lots and alleys where crawling speeds are appropriate. A speed hump is long and gentle — 10 to 14 feet of travel length, 3 to 3.5 inches tall — and targets 15 to 20 mph on residential streets. Putting a true bump on a 25 mph street launches suspensions and generates complaints, bottomed-out oil pans, and sometimes lawsuits. Most “concrete speed bump” projects on private property are genuine bumps; anything on a street shared with the public should follow hump geometry from ITE (Institute of Transportation Engineers) guidance.
Standard Dimensions and Profile
A well-mannered parking-lot bump follows dimensions the traffic-control industry converged on decades ago:
- Height: 2.5 to 4 inches; 3 inches is the sweet spot for cars without scraping low bumpers
- Travel length (direction of traffic): 12 to 36 inches, with a rounded or trapezoidal crown
- Width across the lane: typically 6 to 10 feet per section, leaving 1 to 2 feet of gap at each edge for drainage and bicycles
- Profile: curved (circular segment) or flat-topped with 1:6 tapered ramps — never a sharp triangular peak
The edge gaps matter more than people expect. Bumps that dam the full pavement width pond water against themselves, and ponded water plus freeze cycles is how concrete bumps crack loose from the pavement below.
Precast vs. Poured-in-Place
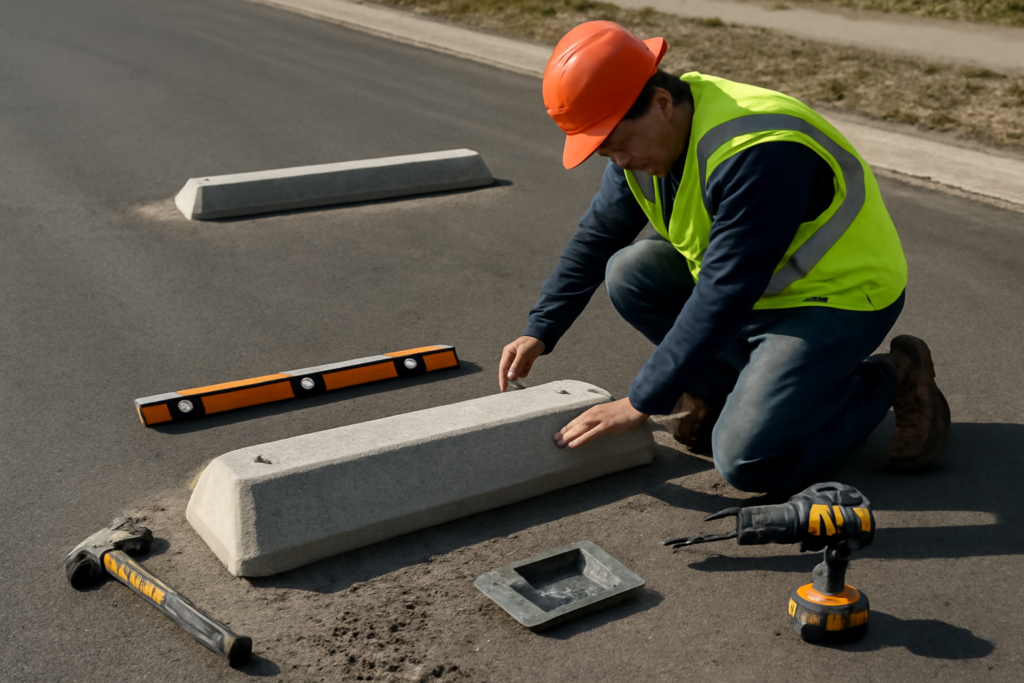
Precast concrete bump sections — usually 6-foot lengths at 250 to 400 pounds each — cost $150 to $350 per section and install in an hour with a drill and anchors. They arrive with molded reflective striping grooves and consistent geometry, and a damaged section swaps out individually. Poured-in-place bumps cost less in material (a 6-foot bump uses roughly 3 to 4 bags of 80-pound concrete mix, about $25) but demand formwork, finishing skill, and cure time, and they bond permanently to the pavement. Pour when you want a monolithic bump on a concrete drive, or a custom length; go precast on asphalt, where poured concrete adheres poorly and precast anchoring is the standard detail. Rubber and recycled-plastic bumps, for comparison, run $60 to $150 per 6-foot section but deform under trucks and UV-fade in five to eight years — concrete’s maintenance advantage compounds over time.
Legal and Liability Checks Before You Build
On fully private property — a fenced lot, a private parking area — you generally may install traffic calming at will, but signage and visibility marking are still your liability shield. On shared private roads, HOA streets, and anything with an easement, get written approval from the road association or HOA board first; a bump installed unilaterally on a shared road is a removal order waiting to happen. Public streets are entirely off-limits to private installation. Two universal requirements regardless of setting: paint the bump in high-visibility yellow with reflective striping, and post a “SPEED BUMP” or “BUMP” warning sign 50 to 100 feet ahead in each direction. Unmarked bumps that damage vehicles or throw cyclists are textbook premises-liability claims. Also think through emergency access — fire departments in many jurisdictions ask for bump-free fire lanes — and snow plowing, since a plow blade meeting a 3-inch bump at speed damages both.
Installing Precast Sections
Precast installation is a straightforward half-day job for two people.
- Sweep and dry the pavement. Chalk-line the bump position square to traffic flow, leaving drainage gaps at the edges.
- Dry-set the sections and mark the anchor holes through the cast-in bolt pockets — usually four per 6-foot section.
- Drill the pavement with a hammer drill: 1/2-inch masonry bit into concrete for wedge anchors, or 3/4-inch holes for 10 to 12-inch spike anchors in asphalt.
- Bed each section in a bead of polyurethane construction adhesive (PL Premium or Sikaflex), set it, and drive the anchors. Adhesive stops the micro-rocking that eventually wallows out anchor holes.
- Torque wedge anchors snug — not gorilla-tight, which can crack the casting — and cap the recesses.
On asphalt in hot climates, check anchors annually; asphalt creeps under load and spikes can loosen.
Pouring a Concrete Bump in Place
For a poured bump on an existing concrete driveway, cut shallow keyways or drill and epoxy short lengths of #3 rebar as dowels every 16 inches so the bump locks to the slab — surface bonding alone shears off under traffic. Build side forms from 2×4 stock ripped to the bump height with the ramp profile cut into plywood end templates. Use a 4,000 PSI mix, low slump so it holds the crown shape, and screed to the templates. Finish with a magnesium float and give the surface a light broom texture for wet-weather grip; a slick troweled bump is a motorcycle hazard. Moist-cure for three days, keep traffic off for seven, and paint at 28 days with yellow traffic-marking paint ($30 to $45 per gallon), refreshed every two to three years.
Placement and Drainage Planning
Where a bump sits matters as much as how it is built. Position bumps at least 75 feet from stop signs, gates, and corners so drivers are not braking for two things at once, and space multiple bumps 200 to 300 feet apart on a long private drive — closer spacing punishes compliant drivers without further slowing the speeders, who simply accelerate between bumps. Keep bumps off curves, where they unsettle vehicles mid-turn, and away from the bottom of grades steeper than about 8 percent, where winter ice plus a bump equals sliding cars. Lighting deserves a line item: a bump in a dark lot needs either an overhead light within 50 feet or high-grade reflective striping tape rated for pavement, because paint alone fades below useful visibility in two to three years of tire scrub.
Drainage is the quiet engineering problem. Water approaching a bump has to go somewhere, and the edge gaps mentioned earlier handle sheet flow on flat lots. On sloped pavement, the uphill side of a bump acts as a dam and will silt up, freeze, and undermine the bump’s bedding over a few seasons. Either cast a 4-inch drainage channel through the bump’s base at the low point or align the bump with a slight skew so water tracks along its face to the edge gap. Ten minutes with a level and a hose before installation reveals exactly where water wants to travel — test it, because relocating a bolted or bonded 400-pound bump later is nobody’s idea of maintenance.
Costs at a Glance
- DIY poured bump, 10 ft: $60 to $120 in concrete, rebar, forms, and paint
- Precast concrete, supplied and self-installed: $300 to $700 for a 10 to 12-ft run
- Contractor-installed precast or poured: $800 to $2,500 per bump depending on region and traffic control
- Signage: $30 to $80 per warning sign plus posts
Against a rubber system replaced every six years, a concrete bump amortizes to the cheapest option on any horizon past a decade — provided it was profiled, marked, and anchored correctly on day one. Spend your effort on the geometry and the striping; those two details determine whether the bump calms traffic quietly for twenty years or becomes the most argued-about object on the property.