Every good floor I’ve ever laid started long before the finish material came out of the box, and the reason is the stuff most homeowners never see: the construction chemicals for flooring that prepare, level, protect, and bond the whole assembly together. Primers, self-leveling compounds, moisture barriers, screeds, epoxy coatings, and curing compounds are the unglamorous heroes of a lasting floor. Get them right and the finished surface looks perfect for decades. Get them wrong and even the most expensive tile or timber will fail.
In this guide I’ll walk through the main categories of flooring chemicals, what each one actually does, and when I reach for them on a job. Whether you’re a serious DIYer preparing a slab or just want to understand what your contractor is spending your money on, this is the working knowledge that separates a floor that lasts from one that lifts, cracks, or sweats within a year.
Primers: The Handshake Between Layers
Primers are the first construction chemical I open on almost every job, and they’re the most skipped step by people who don’t know better. A primer’s job is to seal a porous subfloor, control how fast it draws moisture out of the next layer, and create a mechanical and chemical bond so that whatever goes on top actually sticks. Skip the primer under a self-leveling compound and you’ll often get pinholing, poor adhesion, and a screed that drums hollow when you tap it.
There are different primers for different substrates. Acrylic dispersion primers are common over absorbent concrete and cement screeds, diluted to different ratios depending on how thirsty the surface is. For dense, non-absorbent surfaces like existing tile or terrazzo, you switch to a grip or bonding primer, sometimes filled with quartz, that gives smooth surfaces a key for the next layer to hold onto.
The practical rule I follow: match the primer to both the substrate and the product going over it, and always respect the drying time on the tin. A primer applied too thick or covered before it’s cured is worse than no primer at all, because it becomes a slip plane. Applied correctly, it’s cheap insurance that pays for itself many times over.
Self-Leveling Compounds: Getting a Flat Base
Self-leveling compounds, sometimes called levelers or SLCs, are cement or gypsum-based powders you mix with water into a pourable slurry that flows out to a smooth, flat plane. This is the product that turns a wavy, patched, uneven slab into something you can actually lay tile, vinyl, or engineered timber over. For thin resilient floors like LVT and sheet vinyl, a flat base isn’t optional, because every hump and hollow telegraphs straight through the finish.
Most levelers are designed to be applied from a feather edge up to around 10mm to 15mm in a single pour, though there are deep-fill versions that go thicker. You prime first, mix to the exact water ratio, pour, and help it along with a spiked roller to release air bubbles. Working time is short, often 15 to 30 minutes, so on larger areas you mix in a disciplined rhythm and keep a wet edge between batches.
Cure and walk-on times vary, but many products take foot traffic in a few hours and accept floor coverings within 24 to 48 hours depending on thickness and the covering type. Always check whether the leveler is compatible with the moisture level of your slab, because a gypsum-based product over a damp slab can be a recipe for trouble.
Moisture Barriers and Damp Proof Membranes
If there’s one category of construction chemicals for flooring that saves the most failures, it’s moisture control. Concrete slabs, especially ground-bearing ones, can carry residual construction moisture for months and can also draw up ground moisture over their whole life. Lay a moisture-sensitive floor over a wet slab and you get cupping timber, bubbling vinyl, adhesive failure, and that musty smell nobody can trace.
Liquid-applied damp proof membranes, often two-part epoxy DPMs, are the pro solution. You roll or squeegee them over a prepared slab in the specified number of coats, and they form a continuous film that suppresses moisture vapor from pushing up into your floor build-up. Many are rated to handle high relative humidity readings, which lets you install moisture-sensitive floors sooner than you could otherwise.
Before I ever commit to a barrier or a floor, I test. A calcium chloride test or a relative humidity probe in the slab tells me what I’m actually dealing with rather than guessing. The membrane you choose has to be rated for the reading you get, and it has to be primed and top-coated correctly so the next layer bonds to it. Moisture is patient and relentless, and this is not a step to economize on.
Screeds: Building Up to Level
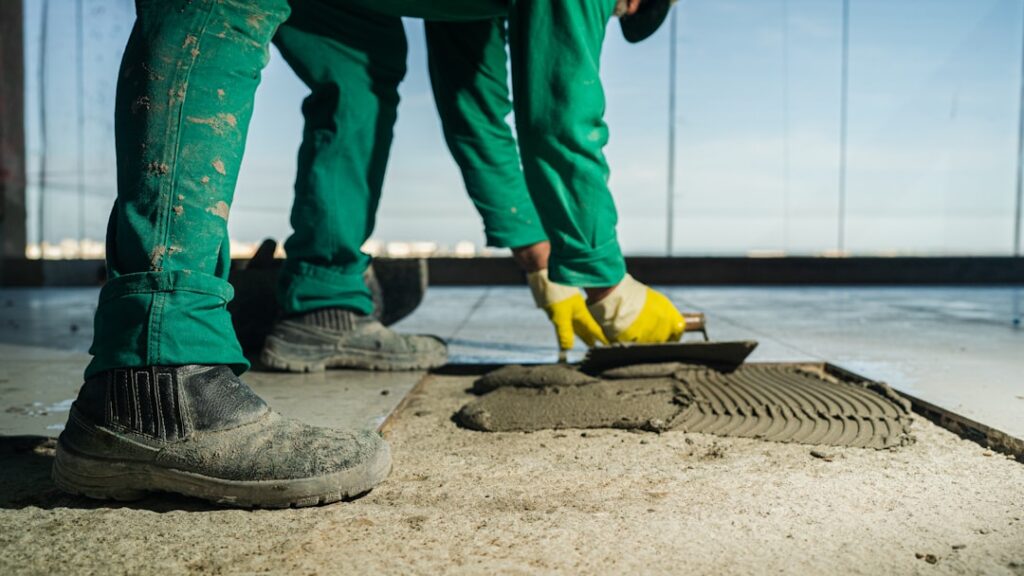
Screeds are the thicker, structural leveling layer, distinct from a thin self-leveler. A traditional sand-and-cement screed is a semi-dry mix laid and compacted to falls or to a level datum, typically 40mm to 75mm thick, that provides a sound, flat base over structural concrete or over insulation and underfloor heating pipes. Modern flowing screeds, often calcium sulfate or specialized cementitious, pour like a liquid and self-compact, which makes them fast and flat over large areas.
The key thing with screeds is that they need time and the right conditions to dry and gain strength before you tile or floor over them. A rough traditional rule of thumb is around a day per millimeter of thickness for the first stretch of drying, though it slows down considerably in thicker sections, and flowing screeds have their own drying regimes. Rushing a floor onto a green screed is a classic cause of failure.
Screeds also interact with additives and admixtures, plasticizers that improve workability, accelerators, and bonding agents for thin bonded screeds. When a screed has to go down thin over an existing slab, a slurry bonding coat brushed into the substrate is what stops it debonding and curling. Understanding whether your screed is bonded, unbonded, or floating changes how you detail the edges and joints.
Epoxy Coatings and Resin Floors
Epoxy and polyurethane resin systems are construction chemicals that become the finished floor themselves, not just preparation. In garages, workshops, commercial kitchens, warehouses, and increasingly in modern homes, a resin floor gives a seamless, hard, chemical-resistant, easy-clean surface. They range from thin roller-applied floor paints through self-smoothing pours a few millimeters thick to heavy-duty screeds packed with aggregate for industrial abuse.
The magic and the difficulty of epoxy both come from the same fact: it’s a two-part chemical reaction. You mix a resin and a hardener in the exact ratio, and once combined it has a fixed pot life before it goes off in the bucket. Surface preparation is everything with resin, which usually means grinding or shot-blasting the concrete to a clean, open profile, because epoxy bonds to the mechanical texture of the substrate. A greasy or laitance-covered slab will reject the coating no matter how good the product is.
Temperature and moisture rule the outcome. Most epoxies want to be applied within a certain temperature band and over a slab below a moisture threshold, and they cure through chemistry rather than drying, so cold slows them and heat speeds them. Done right, a resin floor lasts many years and shrugs off oil, chemicals, and traffic. Done in a cold damp garage with no prep, it peels off in sheets.
Waterproofing and Tanking Systems
Wet areas need their own chemistry. Before tiling a shower, wet room, or balcony, I apply a waterproofing or tanking system, usually a liquid membrane rolled or brushed over the substrate and reinforced at every corner, joint, and floor-to-wall junction with a proprietary fabric tape or matting. This creates a continuous tanked envelope beneath the tile so that any water passing through grout, and water does pass through grout, is caught and drained rather than soaking into the structure.
These membranes come as ready-mixed acrylic liquids, two-part cementitious slurries, and sheet membranes bonded down with adhesive. The cementitious kind suit areas that stay wet, while flexible liquid membranes handle substrates that move a little. Whichever you use, the detailing at drains, pipe penetrations, and internal corners is where waterproofing succeeds or fails, so those get extra attention and reinforcement.
You then tile directly onto the cured membrane with an appropriate cement-based tile adhesive. The critical mistake I see is people treating grout and silicone as the waterproofing. They are not. Grout is porous and silicone is a maintenance item that fails over time. The tanking membrane under the tile is the real barrier, and it’s a construction chemical worth every cent in any room that gets wet.
Curing Compounds, Adhesives, and Admixtures
A few supporting chemicals round out the toolkit. Curing compounds are sprayed onto fresh concrete to slow water loss so the slab hydrates properly and gains strength without surface crazing, though you have to know whether a given compound needs removing before you bond a floor over it. Bonding agents and admixtures tweak the behavior of screeds and repair mortars, improving adhesion, flow, or set speed for the conditions on site.
Adhesives are their own deep subject: cement-based tile adhesives graded for different tiles and substrates, flexible polymer-modified versions for movement-prone areas, and specialized flooring adhesives for vinyl, rubber, and timber. Choosing the right adhesive class for the covering and the environment, wet, dry, heated, or exterior, is as important as the covering itself.
The thread running through all of these construction chemicals for flooring is that they only work as a coordinated system. The primer suits the substrate, the leveler suits the primer, the barrier suits the moisture reading, the adhesive suits the covering. When I plan a floor, I plan the whole chemical stack from the slab up, because that hidden sequence is what makes the visible floor last. Treat these products with respect, follow the technical data sheets, and you build a floor that outlives the fashion of whatever you laid on top.
Prefer to explore on your own?
See how new flooring looks in your actual room in seconds — free, no signup.
Try the free Floor Studio →