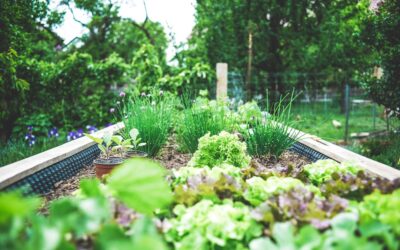
A sheet of corrugated roofing panel costs less than most cedar boards of the same length, and it will not rot. That simple math is why corrugated metal raised garden beds have become one of the most popular backyard builds. Framed with lumber or steel angle, capped along the top, and filled with a good soil mix, a bed like this can last 20 years or more and warms up earlier in spring than a wooden box.
You can buy a galvanized raised garden bed kit that bolts together in an afternoon, and for many people that is the simplest route. Building your own lets you pick the exact size and height, match the frame to your yard, and reuse leftover roofing panels. What follows is the full build: design, materials, cutting, assembly, edge capping, and the food-safety questions people always ask about zinc.
- Planning Corrugated Metal Raised Garden Beds
- Materials: Galvanized, Aluminum, or Weathering Steel
- Tools and Materials List
- Step-by-Step Build
- Are Galvanized Metal Raised Beds Safe for Vegetables?
- Do Metal Planting Beds Get Too Hot?
- Troubleshooting
- Cost: DIY vs Kits
- When to Call a Pro
- Frequently Asked Questions
Planning Corrugated Metal Raised Garden Beds
Start with size. A width of 3 to 4 feet lets you reach the middle from either side without stepping in the bed. If the bed sits against a fence, keep it to about 2.5 feet wide. Length is flexible; 8 feet works well because standard panels and lumber come in 8-foot lengths, which means fewer cuts.
Height depends on your back and your soil. An 18-inch bed is easy to fill and suits most vegetables. A 24- to 30-inch bed reduces bending and is friendlier for gardeners with limited mobility, but it takes far more soil. Corrugated panels ripped in half lengthwise give two strips of about 13 inches (for a 26-inch panel), which is a handy height for low beds.
Pick a spot with 6 to 8 hours of direct sun for most edible crops. Level ground saves work. On a slope, you will need to dig one side down or build the frame taller on the low end.
Materials: Galvanized, Aluminum, or Weathering Steel
Most corrugated metal garden beds use galvanized steel roofing panels, which are steel coated in zinc to prevent rust. Some panels use a zinc-aluminum alloy coating, often labeled aluminum-zinc coated, which tends to resist corrosion longer in wet soil.
- Galvanized steel: The most common and affordable option. Ages from bright silver to a dull grey.
- Aluminum-zinc coated steel: Similar look, often better lifespan in soil contact.
- Aluminum raised beds: Lightweight and rustproof, but softer, so they dent easily and cost more. Most aluminum beds are sold as kits rather than built from panels.
- Weathering steel: This steel forms a stable rust-colored patina. Weathering steel raised beds look striking in modern gardens but are pricier, and the surface rust can stain patios and concrete it touches.
- Painted or powder-coated steel: Available in many colors, common in kits. The coating protects the steel and softens the industrial look.
For a DIY frame you have two main options. A wood frame (cedar, redwood, or ground-contact-rated treated lumber) is easy to cut and screw into. A steel frame made from galvanized angle or square tubing lasts longer and looks cleaner but needs a metal-cutting blade and self-drilling screws or bolts.
Tools and Materials List
For one 4 by 8 foot bed, about 24 inches tall, with a wood frame:
- 3 corrugated panels, 26 inches by 8 feet (galvanized or coated)
- 4×4 posts: four corner posts plus two midpoint posts, cut to bed height
- 2×6 or 2×4 boards for the top frame and optional cap
- Optional 2×4 bottom rails for a stiffer box
- Exterior screws for wood, plus hex-head roofing screws with neoprene washers for the metal
- Tin snips (left and right cut) or a circular saw with a metal-cutting blade, or a nibbler
- Drill/driver and a speed square
- Measuring tape, marker, and clamps
- Cut-resistant gloves, safety glasses, hearing protection
- Hardware cloth (optional, for burrowing pests)
Step-by-Step Build
1. Cut the panels
Mark cut lines with a straightedge. For long cuts across the ribs, a circular saw with a metal-cutting blade is fastest; it throws hot sparks and metal slivers, so wear safety glasses, gloves, long sleeves, and hearing protection, and clear away anything flammable. Tin snips work for short cuts and trimming. Cut two panels to 8 feet for the long sides (often already that length) and one panel into two 4-foot pieces for the ends.
Orient the ribs vertically. Vertical corrugation gives the sides much more stiffness against outward soil pressure than horizontal ribs do.
2. Build the corner posts and frame
Cut the 4×4 posts to your bed height. Lay out the rectangle on flat ground and connect the posts with the top frame boards so the metal can sit inside or behind the boards. A common design fastens the metal to the inside face of the posts, then adds a horizontal 2×6 cap on top that covers the sharp cut edge.
3. Attach the metal
Clamp a panel against the posts and fasten it with roofing screws every 8 to 12 inches, driving them through the flat valley of the corrugation rather than the peak. Overlap corners by one rib where panels meet, or butt them against the post. On 8-foot sides, add a midpoint post; long unsupported metal walls bow outward once the bed is full of wet soil.
4. Cap the edges
The top edge of a cut panel is sharp enough to slice skin. Never leave it exposed. Options include a wood top cap (a 2×6 laid flat and screwed to the posts), a U-channel metal edge trim, or split rubber hose or garden-bed edge guard pressed onto the lip. A flat wood cap also gives you a handy seat and a spot to rest tools.
5. Stiffen long sides
For beds longer than 6 feet or taller than 18 inches, add a cross brace. A length of galvanized threaded rod or strapping across the middle, anchored to opposite midpoint posts, stops the sides from bowing. Steel garden beds sold as kits often include similar internal ties.
6. Place and level
Set the bed in its final spot. Remove sod or smother it with cardboard. Level the bed by digging posts down slightly on the high side. If gophers or voles are common, staple hardware cloth across the bottom before filling.
7. Fill the bed
Tall beds take a lot of soil. A 4 by 8 by 2 foot bed holds about 64 cubic feet, a bit over 2.3 cubic yards. Many gardeners fill the lower third with coarse organic material like logs, branches, and leaves, then top with a blended mix of topsoil and compost. Expect the level to settle a few inches over the first season.
Are Galvanized Metal Raised Beds Safe for Vegetables?
This is the most common question about galvanized flower beds and vegetable boxes. Zinc is a plant nutrient in small amounts, and research on galvanized steel planter boxes generally shows that zinc leaching into typical garden soil is minimal, especially in neutral to slightly acidic soil. Most extension services consider galvanized beds acceptable for food gardening.
A few precautions make sense:
- Avoid very acidic soil (below about pH 6), which speeds zinc and coating breakdown.
- Use new or known-source panels. Old salvaged roofing may carry lead-based paint or unknown coatings; skip it for edibles unless you know what it is.
- If you want extra peace of mind, line the inside walls with a food-safe plastic sheet, leaving the bottom open for drainage.
Do Metal Planting Beds Get Too Hot?
Metal walls do warm up in direct sun, but the soil mass buffers most of that heat. Soil right against the wall can run warmer than the center, which helps cool-season crops early in spring and can stress shallow roots in a hot summer. In very hot climates, choose a lighter color, add a 2-inch layer of mulch, water deeply, and keep plants a few inches back from the walls. Taller beds hold more soil and swing less in temperature.
Troubleshooting
Sides bowing out: Add midpoint posts or cross braces. The pressure from wet soil is significant on long runs.
Rust spots: Scratches through the zinc layer can rust. Touch them up with cold galvanizing spray. Coated panels last longer when you avoid scraping the inside with a shovel.
Wood frame rotting: Use cedar, redwood, or ground-contact treated lumber, and keep soil away from the top cap where possible.
Soil washing out at the base: Bury the bottom edge 1 to 2 inches into the ground, or add a bottom rail on a gravel strip.
Cost: DIY vs Kits
A DIY 4 by 8 foot bed with a wood frame usually costs somewhere between $100 and $250 in materials, depending on lumber prices and panel type. Galvanized raised planters sold as kits range from under $100 for small shallow models to several hundred dollars for tall, powder-coated beds. Soil is often the biggest expense; bulk delivery by the yard is far cheaper than bagged mix for tall beds.
Galvanized metal planters outdoor kits save time and usually include rolled safety edges. Building your own saves money on large or custom sizes. For a single small bed, a kit is often the better value once you count blades and hardware.
When to Call a Pro
Most homeowners can handle this project. Consider hiring a carpenter or landscaper for tall beds over 30 inches, beds built on steep slopes that need retaining, or large installations where many beds and soil deliveries must be staged. Always handle cut metal with cut-resistant gloves, and call 811 before digging posts into the ground.
Frequently Asked Questions
How long do corrugated metal raised garden beds last?
Galvanized or coated steel beds commonly last 15 to 20 years or more. The wood frame usually wears out first, so choose rot-resistant lumber or a steel frame for the longest life.
Should the ribs run vertically or horizontally?
Vertically. Vertical ribs make the walls much stiffer against soil pressure and reduce bowing. Horizontal ribs look sleek but need more posts and bracing.
Do I need to line a metal raised bed?
Lining is optional. Galvanized beds are generally considered safe for vegetables, but a food-safe plastic liner on the walls is a simple option if you prefer extra separation. Leave the bottom open so water drains.
What do I put in the bottom of a tall metal garden bed?
Many gardeners fill the bottom third with logs, branches, leaves, and coarse compost to save on soil, then top with a topsoil and compost blend. Expect extra settling in the first year as the woody material breaks down.
How do I cover the sharp edges of corrugated metal?
Screw a wood top cap over the edge, fit metal U-channel trim, or press a split rubber edge guard onto the lip. Never leave cut edges exposed where hands, kids, or pets can touch them.