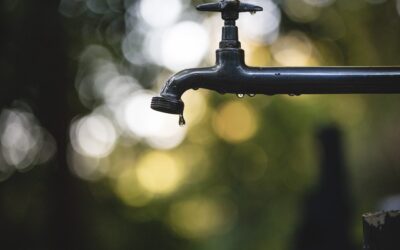
A dripping hose bib wastes more water than most homeowners expect, and a split one inside the wall can soak a basement ceiling before anyone notices. The cost to replace outside faucet hardware usually runs $15 to $60 if you do it yourself and $150 to $450 when a plumber handles the job. Frost-free models, soldered connections, and hard-to-reach pipes push the price toward the top of that range, while a simple threaded swap stays near the bottom.
Most of the spread comes down to three things: what kind of faucet you are installing, how the supply pipe connects to it, and whether anyone has to open a wall or ceiling to reach it. If your old spigot screws onto a threaded fitting you can see from the basement, the job is often a one-hour DIY project. If it is soldered copper buried behind finished drywall, expect a longer service call and possibly a separate patch-and-paint bill.
- Cost to Replace Outside Faucet by Type
- What Drives the Cost to Replace an Outside Spigot
- Outside Faucet Handle Replacement and Quick Repairs
- Tools and Materials for a DIY Replacement
- How to Replace an Outside Faucet Step by Step
- Is the Frost-Free Upgrade Worth It?
- Troubleshooting After Installation
- When to Call a Plumber
- Replacing Outside Faucet Hardware: Shutoff, Draining, and Choosing a Code-Friendly Sillcock
- Frequently Asked Questions
Below you will find realistic price ranges for each faucet type, a breakdown of what plumbers charge for, a step-by-step guide for the DIY route, and the warning signs that mean the problem is bigger than the faucet itself.
Cost to Replace Outside Faucet by Type
Material prices vary by region and retailer, so treat any cost to replace outside faucet estimate as a starting point. These general ranges hold across most of the US. Labor figures assume a typical single-family home with basement or crawlspace access to the pipe.
| Faucet type | Part cost | Installed by a plumber |
|---|---|---|
| Standard compression hose bib | $10 – $30 | $150 – $275 |
| Frost-free sillcock (6 to 12 inch) | $25 – $60 | $200 – $400 |
| Anti-siphon frost-free sillcock | $35 – $80 | $225 – $450 |
| Quarter-turn ball valve hose bib | $15 – $40 | $160 – $300 |
| Handle or washer repair only | $3 – $15 | $100 – $175 |
Standard hose bibs are the cheapest option, but the shutoff washer sits right at the exterior wall, so any water left in the spout can freeze and split the body in cold climates. Frost-free sillcocks move the shutoff 6 to 14 inches inside the heated part of the house, which lets the barrel drain every time you close the handle. Anti-siphon versions add a vacuum breaker that keeps dirty hose water from being pulled back into your drinking supply, and many local codes now require one on new installations.
What Drives the Cost to Replace an Outside Spigot
When you compare quotes, the cost to replace outside spigot hardware is rarely about the part. A $30 faucet can become a $400 job if the plumber spends two hours cutting access and sweating copper in a tight joist bay.
Wall and Pipe Access
An unfinished basement or open crawlspace is the ideal situation. Finished basements with drywall ceilings often need a 6 by 6 inch access hole cut behind the faucet, which is simple to make but adds $100 to $300 for drywall patching and painting afterward. Slab-on-grade homes sometimes route the line through an exterior wall cavity, which can mean opening siding or interior drywall.
Connection Type
Threaded (MIP or FIP) connections are the fastest to swap. Soldered copper requires a torch, flux, and fire precautions, so many plumbers price it higher. PEX connections are usually quick with crimp or expansion fittings, and push-to-connect fittings let a handy homeowner make the joint with no special tools.
Wall Thickness and Barrel Length
Frost-free sillcocks must be long enough for the valve seat to sit inside the heated space. A home with a 2×6 wall and a thick rim joist might need a 10 or 12 inch barrel. Buying the wrong length is one of the most common DIY mistakes and leads to a second trip to the store.
Local Labor Rates and Trip Charges
Many plumbing companies charge a service-call or trip fee of $75 to $150 that covers the first half hour or hour. Hourly labor in most markets falls between $75 and $150. Emergency, weekend, or holiday calls can add 50 percent or more.
Outside Faucet Handle Replacement and Quick Repairs
Not every leak needs a new faucet. If the handle is stripped, cracked, or spins without shutting the water off, an outside faucet handle replacement may solve the problem for a few dollars. Universal replacement handles fit most square or splined stems; take the old handle to the store to match the broach pattern.
A spigot that drips from the spout when closed usually has a worn seat washer. A leak around the stem when the water is on points to a worn packing nut or O-ring. Both are $3 to $10 fixes on a standard hose bib. On a frost-free model, the entire stem assembly can often be pulled out and replaced with a brand-matched cartridge, typically $12 to $30, without disturbing the pipe connection.
If water appears inside the house when you run the hose, or the faucet body itself is cracked, repair is not an option. That points to a freeze-split barrel, and the whole sillcock must be replaced.
Tools and Materials for a DIY Replacement
- Replacement faucet sized to your wall thickness (measure from the siding to the inside of the rim joist)
- Two pipe wrenches or an adjustable wrench and a pipe wrench
- Thread seal tape and pipe-thread sealant rated for potable water
- Tubing cutter for copper or PEX cutter
- Push-to-connect coupling or PEX fittings if converting from soldered copper
- Exterior silicone or polyurethane sealant and four 1-1/4 inch stainless or coated screws
- Bucket, rags, and a flashlight
How to Replace an Outside Faucet Step by Step
- Shut off the water. Close the dedicated shutoff valve for the outside faucet, usually found in the basement near the sillcock. If there is no branch valve, close the main water shutoff. Open the outside faucet to drain the line.
- Remove the mounting screws. Back out the screws holding the faucet flange to the siding or brick mold. Scrape away old caulk.
- Disconnect the supply. For a threaded connection, hold the pipe fitting steady with one wrench and unscrew the faucet with the other so you do not twist the supply line. For soldered copper, cut the pipe with a tubing cutter a few inches back from the faucet.
- Pull the old faucet out. Slide it out from the exterior. Note which way the old unit was sloped; the new one should pitch slightly downward toward the outside so it drains.
- Prepare the new faucet. Wrap male threads clockwise with three or four layers of thread seal tape, then add a thin coat of pipe sealant. Run a bead of exterior sealant on the back of the flange.
- Install and connect. Push the new faucet through the wall, fasten the flange with screws, and make the inside connection. Use a push-to-connect coupling or PEX adapter if you cut the copper line.
- Restore water and test. Close the new faucet, turn the supply back on slowly, and check the inside connection for drips. Open the outside faucet fully, then close it and look again after 15 minutes.
Plan on 60 to 90 minutes for a threaded replacement and two to three hours if you have to modify the supply pipe.
Is the Frost-Free Upgrade Worth It?
In any area that sees hard freezes, yes. The price difference between a standard hose bib and a frost-free sillcock is usually $20 to $50 in parts, while a single freeze-split line can cause water damage that costs thousands to dry out and repair. Frost-free units also eliminate the chore of closing an interior shutoff and draining the line every fall, although you still must disconnect hoses before the first freeze. A hose left attached traps water in the barrel and defeats the frost-free design.
In warm-climate states where pipes rarely freeze, a quality quarter-turn hose bib with a vacuum breaker is a reasonable, lower-cost choice. Quarter-turn ball valves also last longer than washer-style bibs because there is no rubber seat to wear out.
Troubleshooting After Installation
- Drip at the inside joint: Tighten the threaded connection a quarter turn at a time. If it still leaks, shut off the water, redo the tape and sealant, and reassemble.
- Water running down the inside wall: The faucet may be sloped toward the house. Loosen the flange screws and shim the bottom so the barrel pitches outward.
- Vacuum breaker spits water when you close the faucet: A brief spurt is normal on anti-siphon models. Constant leaking means the breaker cap needs a new seal.
- Low flow: Check for a partially closed branch valve or debris that came loose in the line during the swap.
When to Call a Plumber
Hire a licensed plumber if the faucet connects with soldered copper and you are not comfortable using a torch near wood framing, if you find corroded galvanized pipe that crumbles when you touch it, or if the supply line runs through a finished ceiling with no clear access. Call right away if you see water stains, soft drywall, or mold near the faucet inside the house, because a split pipe may have been leaking inside the wall for some time. Some municipalities also require a permit and a backflow preventer for new hose bibs, so a local plumber can confirm what applies in your area.
For a straightforward swap, the DIY cost to replace outside faucet hardware is hard to beat. For anything involving hidden leaks or pipe modifications, the extra $150 to $300 for a professional is cheap insurance against a much larger water damage bill.
Replacing Outside Faucet Hardware: Shutoff, Draining, and Choosing a Code-Friendly Sillcock
Most problems with replacing outside faucet hardware start before the old unit ever comes out of the wall. A line that was not fully drained, a replacement that does not match the wall depth, or a faucet without backflow protection can turn a simple swap into a leak or a failed inspection. A few checks up front make the job cleaner and the result more durable.
Shut Off and Drain Completely. Many homes feed the outdoor faucet through a stop-and-waste valve, a branch shutoff with a small drain cap on its side. After closing the valve, open the outside faucet, then loosen that cap over a bucket so air can enter and the pipe between the valve and the wall empties. Without that air path, water can hold in the line and spill out the moment you break the connection. If there is no branch valve and you have to close the main, open a low faucet inside the house as well to relieve pressure.
Choose the Right Replacement
- Frost-free sillcocks: In freezing climates, these place the valve seat inside the heated space. Measure from the exterior face of the wall to the inside of the rim joist so the barrel is long enough to reach warm air.
- Anti-siphon protection: Choose a model with a built-in vacuum breaker, which stops garden hose water from being drawn back into the drinking supply. Many local codes require it on replacements as well as new installs.
- Keeping the existing faucet: If the faucet is sound but lacks backflow protection, a screw-on hose-connection vacuum breaker is an inexpensive add-on.
- Matching connections: Note whether the supply is threaded, soldered copper, or PEX so you buy a faucet and fittings that match.
When the Work Moves Inside the Wall. A swap you can reach from an unfinished basement is a reasonable DIY task. Once the job means cutting into a finished wall or ceiling, rerouting supply pipe, soldering near framing, or relocating the faucet to a new spot, bring in a licensed plumber. The same applies if you find corroded pipe, signs of a hidden leak, or if your area requires a permit. After any replacement, disconnect hoses before the first freeze and look at the inside connection again after the first few uses.
Frequently Asked Questions
How much does a plumber charge to replace an outdoor faucet?
Most plumbers charge $150 to $450 for the complete job, including the part. Simple threaded replacements with basement access sit near the low end, while frost-free anti-siphon models, soldered joints, or drywall access holes push the total higher.
Can I replace an outside spigot without turning off the main water?
Only if the outside faucet has its own branch shutoff valve inside the house. Close that valve and drain the line. If there is no branch valve, you must shut off the main water supply before disconnecting anything.
How long does a frost-free sillcock last?
A good-quality frost-free sillcock typically lasts 15 to 20 years or longer. The internal stem washer may need replacement sooner, but that is an inexpensive repair that does not require removing the faucet from the wall.
Why does my new frost-free faucet still freeze?
The most common causes are a hose left connected during freezing weather, a barrel too short to reach the heated space, or a faucet sloped toward the house so water cannot drain out of the spout.