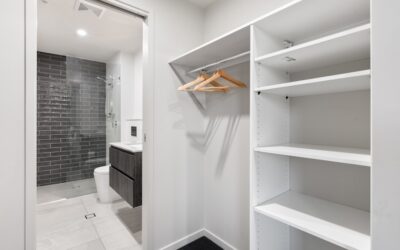
Ask any crafter where their supplies live and you will usually get a sheepish laugh. Ribbon in one drawer, paint in a shoebox, fabric spilling off a shelf. A well-planned craft closet organizer fixes that chaos by giving every glue gun, spool, and sheet of cardstock a dedicated home — and it turns wasted closet space into the most productive corner of your house. You do not need a dedicated craft room to pull this off; a standard reach-in closet, thoughtfully outfitted, holds a surprising amount.
- Start by Sorting Before You Shop
- Build Vertical: The Single Biggest Space Win
- Choose the Right Storage Containers
- Zone the Closet by How You Work
- Label Everything (Yes, Everything)
- Lighting Makes a Real Difference
- Budget-Friendly vs. Built-In Approaches
- Add a Work Surface If You Have Room
- Keep It Working Long-Term
Start by Sorting Before You Shop
The temptation is to buy bins first. Resist it. Pull everything out of the closet and sort into categories: paper and cardstock, paints and inks, tools (scissors, cutters, glue guns), fabric and yarn, embellishments, and works in progress. Now you know your real volumes. Most people discover they own three times more washi tape than they thought and have been storing bulky items in premium eye-level space that should hold everyday supplies.
Measure the closet interior — width, depth, and height — and note the door type. A reach-in with a standard 24-inch depth stores differently than a shallow 14-inch linen closet. Those numbers drive every product decision that follows.
Build Vertical: The Single Biggest Space Win
Craft supplies are mostly small and light, which means a craft closet lives or dies on how well you use vertical space. A single rod-and-shelf closet wastes 60 percent of its cubic volume. Replace it with a full-height shelving system.
- Adjustable wire or wood shelving: space shelves 8 to 10 inches apart for small bins, closer for paper trays. Adjustability lets you retune as your hobby evolves.
- A closet tower or cube unit: a 9- or 12-cube organizer fits many reach-in closets and pairs perfectly with fabric drawers for yarn and fabric.
- Over-the-door racks: the inside of the closet door is prime real estate for spray paints, ribbon spools, and tools in clear pocket organizers.
Choose the Right Storage Containers
Matching the container to the supply is what makes a system stick. A few reliable pairings:
- Clear stackable bins for anything you need to see at a glance — beads, buttons, small tools. Clear beats opaque because you will not dig.
- Vertical paper holders or magazine files for 12×12 cardstock and scrapbook paper, stored on edge so sheets do not curl.
- Pegboard on a side wall for scissors, rulers, punches, and anything you reach for constantly. Hanging tools stay visible and free up drawer space.
- Small labeled drawers (the hardware-organizer style) for embellishments, brads, eyelets, and findings.
- Rolling cart tucked into the closet floor for current projects — pull it out to your table, roll it back when done.
Zone the Closet by How You Work
Efficiency comes from placing supplies where your hands naturally reach. Think in three zones:
- Eye level (prime zone): your most-used tools and current-project supplies. This is the space you should never fill with off-season or bulk items.
- Waist to shoulder: frequently used paper, paints, and go-to materials.
- Top and floor: bulk stock, seasonal supplies, and heavy items like fabric bolts or bins of yarn on the floor where their weight is safe.
Group related activities together too. If you scrapbook, keep paper, adhesives, and trimmers in one vertical column so you are not crossing the closet mid-project.
Label Everything (Yes, Everything)
A labeled system is a system that survives. Unlabeled bins slowly collect random junk until the whole thing collapses back into chaos. Use a label maker or printable adhesive labels on the front of every bin and drawer. For clear bins, labels still help others in the house respect the categories. Pro tip: label by category, not by exact contents, so the system flexes as your supplies change — “adhesives” outlasts “glue dots, 200 count.”
Lighting Makes a Real Difference
Closets are dark, and color-matching yarn or paint in a shadowy corner is miserable. Battery-powered LED puck lights or a rechargeable motion-sensor strip mounted under the top shelf transform usability for under $25. Stick-on lights avoid any wiring and switch on the moment you open the door — a small upgrade that makes the whole closet feel like real workspace.
Budget-Friendly vs. Built-In Approaches
You can outfit a craft closet at almost any price point:
- Budget ($75 to $150): a cube organizer, a stack of clear bins, over-the-door pockets, and stick-on LED lights. Renter-friendly and reversible.
- Mid-range ($200 to $500): an adjustable wire shelving kit, matching fabric drawers, a pegboard wall, and a rolling cart.
- Custom built-in ($800 to $2,500): professionally installed shelving, a fold-down work surface, and integrated lighting. Worth it if crafting is a serious, long-term hobby.
Add a Work Surface If You Have Room
If your closet is deep enough, a small work surface transforms it from storage into a genuine mini-studio. A fold-down wall-mounted desk that drops to about 30 inches deep gives you a cutting and assembly station that tucks away when not in use. In a reach-in closet, a pull-out shelf on heavy-duty slides serves the same purpose in a smaller footprint. Pair it with a stool that slides under the closet lip, and mount a task light directly above so you are not working in your own shadow. Even a 24-inch-wide surface is enough for trimming paper, wrapping gifts, or assembling a card.
Keep It Working Long-Term
The best craft closet organizer is one you can maintain in five minutes. Build in a little breathing room — leave 15 to 20 percent of shelf space empty so new supplies have somewhere to go without triggering a reorganization. Do a quick reset every few months: return strays to their zone, toss dried-out glue and empty spools, and consolidate half-used bins. A system that stays open and labeled invites you to put things back, and that habit is what keeps your creative space ready the moment inspiration strikes.