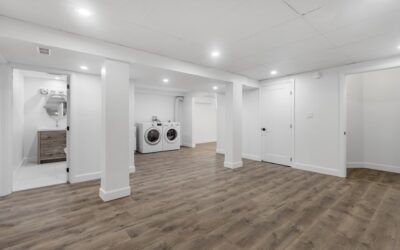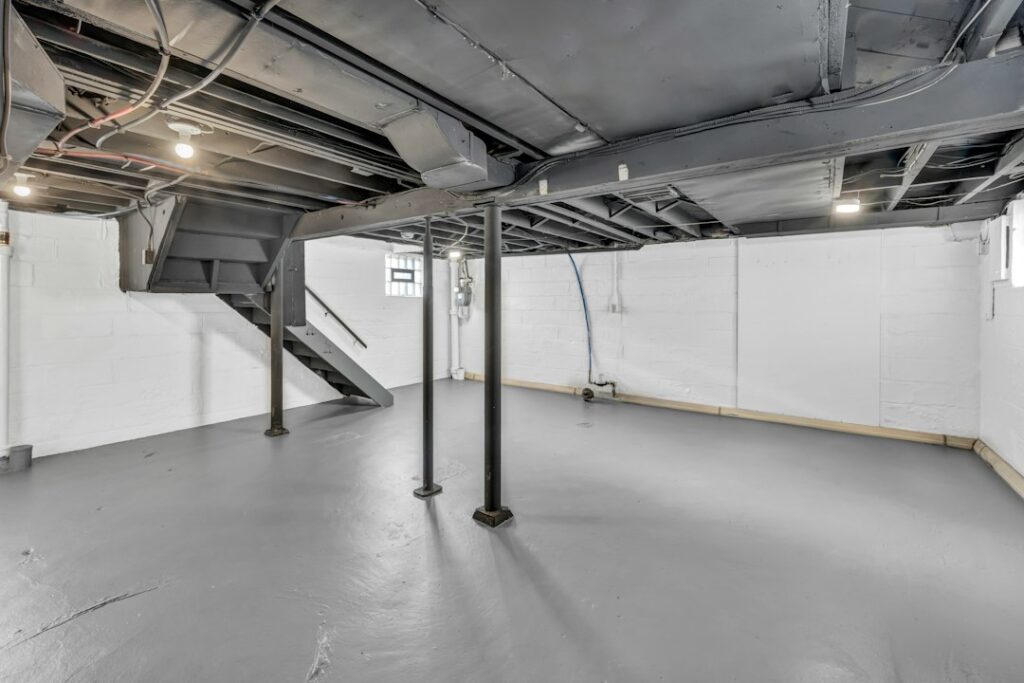
Turning a crawlspace into a basement is one of the few ways to add a full floor of living space without changing your home’s footprint or roofline. It is also one of the most complex residential projects you can take on. Converting a crawlspace into basement space means excavating several feet of soil from under a house that is still standing, then deepening or reinforcing the foundation so the structure stays put while you do it.
The short answer to “can I do it?” is usually yes, with the right site conditions and budget. The work is typically led by a structural engineer and carried out by foundation contractors with permits. Costs often land in the high tens of thousands and can exceed six figures on larger homes. The real question is whether the finished space will be worth more than it costs, and whether a much cheaper crawlspace encapsulation would solve the problem you actually have.
- Is Converting a Crawlspace Into Basement Space Right for Your Home?
- Step 1: Engineering, Soil Testing and Permits
- Step 2: Choose a Foundation Strategy: Underpinning or Bench Footing
- Step 3: Excavation and Structural Work
- Step 4: Drainage, Waterproofing and Moisture Control
- Step 5: Egress, Headroom and Finishing
- Crawlspace Into Basement Cost Ranges
- ROI: Conversion vs Crawlspace Encapsulation
- Troubleshooting and Common Pitfalls
- When to Call a Pro
- Frequently Asked Questions
This guide walks through how a dig-out conversion works, the two main foundation strategies, the drainage and egress work that makes the space usable, realistic cost ranges and how the return compares with encapsulation.
Is Converting a Crawlspace Into Basement Space Right for Your Home?
Before you call anyone, think through a few site factors that make or break the project:
- Water table and drainage: A crawlspace that floods or stays damp will become a basement that floods, unless drainage is designed in. High groundwater can make a conversion impractical.
- Soil type: Stable soils are easier and cheaper to dig. Expansive clay, loose sand, heavy rock or fill soils add engineering and cost.
- Existing foundation: The depth, condition and type of footings determine how much work is needed to go deeper safely.
- Access: Soil has to come out and concrete has to go in. Tight lots, limited access and interior-only access slow the job down.
- Utilities in the crawlspace: Ductwork, plumbing, gas lines and wiring often have to be moved or rerouted.
- Local rules: Ceiling height, egress and habitable-space requirements vary. Your building department sets what the finished space must include.
If your main goal is dry air, fewer pests and warmer floors, encapsulation may be all you need. If you want bedrooms, a family room or a finished storage level, a conversion is the path.
Step 1: Engineering, Soil Testing and Permits
This is not an optional step. A structural engineer evaluates the existing foundation, the soil, the loads from the house above and the depth you want to reach. Many projects also include a soils (geotechnical) report. The engineer produces drawings that specify the excavation sequence, the foundation method, temporary shoring and the new slab and walls.
Those drawings go to your local building department for permits. Expect inspections at key stages such as footings, walls, drainage and framing. Before any digging starts, the contractor should call 811 to have underground utilities marked around the house.
Never dig below or beside existing footings as a DIY project. Removing soil that supports a footing can cause the foundation to shift, crack or collapse, with the house on top of it. Excavation under an occupied structure is work for licensed foundation contractors following an engineer’s plan.
Step 2: Choose a Foundation Strategy: Underpinning or Bench Footing
Going deeper means the bottom of your new basement will sit below the current footings. There are two common ways engineers handle that.
Underpinning
Underpinning extends the existing foundation downward. Contractors excavate small sections beneath the footing, one at a time in a set sequence, and fill each section with concrete so the foundation is deepened in stages. The result is full-height walls all the way around and the most usable floor area. It is also slower, more labor-intensive and more expensive.
Bench footing (benching)
A bench footing leaves the original footing in place and steps the excavation in from it, creating a concrete ledge or “bench” around the perimeter at the old footing level. The new, deeper floor starts inside that bench. Benching generally costs less and carries less risk to the existing foundation, but you lose floor space along the walls. Many homeowners turn the bench into built-in shelving or seating.
Your engineer will recommend the right approach based on soil, footing depth and how much space you want. Some projects combine both methods on different walls.
Step 3: Excavation and Structural Work
With permits in hand, the typical sequence looks like this:
- Move or protect utilities. Ducts, pipes, gas and wiring in the crawlspace are rerouted or temporarily supported.
- Install temporary shoring. Posts and beams support the floor above as interior supports are removed or replaced.
- Excavate. Soil is removed, often by hand or with small equipment through an access opening or conveyor. This is frequently the longest phase.
- Build the new foundation. Underpinning pours, bench footings, new interior footings and permanent posts or beams are installed per the engineering plan.
- Waterproofing and drainage. Covered in the next step, installed before the slab.
- Pour the slab. A gravel base, vapor barrier and insulation (where specified) go down before the concrete floor.
Step 4: Drainage, Waterproofing and Moisture Control
A dry basement depends on getting water away before it gets in. Most conversions include:
- Perimeter drain tile (interior, exterior or both) leading to a sump pit with a sump pump
- Waterproofing or damp-proofing on foundation walls
- A vapor barrier beneath the slab
- Proper exterior grading and downspout extensions so roof water is carried away from the house
- A dehumidifier sized for the space once it is finished
Skimping here is the most common regret in a crawlspace into basement conversion. A finished room with a damp slab will need to be torn out.
Step 5: Egress, Headroom and Finishing
If you want bedrooms or other habitable rooms, you will almost always need an egress window or an exterior door. That usually means cutting an opening in the foundation wall, installing a window well and adding drainage at the bottom of the well. Your building department will specify the requirements.
Headroom matters too. Beams, ducts and pipes eat into ceiling height, so plan your dig depth for the finished ceiling, not the bare joists. Finishing work then follows a typical basement path: framing, insulation, electrical, plumbing, HVAC extensions, drywall and flooring. Moisture-tolerant flooring such as luxury vinyl plank, porcelain tile or sealed concrete is a sensible choice below grade.
Crawlspace Into Basement Cost Ranges
No two conversions are priced the same, but these general ranges help with early planning:
| Project phase | General cost range |
|---|---|
| Engineering, soils report and permits | Low thousands to several thousand |
| Excavation and soil removal | Often the largest single cost; varies with access and soil |
| Underpinning or bench footings | Tens of thousands on a typical home |
| Drainage, waterproofing and slab | Several thousand to tens of thousands |
| Egress window with well | Several thousand per opening |
| Finishing the space | Similar to a standard basement finish |
All together, an unfinished conversion commonly runs into the high tens of thousands of dollars, and a fully finished project on a larger home can pass six figures. Difficult soils, high water tables, poor access or extensive utility relocation push costs up.
ROI: Conversion vs Crawlspace Encapsulation
Encapsulation seals the crawlspace with a heavy vapor barrier on the floor and walls, closes vents, and usually adds a dehumidifier or conditioned air. It typically costs a fraction of a conversion, often a few thousand to around ten thousand dollars, and delivers drier air, fewer pests, less mold risk and warmer floors. It does not add living space.
A conversion can add significant usable square footage, and in high-cost housing markets that space may return a solid share of its cost at resale. In lower-cost markets, the project may cost more than it adds in value. Get a local appraiser or agent’s opinion on what finished below-grade space is worth in your area before committing. If you mainly need storage or moisture control, encapsulation usually wins on return.
Troubleshooting and Common Pitfalls
- Cracks appearing upstairs during work: Stop and have the engineer inspect. Minor drywall cracks can happen, but new or widening foundation cracks need attention.
- Water in the excavation: A sign the drainage design needs revisiting before the slab goes in.
- Low ceiling after finishing: Plan duct and beam routing early. Relocating ducts into soffits or joist bays can recover headroom.
- Budget overruns: Rock, poor soils and utility surprises are common. Carry a contingency of at least 10 to 20 percent.
When to Call a Pro
For this project, the answer is from the very start. A structural engineer, a licensed foundation contractor and your local building department should all be involved before a shovel goes in the ground. Homeowners can often take on the later finishing work, such as painting, flooring and some framing, once the structural, drainage and egress work is complete and inspected. Converting a crawlspace into basement space is a long-term investment, and doing the structural part right is what makes the rest of it worth building.
Frequently Asked Questions
How long does it take to convert a crawlspace into a basement?
Excavation and structural work often take several weeks to a few months, depending on soil, access and weather. Finishing the space adds more time, similar to finishing a standard basement.
Can I stay in my house during a crawlspace dig-out?
Many families stay home during the work, but expect noise, dust and utility interruptions. Your contractor may recommend moving out during certain phases, such as when utilities are rerouted.
What is the difference between underpinning and a bench footing?
Underpinning extends the existing footings downward in sections, giving full-height walls. A bench footing leaves the old footing in place and steps the new floor inward, creating a ledge that saves cost but reduces floor space.
Do I need an egress window in a converted basement?
If the space will include bedrooms or other habitable rooms, you will typically need an egress window or door. Your local building department sets the specific requirements.
Is crawlspace encapsulation a good alternative?
Yes, if your goal is moisture control, better air quality and warmer floors rather than more living space. Encapsulation costs far less than a conversion but does not add usable square footage.