Half the crawlspace insulation in America is hanging by one corner, soaked, or lying in the dirt. Floor batts between the joists — the way most crawlspaces were done for fifty years — fail on a schedule: humidity sags them, critters shred them, and within a decade the floors above are cold again. The methods that last start from a different question: should this crawlspace be treated as outside (vented, insulate the floor) or inside (sealed, insulate the walls)? Get that call right for your climate and moisture conditions, and the insulation you install this year will still be working in thirty. This guide walks the decision, the moisture prerequisites nothing survives without, and both methods step by step.
First Decision: Vented vs. Unvented
The vented approach (insulate the floor)
Keep the foundation vents open, treat the crawlspace as outdoors, and insulate the underside of the living space — batts or foam between the floor joists, plus sealed ductwork and wrapped pipes. This is the traditional prescription and it still makes sense in two situations: dry climates (much of the arid West) where vented crawlspaces actually stay dry, and flood-prone sites where a sealed space would trap floodwater problems.
The unvented approach (insulate the walls)
Seal the vents, put a heavy vapor barrier over the ground, insulate the foundation walls, and let the crawlspace become semi-conditioned space inside your thermal envelope. Ducts and pipes now live in tempered air; floors above stay warm; summer humidity stops condensing on cool framing. In humid climates — the entire Southeast, mid-Atlantic, and most of the Midwest — this is decisively the better-performing method, and it’s what building science has recommended for two decades.
The reason vented crawlspaces rot in humid climates is dew point arithmetic: summer air at 85°F and 70 percent humidity enters the vents, hits framing and ducts cooled to 65–70°F by the house above, and condenses. The vents installed to dry the space are what’s wetting it.
| Your situation | Method |
|---|---|
| Humid Southeast / mid-Atlantic / Midwest | Unvented, wall insulation |
| Arid West, dry site | Either; vented floor insulation is fine |
| Cold North with plumbing/ducts in crawl | Unvented — protect the mechanicals |
| Flood zone | Vented, floor insulated with foam (not fiber) |
| Chronic standing water you won’t fix | Fix the water first. Nothing else counts. |
Moisture Prerequisites — Do These or Don’t Bother
- Bulk water out. Grade soil away from the foundation, extend downspouts 4–6 feet, fix plumbing leaks. Standing water needs a sump or exterior drainage before any insulation.
- Ground vapor barrier. 10–20 mil polyethylene over 100 percent of the dirt floor, seams overlapped 12 inches and taped, edges sealed up the wall 6–12 inches. Bare earth releases gallons of vapor per day into the space; this single sheet is the highest-value component in the whole project. (6-mil poly meets minimum code but punctures during the install crawl — buy the thick stuff.)
- Combustion safety. If a furnace or water heater draws combustion air from the crawlspace, sealing it changes the air supply — have an HVAC tech confirm the appliance plan (sealed-combustion, ducted air, or leave-vented).
- Pest gap. Termite country requires a 2–3 inch inspection strip of bare foundation wall at the top. Check local rules before running foam to the sill.
Method A: Unvented — Insulating the Walls
Target R: R-10 continuous in mild zones (3–4), R-15 in zones 5–7 per IECC foundation-wall rows.
Materials: rigid foam board glued to the walls, closed-cell spray foam, or foil-faced polyiso. Fiberglass has no business on a foundation wall.
- Seal vents with foam board blocks foamed in place; air-seal the rim joist bays above the wall — full method in the rim joist insulation guide, and it’s non-optional here since the rim is now the top of your envelope.
- Install the ground vapor barrier first, running it up the wall.
- Glue 2–3 inches of rigid foam to the walls (foam-safe adhesive plus mechanical fasteners for insurance), seams taped or foamed. Board selection is covered in the rigid insulation guide. Or have 2 inches of closed-cell sprayed over wall and rim in one visit — the spray option’s economics are in the closed cell foam insulation comparison.
- Manage the air: code requires either a small supply duct from the HVAC (1 cfm per 50 sq ft), an exhaust fan to outside, or a dehumidifier. A $250 crawl-rated dehumidifier set to 55 percent is the simple retrofit answer.
- Check fire rules — exposed foam in crawlspaces is usually fine under the ignition-barrier exemption if the space isn’t used for storage, but verify locally; intumescent coating adds ~$0.75/sq ft when required.
Cost: DIY $1,500–$3,000 for a typical 1,200 sq ft crawl (poly, foam board, dehumidifier). Professional full encapsulation with wall foam runs $4,000–$10,000+.
Method B: Vented — Insulating the Floor
Target R: R-19 in zones 3–4, R-30 in zones 5+ for floors over unconditioned space.
- Ground vapor barrier anyway — it costs $300 and halves the humidity the assembly must endure.
- Air-seal the subfloor: foam every plumbing and wiring hole up into the house first. This step outranks the batts.
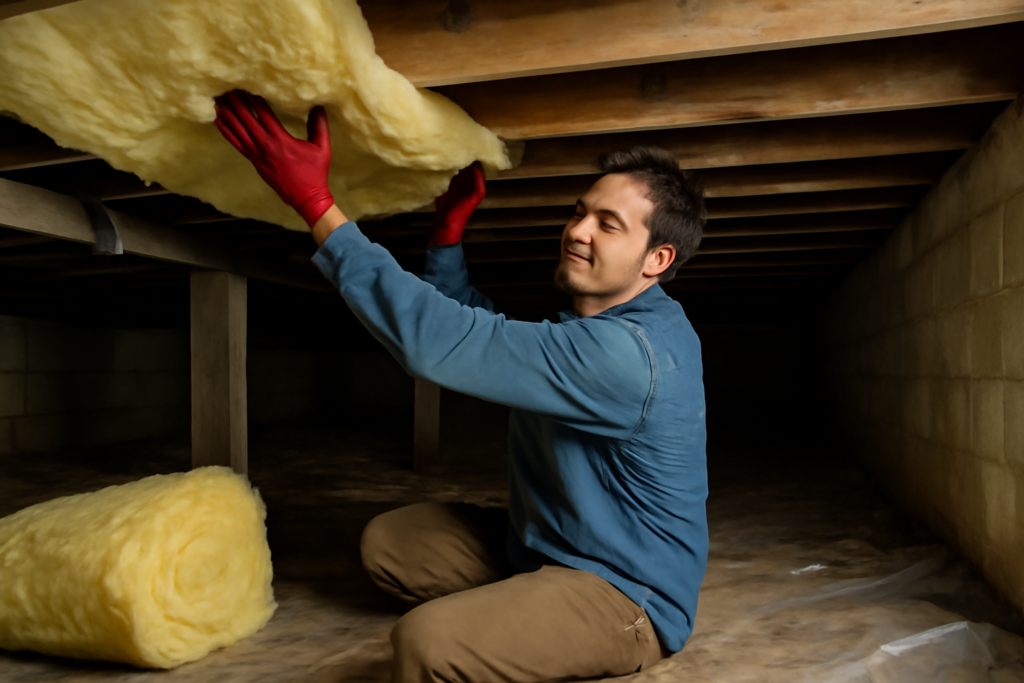
- Install unfaced fiberglass or mineral wool batts fully lofted, in full contact with the subfloor — gaps above the batt become convection loops that gut performance. R-30 needs 2×10 joists or deeper; don’t compress R-30 into 2x8s and expect R-30.
- Support properly: rigid wire stays every 12–16 inches minimum. Better: cap the joists with housewrap or, best, foam board sheathing across the joist bottoms — this air-seals the whole assembly and holds batts forever.
- Wrap pipes (foam sleeves) and insulate ducts to R-8; in a vented crawl they’re outdoors now.
Cost: DIY $1–$2/sq ft with fiberglass; add $0.75–$1.50/sq ft for a foam-board cap.
Mistakes That Shorten the Lifespan
- Insulating before solving water. The #1 wasted dollar in crawlspaces.
- Faced batts installed paper-down (vapor barrier on the cold side) in a humid vented crawl.
- Skipping rim joists in a wall job — the envelope leaks at the top forever.
- 6-mil poly laid loose with untaped seams — it’s a ground cover, not a vapor barrier.
- No humidity management after sealing — an unvented crawl with no supply air, fan, or dehumidifier just stagnates.
- Blocking combustion air or burying a junction box in foam.
What the Finished Job Should Look Like
Walk your crawlspace after the work — yours or a contractor’s — with this punch list. In a sealed-wall job: white poly runs wall to wall with no dirt visible anywhere, seams overlap and are taped in straight runs, and the liner turns up the wall and terminates in a clean mechanical or taped edge below the inspection gap. Foam board sits flat and fully adhered — press each sheet; drummy, flexing spots mean adhesive skipped. Every rim bay overhead is foamed or boarded with sealed perimeters, vents are blocked and airtight from inside, and the access door itself is insulated and weatherstripped (the most commonly forgotten square foot in the project). A hygrometer reading taken a month after sealing should hold between 50 and 60 percent RH in summer; buy a $15 remote sensor and leave it down there permanently — it’s the smoke alarm of crawlspace work. In a vented floor job: batts touch the subfloor with no gaps or slumps, supports run every 12–16 inches, faced batts show their facing up against the warm floor, every plumbing penetration overhead is foamed, and pipes wear their sleeves. Either method: no insulation touching the ground, no poly stapled to joists as a ceiling (a mold sandwich waiting to happen), and daylight visible nowhere. Ten minutes with a headlamp against this list catches ninety percent of shortcuts.
FAQ
Which method saves more energy?
In humid and cold climates, the sealed-wall approach usually wins — mostly because ducts and pipes come inside the envelope and the stack-effect leakage path closes. Homes with no mechanicals in the crawl see a smaller gap between methods.
Can I encapsulate without insulating?
Yes — poly plus sealed vents plus dehumidifier solves moisture without touching R-value. Many owners phase it: moisture year one, wall foam year two.
What about spray foaming the floor above instead of batts?
Closed cell under the subfloor is durable and air-seals beautifully, but at $3–$5/sq ft it costs more than sealing the walls in most layouts — quote both.
Do crawlspace vents ever help?
In genuinely arid climates, yes. East of the 100th meridian in summer, vents mostly import humidity. That’s the whole debate in one sentence.
Choose the envelope line first, kill the moisture second, and only then buy insulation. Done in that order, crawlspace insulation is a fix-it-once project — warm floors in January, dry framing in July, and nothing hanging by one corner in 2040.