The rim joist — the band of framing that caps your floor joists where they meet the foundation — is often the leakiest 12 inches in the entire house. Builders left it bare or stuffed a scrap of fiberglass against it, and every winter it bleeds heat while pumping cold air across your basement floor. Proper rim joist insulation is one of the highest-return weekend projects in home efficiency: $150–$400 in materials, one Saturday, and typical savings of $100–$200 a year in heating costs for a cold-climate home, plus warmer floors upstairs. This guide covers why the rim leaks, the two methods that work, the moisture rules that keep the wood safe, and the step-by-step.
Why the Rim Joist Leaks So Badly
Three things gang up on this strip of wood:
- Penetrations. Dryer vents, hose bibs, AC linesets, gas lines, and cable all punch through the rim, and none of the holes are sealed well.
- Joints everywhere. The rim meets the sill plate below, the subfloor above, and a joist every 16 inches — dozens of linear feet of unsealed wood-to-wood seams per wall. Wood shrinks; gaps open.
- Stack effect. Warm air rising out the attic pulls replacement air in at the lowest leaks — which is exactly here. Blower-door studies routinely attribute 10–30 percent of a home’s total air leakage to the rim/sill zone.
This is why fiberglass batts fail here: fiberglass slows heat but does nothing to stop airflow. Cold air washes straight through a batt, and worse, moist basement air reaches the cold rim behind it and condenses. The batt-only approach can actually cause the mold it was hiding. The fix must be an air barrier first and insulation second — which means foam.
The Two Methods That Work
Method 1: Cut-and-cobble rigid foam + canned foam (the DIY standard)
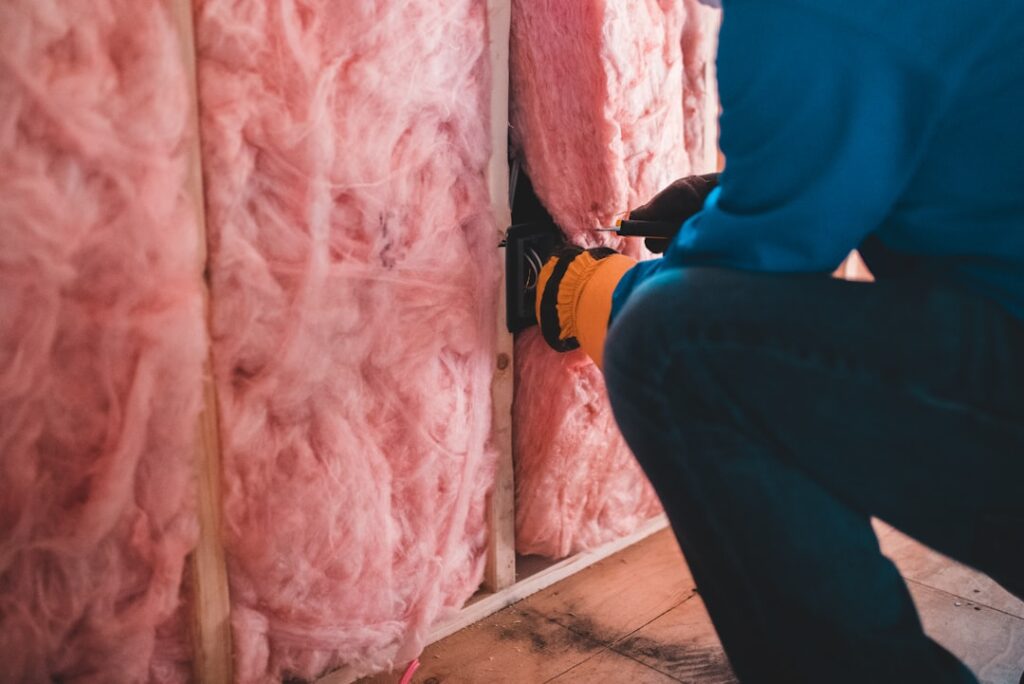
Cut rectangles of rigid foam board to fit each joist bay against the rim, then seal the perimeter of every piece with canned spray foam. Materials:
- Foam board: 2-inch XPS (R-10) or 2-inch polyiso (R-12–13) sheets, $25–$40 per 4×8 sheet. Foil-faced polyiso gives the highest R per inch and a built-in vapor retarder; XPS is more forgiving of damp masonry contact. The full rundown of board types is in the rigid insulation guide.
- Canned foam: one 12-oz can of gap-filling foam seals roughly 8–12 bays. Buy a $40 foam gun and gun foam canisters if you’re doing the whole perimeter — cheaper per foot and controllable.
Cost: roughly $1.50–$2.50 per square foot of rim area. A 1,500 sq ft ranch has about 150 linear feet of rim x ~10 inches tall ≈ 125 sq ft, so $200–$350 all-in.
Method 2: Two-part spray foam kits (faster, better for ugly framing)
A two-component closed-cell kit (Froth-Pak 210 or 620 class) sprays the entire rim, sealing and insulating in one pass. A 200-board-foot kit runs $400–$500 and covers a typical home’s rim at 2 inches. Choose spray when joist bays are irregular, blocked by bridging, or when the rim is balloon-framed and hard to cobble. Closed-cell foam’s properties — R-6 to 7 per inch and a built-in vapor retarder at 2 inches — are covered in depth in the closed cell foam insulation comparison. Professional spray-foam contractors will also do rims as a small job for $800–$1,500 if a bigger crew is already in the area.
Never use open-cell foam or air-permeable insulation alone at the rim in a cold climate — open cell lets vapor reach the cold wood.
R-Value Targets and the Moisture Rule
| Climate zone (IECC) | Code target for rim/basement walls | Practical spec |
|---|---|---|
| Zones 3–4 (mild) | R-10 to R-13 | 2 in. foam board or 1.5–2 in. closed cell |
| Zone 5 (Chicago, Denver) | R-15 | 2 in. polyiso + optional R-13 batt over |
| Zones 6–7 (Minneapolis, Maine) | R-15 to R-20 | 3 in. foam, or 2 in. + batt facing |
The moisture rule that governs everything: the foam layer against the rim must be thick enough to keep its interior face above the dew point of basement air, or moist air condenses behind your assembly. In zones 5–7 that means a minimum of 2 inches of closed-cell foam or rigid board before you add any fibrous insulation on the interior side. If you want R-20 in Minnesota, that’s 2–3 inches of foam first, then an unfaced batt snugged over it — never a batt against bare wood. And skip polyethylene sheeting entirely; the assembly must dry inward. The general principles are in the vapor barrier insulation guide.
Step-by-Step: Cut and Cobble
- Clear and inspect. Pull old fiberglass out of the bays. Check the rim for existing rot, insect damage, and daylight. Soft wood means a structural repair first, not insulation.
- Seal penetrations. Foam or caulk around every pipe, wire, and vent through the rim. Use fire-rated caulk around flues and keep foam 3 inches off B-vent (check the vent’s clearance listing).
- Measure bays individually. They will not be uniform. Cut boards 1/2 inch small on each side — the foam seal fills the gap and does the airtightness work.
- Dry-fit, then foam. Press each piece against the rim and run a continuous bead of canned foam around all four edges. Don’t skimp at the subfloor joint on top — it’s the hardest to reach and leaks the most.
- Second layer for cold zones. Stagger a second 1-inch layer over the first, or foam-seal an unfaced batt in front once the board is airtight.
- Sill plate seam. Run a foam bead along the sill-to-foundation joint while you’re down there — same leak family, same fix.
Time: 4–8 hours for a full perimeter, half that with a helper cutting while you foam.
Special Cases
- Fire code: exposed foam plastic generally requires an ignition barrier; many jurisdictions exempt rim joists up to a thickness limit, but some require intumescent coating or covering. One phone call to your building department settles it.
- Termite zones (Southeast): some codes require an inspection gap — 3 inches of visible foundation/sill below the foam so inspectors can spot mud tubes. Check before covering everything.
- Crawlspace rims: identical methods apply, and it pairs naturally with a wall-insulation project — see the crawlspace insulation guide for sequencing.
- Finished basements: if drywall will cover the rim, the foam still goes in first; thermal-barrier requirements are then satisfied by the drywall itself.
Mistakes to Avoid
- Stuffing fiberglass against bare rim wood — the classic condensation trap.
- Skipping the edge foam because the board “fits tight.” Wood moves; unsealed boards leak within a season.
- Using 1/2-inch board in zone 6 — too thin to stay above dew point with a batt over it.
- Foaming over an unsealed dryer vent or a leaking hose bib you’ll need to service.
- Ignoring the access nightmare corners near mechanicals — the bays you skip are the ones that grow mold.
Applying Rim Joist Spray Foam Like a Pro
Rim joist spray foam rewards careful setup more than speed. A two-part kit gives you a limited working window once the chemicals start mixing, so the success of the job is mostly decided before the first trigger pull. Planning the order of bays, warming the tanks and protecting yourself all matter as much as the spraying technique itself.
Prepping the Bays and the Kit
Vacuum dust and cobwebs out of every bay, because foam bonds poorly to loose debris. Let any damp wood dry fully before spraying. Mask the sill plate edge, nearby wiring, ducts and anything you do not want coated, and lay plastic over the floor and any appliances within a few feet. Most two-part kits need both the chemicals and the surface within a specific temperature range printed on the label, so bring the tanks into a warm room the day before if your basement runs cold. Shake the tanks as directed and spray a short test pattern onto scrap cardboard to confirm even flow.
Spraying Technique
Hold the nozzle at the distance the label recommends and move in steady sweeps, starting with the perimeter of each bay where the rim meets the sill and the subfloor. Those seams are the main air leaks, so they get foam first. Fill the center next. Build thickness in passes of about an inch rather than one heavy coat, letting each pass rise and firm up before the next. Thick single passes can trap heat as the foam cures, which may cause shrinkage, cracking or pulling away from the wood. Work from one end of the wall toward the other without long pauses, because the mixing nozzle can clog if you stop for more than a short break. Keep spare nozzles within reach.
Chemical Safety During and After Spraying
Two-part foam releases vapors that you should not breathe while it sprays and cures. Ventilate the basement with an exhaust fan blowing out a window and a fresh-air path elsewhere, and keep children and pets out of the house section until the curing time on the label has passed. Wear the respirator type the kit label specifies, plus chemical-resistant gloves, safety goggles and long sleeves or a disposable suit. Never mix leftover chemicals from different kits. Before you start, turn off any gas appliance with a pilot light in the space, such as a water heater or furnace, and keep sparks and flames away until vapors clear, since uncured components and propellants can be flammable.
Fire Barrier and Inspection Checks
Exposed foam plastic may need a thermal or ignition barrier depending on your local code, foam thickness and how the basement is used. Some areas accept bare foam at rim joists within a set thickness, while others require drywall, a fire-rated board or a listed intumescent coating. Ask your building department before you spray, and keep the kit paperwork for an inspector. Once cured, trim any foam that bulged past the joist faces and check each bay for gaps along the edges.
FAQ
Is rim joist insulation worth it in a mild climate?
The air-sealing half is worth it everywhere — it also blocks humidity, radon-carrying soil gas pathways, and pests. The R-value payback is fastest in zones 5+.
Can I just use canned foam alone?
For sealing seams yes; as the whole insulation layer no — you’d need a structural depth of canned foam at silly cost. Board plus canned edges is the economical hybrid.
XPS or polyiso?
Polyiso for higher R and foil facing; XPS where the rim sits close to damp concrete. Either beats nothing by a mile.
Do I need a vapor barrier over the foam?
No — the foam is the vapor control. Adding poly sheeting traps moisture and is the one thing worse than doing nothing.
How do I know it worked?
Three checks. Same-day: run a hand around each bay’s perimeter on a windy day — you should feel no drafts where you felt them before. First winter: the basement’s coldest strip (the top foot of wall) should read 5–10°F warmer on an infrared thermometer, and floors above exterior walls noticeably less icy underfoot. Long term: peek behind a removable test bay each spring for two years — dry wood and dry foam mean the assembly is working; any dampness at the foam-to-wood interface means an edge seal missed. A $25 infrared thermometer turns the whole verification into a ten-minute walk.
Two inches of foam, sealed at every edge, along 150 feet of forgotten wood: rim joist insulation is unglamorous, invisible when done, and one of the few projects where a $300 weekend genuinely pays for itself in two to three winters.