The average American home leaks enough air every hour to fill a small swimming pool. Most of those drafts slip past your insulation entirely, which is why a house can have R-49 in the attic and still feel cold in February. Air sealing insulation is the unglamorous step that makes the fluffy pink stuff actually work, and it usually pays for itself in two to four heating seasons. This guide walks through where to seal, what materials to buy, and the order to tackle the work for the biggest payback.
- Why Air Sealing Matters More Than R-Value
- Materials You Need for Air Sealing Insulation Work
- Start in the Attic Where the Hot Air Goes
- The Basement Rim Joist Is the Second-Biggest Win
- Doors, Windows, and Other Visible Leaks
- Sealing Penetrations You Forget About
- Putting It All Together: A Realistic Weekend Plan
Why Air Sealing Matters More Than R-Value
Insulation slows heat transfer by conduction. It does almost nothing to stop air movement. When warm indoor air leaks out through gaps around plumbing stacks, recessed lights, and rim joists, it carries moisture and energy with it. The Department of Energy estimates that air leakage accounts for 25 to 40 percent of heating and cooling costs in a typical home.
Energy auditors test this with a blower door, a calibrated fan that depressurizes the house to 50 pascals. A leaky 2,000 square foot home might score 12 air changes per hour (ACH50). A well-sealed one comes in at 3 ACH50 or lower. Cutting that number in half is the single biggest move you can make on your utility bill before you ever upgrade a furnace.
Materials You Need for Air Sealing Insulation Work
Stock up before you start so you are not making three trips to the hardware store.
- Great Stuff Pro Gaps and Cracks foam ($7 per 12 oz can)
- Great Stuff Fireblock foam, orange can, for penetrations through top plates ($9)
- OSI Quad Max sealant for exterior gaps ($8 per tube)
- DAP Alex Plus painter’s caulk for interior trim ($3 per tube)
- Frost King V-strip weatherstripping for door jambs ($6 per 17-foot roll)
- Reflectix or 1-inch foil-faced polyiso scraps for attic hatches
- Caulk gun, utility knife, and a headlamp
If you plan to spray more than two cans of foam, splurge on a $40 reusable foam gun. The disposable straws on standard cans clog after one session.
Start in the Attic Where the Hot Air Goes
Heat rises, and so does the dollar value of every leak you close in the attic floor. Pull back the existing insulation in 4-foot sections and look for the obvious offenders: the chase around the chimney, top plates of interior walls, plumbing vents, recessed light cans, bath fan housings, and the attic access hatch.
Seal big gaps (over 1/4 inch) with fireblock foam. Use sheet metal and high-temp silicone around chimneys and B-vents. Recessed lights need IC-AT (insulation contact, air tight) covers if the original cans are not rated for direct contact. After sealing, push insulation back and add more if you are below R-49 in northern climate zones.
The Basement Rim Joist Is the Second-Biggest Win
The rim joist (sometimes called the band joist) is the framing member that sits on top of the foundation wall. It is almost always uninsulated in homes built before 2010, and the gap between the sill plate and the concrete leaks like a screen door. Cut 2-inch rigid foam to fit each bay, foam the perimeter with Great Stuff Pro, and you have just sealed an area roughly equal to your attic plane.
Closed-cell spray foam from a contractor runs $1.50 to $3 per board foot, but the DIY rigid-and-canned-foam method costs about $1 per linear foot of rim joist. On a 1,500 square foot ranch, that is roughly $200 in materials for a job that often shows up as a 10 to 15 percent drop in winter gas use.
Doors, Windows, and Other Visible Leaks
Run a stick of incense or use a thermal camera ($350 for a FLIR ONE Pro) on a 30 degree day to find drafts. Most doors leak at the threshold sweep first, then the weatherstripping at the latch side. Replace door sweeps every 5 to 7 years; they cost $15 and take 10 minutes per door.
Window leaks usually come from the gap between the rough opening and the window jamb, hidden behind the casing. Pop off one piece of trim, fill the gap with low-expansion window-and-door foam, and reinstall the trim with a thin bead of caulk. Skip this step on historic windows with weight pockets, those need wool or backer rod instead so the sash weights still move freely.
Sealing Penetrations You Forget About
Walk the basement and crawl space with a flashlight and look for every place a wire, pipe, or duct passes through a wall, floor, or ceiling. Each one is a leak. The dryer vent, the radon pipe, the cable line entering the foundation, the bathtub plumbing access, the HVAC return chase, the laundry chute (yes, those still leak): every penetration gets sealed with foam, fire caulk, or a gasketed cover plate.
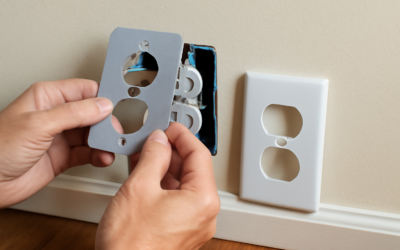
Outlet and switch boxes on exterior walls also leak. Pull the cover plate, install a foam gasket ($0.20 each), and seal the box-to-drywall gap with a thin bead of caulk. A 2,000 square foot home has about 50 of these, and as a group they often equal a 1-square-foot hole in the wall.
Putting It All Together: A Realistic Weekend Plan
If you have one weekend, hit the attic on Saturday and the basement on Sunday. Budget $300 to $500 in materials for a 2,000 square foot home and expect 12 to 16 hours of work for both areas. Wear a Tyvek suit, P100 respirator, and safety glasses. Old fiberglass and dust will get everywhere.
Done well, air sealing insulation upgrades return 50 to 100 percent of their cost in the first year through lower bills and improved comfort. The house feels different almost immediately: no more cold spots near baseboards, no more upstairs rooms that bake while the basement freezes. That comfort dividend is the part homeowners notice first, but the steady reduction in energy use is what keeps paying you back for the next 20 years.