Nothing kills the mood of a finished living room faster than a ceiling light stuck at one harsh brightness. A dimmable ceiling fan lets you drop the integrated LED to a warm glow for movie night and crank it to full output for cleaning day, all while the blades keep the air moving. The catch is that “dimmable” is not a single feature, and buying the wrong combination of fan and control leads to buzzing, flicker, and frustration.
How Dimming Actually Works
Modern ceiling fans almost always ship with an integrated LED light module rather than a socket for a standard bulb. That changes everything about dimming. Traditional wall dimmers were designed for incandescent bulbs that dim smoothly as voltage drops. LEDs behave differently, so the fan’s driver and the dimmer have to be electrically compatible or you get strobing, humming, or a light that simply refuses to go below 40 percent.
The blade speed and the light are separate systems. Most fans control speed through a pull chain, a wall control, or a remote, while the light dims on its own channel. Confusing the two is the number one reason people think their new fan is defective.
Types of Dimming Systems
There are three common ways to dim a ceiling fan light, and knowing which one you have prevents a compatibility headache.
- Remote-controlled dimming: The fan includes a handheld or wall-mounted RF remote that dims the LED digitally. This is the most reliable option because the manufacturer matched the electronics.
- Wall-dimmer compatible: The fan’s LED driver accepts a standard TRIAC (leading-edge) or ELV (trailing-edge) dimmer on the light wire. You must use a dimmer rated for LEDs.
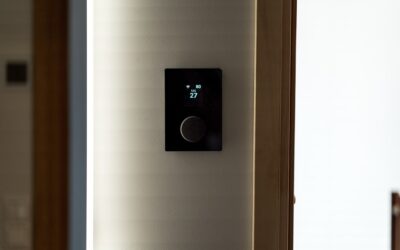
- Smart/app control: Wi-Fi or Bluetooth fans dim through an app or a voice assistant, often with schedules and scenes built in.
Never put a standard wall dimmer on the fan’s motor wire. Dimming the motor voltage causes overheating and a loud hum, and it will burn out the windings over time.
Choosing a Compatible Wall Control
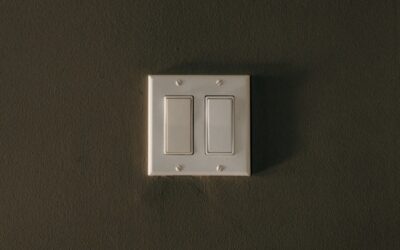
If you want a wall switch rather than a remote, buy a control designed for fans and LED lights. Look for a combination fan-and-light control that offers separate sliders or buttons, or a dedicated LED dimmer listed as compatible with your fan brand. Lutron and Leviton both publish compatibility charts, and matching the model number saves you a return trip to the store.
Trailing-edge (ELV) dimmers generally produce smoother, quieter results with LED drivers than older leading-edge units. If your fan flickers at low settings, swapping to an ELV-rated dimmer often clears it up without touching the fan itself.
Wiring and Installation Basics
A dimmable fan typically needs the same wiring as any fan: a hot, a neutral, a ground, and ideally a second switched hot if you want independent wall control of the light. In a room wired with only a single switch leg, a remote-controlled fan is the easiest retrofit because it splits fan and light functions without new cable in the wall.
Mount the fan to a UL-listed fan-rated ceiling box, never a standard lighting box. A fan weighs 15 to 50 pounds and vibrates in use, so the box must be braced to a joist or a listed fan brace bar. Skipping that step is how fans end up on the floor.
Fixing Buzz, Flicker, and Hum
Buzzing at partial brightness almost always means the dimmer and LED driver are fighting each other. First confirm the dimmer is LED-rated and, if possible, switch to a trailing-edge model. If the noise comes from the fan body rather than the switch, a slightly loose light kit or canopy screw may be resonating.
Flicker at the low end of the range often traces to a minimum-load mismatch: many dimmers need a certain wattage to function, and a low-power LED module falls below it. A compatible fan dimmer or the manufacturer’s own remote solves this cleanly.
Bulbs vs. Integrated LEDs
If you prefer swappable bulbs, choose a fan with a standard light kit that accepts E26 bulbs, then install dimmable LED bulbs and pair them with an LED dimmer. This route gives you control over color temperature and makes future replacement a $5 job instead of buying a whole light kit.
Integrated modules, by contrast, look sleeker and often dim from 2700K warm to 5000K daylight in the same fixture. The tradeoff is that if the module fails after its warranty, you replace the entire assembly rather than a single bulb.
Smart and Voice Control Options
If you want more than a dimmer slider, a growing number of fans build Wi-Fi or Bluetooth right into the motor housing. These pair with an app and with Alexa or Google Assistant, letting you dim the light, change fan speed, and set schedules by voice or on a timer.
A common trick is programming the light to fade to 20 percent at bedtime and ramp back up in the morning, which the fan handles automatically. If your fan is not smart from the factory, a smart wall switch designed for fan-and-light circuits, or a smart bulb in a swappable-bulb light kit, retrofits the same capability for $25 to $60 without rewiring.
Room-by-Room Recommendations
Where the fan lives should guide how you set up the dimming. Each room has a different priority.
- Bedroom: Prioritize deep dimming and quiet operation; a remote with a night-light mode is ideal
- Living room: A wall dimmer keeps control convenient for guests who won’t hunt for a remote
- Dining room: Warm 2700K light dimmed low sets the mood for meals
- Covered patio: Choose a damp- or wet-rated fan and confirm the dimming hardware is rated for outdoor use
Matching the control method to how each room is used prevents the frustration of a beautiful fan that nobody can figure out how to dim.
Getting It Right
Decide first how you want to control the light: a remote for the simplest install, a wall dimmer if you want a switch on the wall, or smart control for automation. Match every component to LED specifications, mount to a fan-rated box, and keep the motor off any dimmer. Do that, and a well-chosen dimmable ceiling fan will give you both a comfortable breeze and lighting that flexes to whatever the room is doing.