Swapping out an old dishwasher looks intimidating, but the core of the job is three connections done in the right order. Proper dishwasher fitting means getting the water supply, the drain line, and the electrical hookup all correct, then leveling the unit so it runs and drains as designed. Most homeowners can handle the plumbing side in an afternoon. The electrical connection is a separate task, and if you are not confident with wiring, hire a licensed electrician for that part.
Shut Everything Off First
Before you touch anything, turn off the water supply to the dishwasher, usually at a shut-off valve under the sink. Then cut the power at the breaker that feeds the unit, and verify it is dead. Never assume the breaker is correctly labeled; test before you trust it. Place towels under the work area, because there will be some water left in the lines and drain hose no matter how careful you are.
If you are replacing an existing machine, disconnect it only after the water and power are confirmed off. Pull it out slowly to avoid kinking the lines still attached at the back.
The Water Supply Connection
Dishwashers run on hot water, so the supply line connects to the hot-water shut-off under the sink, typically with a flexible braided supply line and a 90-degree brass elbow fitting at the dishwasher’s inlet valve. Wrap the threads of the elbow with plumber’s tape and thread it into the inlet by hand before snugging it with a wrench. Do not overtighten, which can crack the brass or strip the threads.
Use a flexible stainless braided line rather than a rigid copper one where possible, as it tolerates the slight movement of sliding the unit into place. Once connected, you will check this joint carefully during your first leak test.
The Drain Line: Air Gap or High Loop
The drain hose carries dirty water out, and how you route it matters for sanitation. There are two accepted methods, and your local code dictates which is required:
- Air gap: A small fitting mounted on the countertop or sink that physically breaks the line, preventing dirty sink water from siphoning back into the dishwasher. Many jurisdictions, especially in parts of the West, require it.
- High loop: Where an air gap is not required, the hose is looped up and secured high under the countertop before dropping down to the connection. This achieves a similar anti-siphon effect.
From there, the hose connects either to a dedicated dishwasher inlet on the garbage disposal or to a drain tailpiece on the sink. If you connect to a new disposal, knock out the plug inside the disposal inlet first, or no water will drain. Secure every hose joint with a stainless hose clamp.
The Electrical Connection
The power side is separate from the plumbing and deserves respect. Dishwashers are either hardwired to a junction box or plugged into a dedicated outlet. With the breaker confirmed off, match the wires by color: black to black, white to white, and the bare or green ground to the green screw or ground wire. A built-in dishwasher should be on its own dedicated circuit. If any of this is unfamiliar, stop and call a licensed electrician. Mistakes here cause shocks or fire, and the cost of a pro is small compared to the risk.
Leveling the Unit
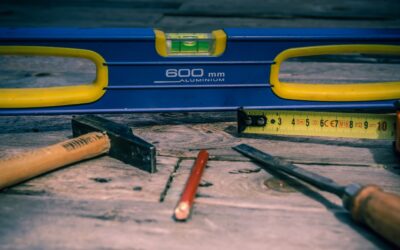
A dishwasher that is not level will not drain fully and may leak or run noisily. Slide the unit into the cabinet opening, then set a bubble level on the door frame and the bottom rack rails, checking both front-to-back and side-to-side. Adjust the four threaded leveling feet until the unit sits flat and the door closes evenly. Once level, secure the unit to the underside of the countertop or the cabinet sides with the provided brackets so it does not tip when you pull out a loaded rack.
Tools and Materials You Will Need
Gathering everything first makes the job go smoothly. A typical dishwasher fitting calls for:
- An adjustable wrench and channel-lock pliers for the supply and drain fittings
- A flexible braided stainless supply line and a 90-degree brass dishwasher elbow
- Plumber’s tape for sealing threaded connections
- Stainless hose clamps for the drain hose
- A bubble level for setting the unit flat
- A screwdriver or nut driver for the mounting brackets and wire connections
- A voltage tester to confirm the power is truly off
- Towels and a shallow pan for the inevitable trickle of water
Having the right elbow and supply line on hand prevents the frustrating mid-job trip to the hardware store.
Common Mistakes to Avoid
A few errors cause most dishwasher leaks and failures. Forgetting to knock out the disposal plug is the classic one, and it leaves the dishwasher unable to drain at all. Skipping the air gap or high loop allows dirty sink water to siphon back into the clean dishwasher. Overtightening the brass supply elbow can crack it, while undertightening invites a slow drip. Kinking the drain hose behind the unit restricts flow, and failing to level the machine leads to incomplete draining and door leaks. Run through each of these before you push the unit into place, because every one of them is far easier to fix while the dishwasher is still pulled out.
Test Before You Trust
With everything connected and the unit secured, turn the water back on and inspect the supply joint and drain connections for drips. Then restore power and run a short cycle, watching the floor and the back of the unit through the first fill and drain. Catch a leak now, while the unit is still accessible, rather than after you have pushed it fully into place.
Final Tips for a Clean Job
Keep the drain hose free of sharp kinks, double-check that the disposal plug was removed, and confirm your air gap or high loop is properly set. Good dishwasher fitting is mostly about patience and order: shut off water, make solid connections, level the unit, and test thoroughly. Handle the plumbing yourself if you are comfortable, and bring in a licensed electrician for any wiring you are unsure about.