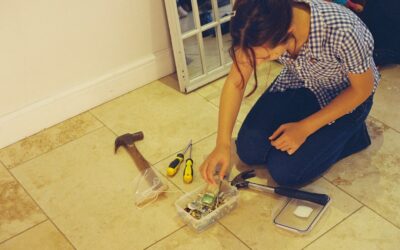
A dent in a stainless dishwasher door or a black appliance that clashes with your new white cabinets does not mean you need a new dishwasher. Dishwasher front panel replacement lets you swap the outer door skin for a new one, change the color with a reversible insert, or fit a custom wood panel that matches your cabinetry. On most models, the outer panel is held on by a handful of screws around the inner door edge, and the job takes about an hour.
There are three common routes. You can order an exact replacement outer panel for your model number, you can install a trim kit that holds a thin decorative insert, or, if you own a panel-ready dishwasher, you can mount a full custom cabinet panel. The first two are simple; the third requires careful measuring and usually an adjustment to the door springs, because a heavier front changes how the door opens and closes.
- Safety First: Disconnect Power Before Dishwasher Front Panel Replacement
- Identify Your Door Type
- How to Measure for a Replacement or Custom Panel
- Tools and Materials
- Step-by-Step Dishwasher Panel Replacement
- Rebalancing the Door Springs
- Troubleshooting Common Panel Problems
- Cost Ranges
- When to Call a Pro
- Frequently Asked Questions
Below you will find safety steps, how to identify which type of door you have, measuring guidelines, the tools you need, step-by-step instructions, and fixes for the problems people run into most often.
Safety First: Disconnect Power Before Dishwasher Front Panel Replacement
Before removing any screws, unplug the dishwasher or turn off its circuit breaker at the main panel. Many dishwashers run their control wiring through the door, and some electronic control boards are mounted directly behind the outer panel. Working with the power off prevents shocks and protects the electronics from shorting if a screwdriver slips. If your dishwasher is hardwired, turn off the breaker and confirm power is off with a non-contact voltage tester at the junction box before continuing. Also let the unit cool if it has just run, since the inner door and water can stay hot for some time.
Identify Your Door Type
Successful dishwasher front panel replacement starts with knowing what you have. Find the model number, usually printed on a label along the edge of the inner door or on the tub frame when the door is open. Look up the parts diagram for that model to see which panel style it uses.
- Standard outer panel: a stainless, black, or white metal or plastic skin screwed to the inner door. Replace it with an exact-match part.
- Trim kit style: a frame around the door holds a thin insert panel, sometimes reversible with a different color on each side. You slide out the insert and swap it.
- Panel-ready: the dishwasher is designed to accept a custom cabinet door mounted to its front, often with hidden controls on the top edge of the door.
A standard dishwasher cannot always be converted to accept a full wood panel, because the door springs and hinges are not designed for the extra weight. A dishwasher door panel trim kit made for your model is usually the best way to change the look of a standard unit without overloading it.
How to Measure for a Replacement or Custom Panel
For an Exact-Match Replacement
Your model number is the most important measurement. Replacement outer panels are model-specific because hole locations, handle mounts, and control cutouts vary. Order by the part number from the parts diagram.
For a Trim Kit Insert
Measure the width and height of the opening inside the trim frame, plus the thickness the channel accepts, often 1/4 inch or less. Cut your insert slightly undersized, about 1/16 inch, so it slides in without binding.
For a Panel-Ready Custom Front
Check the installation guide for the maximum panel weight, the required dimensions, and the thickness range. Typical guidelines include:
- Width matching the adjacent cabinet doors, commonly just under the 24-inch dishwasher opening.
- Height that aligns the top of the panel with neighboring drawer fronts and leaves toe-kick clearance at the bottom.
- A maximum weight specified by the manufacturer. Heavier panels require door spring adjustment or heavier springs.
- Clearance for the top-edge controls and for the door to swing open without hitting adjacent cabinet handles.
Many manufacturers supply a paper template showing exact mounting hole locations. Use it.
Tools and Materials
- Phillips and Torx screwdrivers (T15 and T20 are common)
- Nut driver set
- Replacement outer panel, trim kit insert, or custom cabinet panel
- Mounting brackets and screws supplied with the panel or kit
- Drill with a stop collar for pilot holes in custom panels
- Tape measure, level, and painter’s tape
- Soft towel or moving blanket to protect the door and floor
- Door spring kit or replacement springs if the manufacturer calls for them
- Work gloves (panel edges can be sharp)
Step-by-Step Dishwasher Panel Replacement
Replacing a Standard Outer Door Panel
- Cut power. Unplug the unit or switch off the breaker as described above.
- Open the door fully. Lay a towel on the floor under the door to protect it and catch dropped screws.
- Remove the screws. Locate the screws around the perimeter of the inner door liner. Remove only the screws that hold the outer panel, not those holding the inner liner or door latch. The parts diagram will show which ones.
- Detach the control panel if needed. On many models the control console at the top of the door must come off first. Note or photograph wire connections before unplugging them.
- Separate the panel. Close the door partially and lift the outer panel off, tilting the top away from the door. Watch for the insulation blanket behind it; keep it in place.
- Transfer parts. Move the handle, badges, and any control components to the new panel if they are not already installed.
- Install the new panel. Hang the new skin in the same position, reconnect any wiring, reinstall the controls, and drive the screws snugly without overtightening.
- Test. Restore power and run a short cycle while checking for proper latching.
Mounting a Custom Panel on a Panel-Ready Unit
- Tape the template to the back of the custom panel, aligned to the measurements in the installation guide.
- Drill pilot holes using a stop collar so you do not go through the face of the panel.
- Attach mounting brackets or clips to the panel.
- Hang the panel on the dishwasher door, level it, and secure it with the supplied screws from inside the door.
- Install the handle or hardware to match neighboring cabinets.
- Check the gaps around adjacent cabinets and adjust side-to-side as needed.
Rebalancing the Door Springs
After adding weight, open the door about halfway and let go. A balanced door should stay put or drift slowly. If it drops open, the springs need more tension. If it springs shut, there is too much tension.
- With the power off, remove the toe-kick panel below the door to access the springs on each side.
- Locate the spring anchor, often a hook that can move between several holes or a threaded adjuster.
- Move each spring to a higher-tension position, adjusting both sides equally. Adjust one step at a time and test.
- If the springs are at maximum tension and the door still drops, install the heavier springs recommended for panel-ready use.
- Reinstall the toe-kick and verify the door opens smoothly and closes fully.
Springs are under tension, so wear gloves and eye protection, and keep fingers clear of hinge pivots.
Troubleshooting Common Panel Problems
- Door slams open: springs are too weak for the new panel weight. Increase tension or install heavier springs.
- Door will not latch: the panel is misaligned, a screw is interfering with the latch, or the panel hits the countertop. Loosen and reposition.
- Error code after reassembly: a control wire connector is loose. Turn off the power, reopen, and reseat each plug firmly.
- Custom panel rubs neighboring cabinets: reduce panel width slightly or adjust the mounting bracket position.
- Loud rattling during wash: a screw is loose or the insulation blanket shifted. Reopen and secure.
- Trim kit insert buckles: the insert is too large. Trim it down about 1/16 inch.
Cost Ranges
Dishwasher front panel replacement costs vary widely by approach. An exact-match replacement outer panel is usually one of the pricier individual dishwasher parts, but it still costs far less than a new machine. Trim kits and decorative inserts are typically moderately priced. A custom cabinet-matched panel from a cabinet shop varies depending on species and finish. Hiring an appliance technician adds a service call and labor charge. If your dishwasher is old and the panel costs a large fraction of a new unit, replacing the entire appliance can make more sense.
When to Call a Pro
Most dishwasher front panel replacement jobs are straightforward DIY. Call an appliance repair technician if the door wiring harness is damaged, the control board needs replacement, the hinges are bent, or you cannot find the correct springs. Hire a cabinetmaker for custom panels that must match intricate cabinet profiles or finishes. If your dishwasher is hardwired and you are not comfortable working near the junction box, have an electrician or technician handle any electrical disconnection. If you notice water leaking from the door or under the unit, call a pro to inspect the door gasket and tub before simply swapping the panel.
Frequently Asked Questions
Can you replace just the front panel of a dishwasher?
Yes. On most models, the outer door panel is a separate part that can be replaced by removing screws around the inner door. Order the part using your model number to get the right fit.
How much does dishwasher panel replacement cost?
Costs depend on your model and approach. A trim kit insert is the least expensive option, an exact-match outer panel costs more, and a custom cabinet panel varies with materials. Professional installation adds labor charges.
Can I put a wood panel on a regular dishwasher?
Only if the manufacturer offers a trim kit or approves it. Standard dishwashers usually have springs sized for the original panel, and adding a heavy wood front can make the door drop open or damage the hinges.
Why does my dishwasher door fall open after installing a new panel?
The added weight exceeds the door spring tension. Adjust the springs to a higher setting or install heavier springs designed for panel-ready models.
Do I need to disconnect power to replace the dishwasher door panel?
Yes. Unplug the unit or turn off the breaker, since control wiring and electronics often sit behind or near the outer panel.