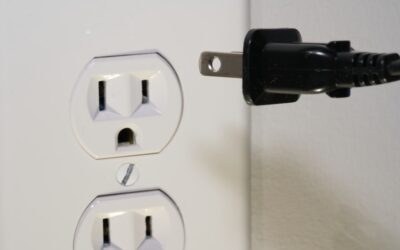
Dishwashers ship without a power connection of any kind — no cord, no pigtail, no hardwire whip. That is because the NEC allows either installation method, and manufacturers leave the choice to the installer. A correctly specified dishwasher power cord meets UL 62, carries the right amperage, and uses an approved strain relief to enter the junction box. This guide covers when to use a cord versus hardwire, the exact parts to buy, the installation sequence, and the code compliance points that pass inspection on the first try.
Cord Versus Hardwire Decision
Both methods are code-compliant per NEC 422.16. Cord-and-plug connection wins in most remodels because it lets you pull the dishwasher for service without calling an electrician. Hardwiring wins in tight cabinetry or when no receptacle exists within reach and the homeowner prefers not to add one.
Local codes sometimes mandate one or the other. California Title 24 requires plug connection in new construction for service access. Some older Chicago municipal amendments require hardwire in conduit. Check before buying — a $25 cord wasted is better than a failed inspection.
Cord Specifications
A dishwasher power cord must meet specific UL and NEC requirements to be legal.
- Cord type: SJTOW or SPT-3 with 3 conductors (hot, neutral, ground)
- Wire gauge: 14 AWG minimum for 15A circuits, 12 AWG for 20A
- Length: 3 to 6 ft — NEC 400.7(A)(8) caps flexible cord length at 6 ft
- Plug: NEMA 5-15P (15A) or 5-20P (20A) based on circuit breaker
- Amperage rating: 13 to 15A covers virtually all residential dishwashers
Smart Choice, Frigidaire, and Certified Appliance all make UL-listed 4 ft cord kits for $18 to $28. The kit includes the cord, strain relief, and wire nuts — the full set of parts you need.
Circuit and Outlet Requirements
Dishwasher circuits should be dedicated 15A or 20A with GFCI protection per the 2020 NEC. A shared circuit with a garbage disposal works if the combined nameplate draw stays below 80 percent of the breaker rating. Most dishwashers pull 6 to 10 amps during heated wash and dry cycles, plus 120V solenoid and motor loads.
The receptacle lives in the adjacent cabinet (usually under the sink) because NEC 400.10 forbids cord connection through the dishwasher’s own compartment wall. A 2 to 3 inch hole saw through the cabinet divider passes the cord cleanly; a plastic grommet from the hardware store protects the cord jacket from the sharp cut edge.
Installing the Cord Step by Step
Work from a fully disconnected circuit verified with a non-contact voltage tester. Gather a #2 Phillips, wire strippers, and the UL-listed cord kit.
- Shut off the dishwasher breaker and verify dead
- Remove the toe kick at the front of the dishwasher to access the junction box
- Open the junction box cover — two screws, usually front-center behind the kick
- Install the cord’s strain relief through the knockout hole on the box
- Feed 6 inches of cord through the strain relief into the box
- Strip 1/2 inch of insulation from each conductor
- Match colors: black to black, white to white, green to green or bare copper
- Twist conductors together and cap with listed wire nuts (orange for 18-14 AWG pairs)
- Tuck connections into the box and reinstall the cover
- Tighten the strain relief until the jacket, not the wires, bears pullout force
- Plug into the outlet and restore power
Hardwire Installation Alternative
Hardwire skips the plug and connects the supply cable directly to the dishwasher junction box. Requirements differ slightly from cord installation.
Use 12/2 or 14/2 NM-B Romex from a dedicated breaker to the dishwasher location. Land the cable in a 4-inch square box behind the dishwasher with a blank cover, or pass the cable directly into the dishwasher junction box through a listed NM clamp. Ground the metal case at the grounding lug or green pigtail. A flexible 12-inch whip (MC cable or liquid-tight flex) between the wall box and the dishwasher junction box allows movement for service without risk to the solid Romex run.
Common Mistakes That Fail Inspection
Three errors account for most red-tagged installs. Using a standard lamp cord or extension cord instead of SJTOW/SPT-3 rated cable fails UL listing. Routing the cord through the dishwasher’s drain or water supply compartment violates NEC 422.16(B)(2). Forgetting to install a strain relief means the cord pulls free of the terminals under vibration within 6 to 18 months.
A fourth common error: connecting a 20A circuit to a 15A cord. The cord is the weakest link and will overheat before the breaker trips. Match cord amperage to breaker amperage or step up the cord to match the circuit.
GFCI Protection Rules
The 2020 NEC 210.8(D) added GFCI requirements for dishwashers regardless of location. The protection can be at the breaker (GFCI breaker, $45) or at the receptacle (GFCI outlet, $18). Hardwired installations typically use a GFCI breaker since there is no outlet to swap.
Older homes under pre-2020 code editions are not required to retrofit GFCI unless the circuit is replaced or the receptacle is changed. However, any trouble call that leads to an outlet swap triggers current-code compliance, so budget for GFCI the next time a service call happens anyway.
Troubleshooting a Dead Dishwasher
When a dishwasher refuses to power up, work this checklist in order.
- Check the breaker — most common cause, especially after a kitchen appliance trip
- Test the GFCI reset button on the outlet or breaker
- Verify the under-sink switch (if equipped) is on
- Test the outlet with a plug-in tester ($6) to confirm line voltage and correct wiring
- Inspect the cord for visible damage or loose strain relief
- Pull the kick plate and check terminal connections for looseness or arcing
If the circuit is live at the junction box but the dishwasher control board stays dark, the problem is internal and calls for an appliance technician. For everything upstream of the control board — circuit, cord, and connections — a methodical DIYer handles the repair in under an hour with basic tools and the right UL-listed parts from the start.