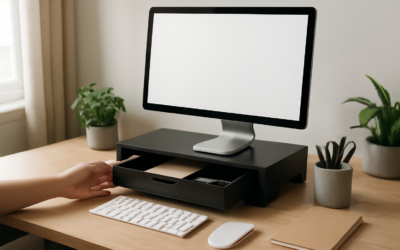
Store-bought sit-stand risers run $150 to $400, which is a lot to pay for what is essentially a raised shelf for your keyboard and monitor. A DIY standing desk converter sits on top of your existing desk and lifts your screen and keyboard to standing height, and you can build a solid one for $20 to $50 in an afternoon. Whether you want a quick cabinet-shelf hack or a proper adjustable build, this guide covers the materials, the all-important ergonomic measurements, and several designs to match your skill level and budget.
Why Build Your Own Converter
A converter is the smartest entry point to standing-desk benefits because it works with the desk you already own, no need to replace it. Alternating between sitting and standing throughout the day eases back strain, improves circulation, and keeps energy up during long work sessions.
Building it yourself saves serious money and lets you size everything to your exact body and equipment. Commercial risers come in fixed configurations; a DIY version can be tailored so your monitor and keyboard land at precisely the right heights for your frame.
Getting the Ergonomics Right
Before cutting any wood, nail down your measurements, because comfort and joint health depend on them. The two critical heights are for your keyboard and your monitor.
- Keyboard height: Your elbows should bend at roughly 90 degrees with forearms parallel to the floor when standing. For most people this is 38 to 45 inches off the ground.
- Monitor height: The top of the screen should sit at or just below eye level, about 15 to 30 inches from your eyes, so you look slightly downward.
Measure yourself in stocking feet at your normal standing posture. The keyboard surface determines the height of your converter’s main shelf, and a separate raised shelf or monitor stand lifts the screen above it.
The Simplest Build: Cabinet Shelf or Crate
The fastest no-tools option uses items you may already have. A sturdy wall-cabinet shelf, a wooden crate, or a set of stacked storage cubes placed on your desk can raise your laptop to standing height in seconds. IKEA’s well-known hack combines a LACK side table set over the desk with a couple of shelf brackets for the keyboard.
This approach costs $10 to $30 and is perfect for testing whether you even like standing to work before investing more effort. The downside is it is fixed-height and a bit improvised-looking, but it proves the concept fast.
A Proper Two-Tier Wooden Riser
For a clean, permanent converter, build a two-tier riser from plywood or pine boards. The lower, wider tier holds your keyboard and mouse; the upper, narrower tier lifts the monitor.
- Cut a base shelf about 28 inches wide by 16 inches deep for the keyboard.
- Cut two side supports to your calculated keyboard height (the desk-to-keyboard gap), typically 5 to 12 inches.
- Assemble the keyboard shelf on its supports with wood screws and glue.
- Build a smaller raised platform on top, 6 to 10 inches higher, for the monitor.
- Sand the edges, then finish with paint or a wipe of polyurethane.
Use 3/4-inch plywood for rigidity and add corner brackets for stability. Total material cost lands around $30 to $50, and the result looks intentional rather than improvised.
Adding Adjustability
The one feature commercial risers have that a basic build lacks is the ability to drop back down to sitting height. You can add that several ways without buying a full mechanism.
Gas-spring monitor arms or a pneumatic laptop stand let the screen move independently. For the keyboard tier, some builders use heavy-duty drawer slides or simply make the riser light enough to lift on and off the desk in one motion, stowing it on a nearby shelf when you want to sit. A removable two-piece design is the cheapest path to true sit-stand flexibility.
Tools, Materials, and Cost Breakdown
A basic build needs only a saw, a drill, screws, wood glue, and sandpaper. Here is a typical shopping list and cost:
- 3/4-inch plywood or pine boards: $20 to $35
- Wood screws and corner brackets: $5 to $10
- Wood glue and sandpaper: $5
- Optional paint or polyurethane finish: $8 to $15
- Optional monitor arm for adjustability: $25 to $60
Even with the upgrades, you stay well under the price of a comparable store-bought unit while getting a converter sized exactly to you.
Cable Management and Stability
Two practical issues separate a converter you love from one you abandon: wobble and wire chaos. Because the converter raises your gear well above the desk, any flex in the structure gets amplified, and a monitor that jiggles every time you type is maddening. Build with rigid 3/4-inch plywood rather than thin particleboard, glue every joint in addition to screwing it, and add a back panel or diagonal brace to triangulate the frame against side-to-side sway. If the unit still rocks, adhesive rubber feet on the bottom grip the desk and kill the last bit of movement.
Cable management keeps the setup from looking like a tangle. Drill a 1.5-inch grommet hole at the back of the keyboard shelf to route the monitor, keyboard, and power cables down to the desk in one bundle. Adhesive cable clips along the rear leg and a small basket or Velcro strap underneath corral the slack. Leave enough cable length for the height change if you build a removable or adjustable design, so lifting the converter does not yank a plug loose. A few dollars in clips and a grommet turn a functional build into one that looks clean on a video call.
Final Tips for a Comfortable Setup
A standing desk converter is only half the equation. Add an anti-fatigue mat, a $20 to $40 cushioned pad, so standing for an hour or two feels good rather than punishing on your feet and knees. Start by alternating every 30 to 60 minutes rather than standing all day at first.
Double-check your final heights once everything is in place; a converter an inch too high or low forces your wrists or neck into strain over time. Build it to your measurements, ease into the routine, and your DIY converter will deliver the health benefits of a sit-stand setup for a fraction of the retail price.