Removing old, cracked, or stained grout by hand is slow, knuckle-scraping work, which is why the Dremel grout removal tool has become the DIYer’s secret weapon for regrouting tile. Using a rotary tool fitted with the right grout-removal attachment, you can grind out old grout in a fraction of the time a manual grout saw takes, with far less effort and more control. But the tool spins fast, and a careless touch chips tile edges, so technique matters. This guide covers the attachments, bit sizes, proper technique, and the tips that keep your tile intact.
Part of our Tile & Grout guide — explore the full guide →
Why Use a Dremel for Grout Removal
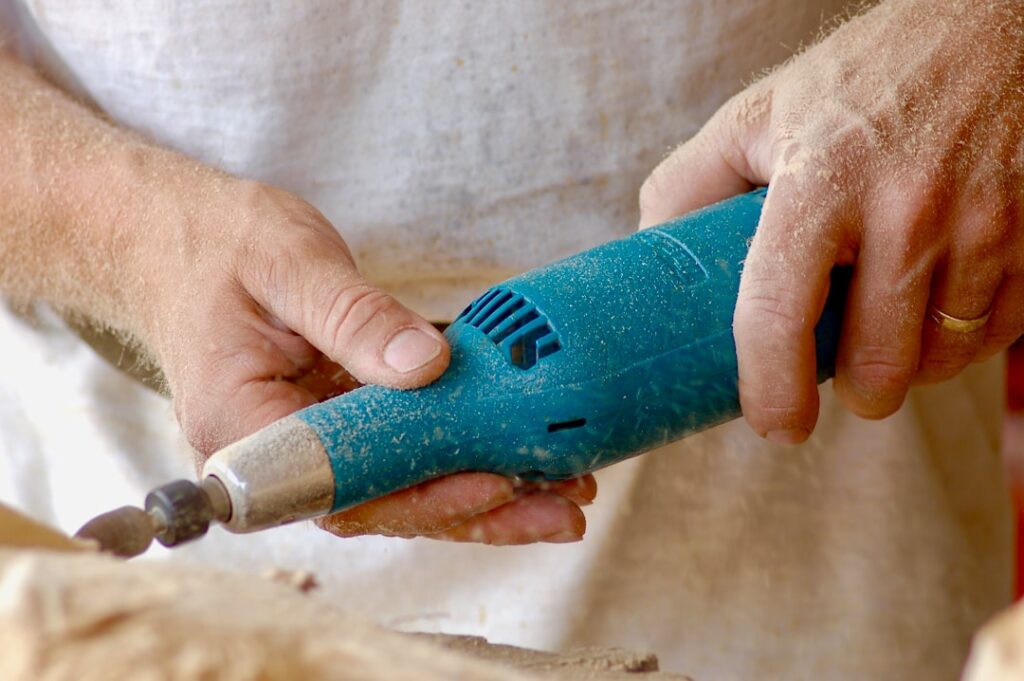
Grout eventually fails. It cracks, crumbles, stains beyond cleaning, or grows stubborn mildew that no scrubbing removes, and the fix is to grind out the old grout and lay fresh. Doing this with a manual carbide grout saw works but is exhausting and slow, especially over a large area. A Dremel rotary tool spins a small cutting bit at high speed, chewing through hardened grout quickly while letting you steer precisely along the grout line.
The speed and control are the appeal. A job that would take hours by hand shrinks to a manageable session, and the compact tool reaches tight corners and narrow joints that bulkier oscillating tools struggle with. For bathroom and kitchen regrouting projects, a Dremel grout removal tool hits the sweet spot of speed, precision, and affordability.
The Attachments You Need
Dremel makes a dedicated grout removal system, and understanding the parts is key:
- Grout removal attachment (guide): A collar that mounts on the front of the rotary tool with an adjustable depth stop and a guide that helps keep the bit centered in the joint and at a consistent depth.
- Grout removal bits: Specialized carbide or diamond-coated cutting bits sized to fit common grout-line widths.
- Multi-purpose bits: Standard cutting bits that also work for grout in a pinch, though the dedicated bits last longer and cut cleaner.
The guide attachment is what makes the difference between a clean job and chipped tile. It steadies the tool, controls the depth so you do not gouge the substrate, and keeps the bit riding down the center of the grout line rather than wandering into the tile edges.
Choosing the Right Bit Size
Matching the bit diameter to your grout line width is the single most important buying decision. Dremel grout removal bits come in common sizes such as 1/16 inch and 1/8 inch. Choose a bit slightly narrower than your grout joint so it removes grout without grinding against the tile edges on either side.
Using a bit that is too wide guarantees you will nick the tile, while one that is too narrow leaves grout behind and forces multiple passes. Measure your grout lines first. Narrow joints under about 1/8 inch call for the smaller 1/16 inch bit, while wider joints accept the 1/8 inch bit. Diamond-coated bits cost more but last considerably longer than plain carbide, which is worth it for a large job.
Step-by-Step Technique
Good technique protects your tile and gives clean joints ready for new grout. Follow this sequence:
- Fit the grout removal attachment and bit, and set the depth stop so the bit removes grout without hitting the substrate beneath the tile.
- Put on safety glasses and a dust mask, since grout removal throws sharp debris and fine silica dust.
- Start the tool at a moderate speed and let it reach full spin before touching the grout.
- Guide the bit slowly down the center of the grout line, letting the tool do the cutting rather than forcing it.
- Make multiple shallow passes rather than one deep aggressive cut, which reduces chipping and gives more control.
- Work along horizontal lines first, then vertical, vacuuming dust periodically to see your progress.
- Finish corners and stubborn spots by hand with a small grout saw to avoid over-grinding.
Patience is everything. Rushing and pressing hard is what cracks tile. Let the high speed of the bit remove the grout while you concentrate on steering straight down the joint.
Avoiding Chipped Tile
The biggest risk with any grout removal tool is damaging the surrounding tile, and a few habits prevent it. Always keep the bit centered in the grout line and never let it lean into a tile edge. Use the guide attachment rather than freehanding, and take light, repeated passes instead of gouging. Slow your feed rate near delicate or decorative tiles.
Glazed ceramic and porcelain tiles chip if the spinning bit catches their edge, and glass and natural stone are even more vulnerable. Where a joint meets a fragile tile or an inside corner, switch to a manual carbide grout saw for the final cleanup. The Dremel handles the bulk of the removal fast, and a few careful hand strokes finish the edges safely.
Finishing the Job
Once the old grout is removed to a consistent depth, vacuum out all the dust and debris from the joints, then wipe the tile clean. The joints must be clean and free of loose grout before new grout goes in, or the fresh grout will not bond properly. Let the surface dry, then apply new grout, tooling it into the clean joints and wiping the excess.
For occasional home regrouting projects, a Dremel grout removal tool pays for itself the first time you use it, turning a dreaded, hours-long chore into a quick, controlled job.
Managing Dust and Safety
Grinding out old grout generates a surprising amount of fine, gritty dust, and much of it contains crystalline silica from the cement, which is harmful to breathe over time. Treat dust control as part of the job, not an afterthought. Always wear a properly rated dust mask or respirator and wrap-around safety glasses, since the bit throws sharp fragments as it cuts. In a bathroom, close the door to the rest of the house, run the exhaust fan, and consider hanging plastic sheeting to contain the mess. Having a shop vacuum running near the work, or a helper holding the hose, captures much of the dust at the source and lets you see the grout line clearly as you go.
Protect the surrounding area too. Cover the tub, sink, and any fixtures, because grout dust is abrasive and can scratch surfaces if it settles and gets wiped around. Take breaks to clear the dust and check your depth, and keep the tool’s cord or battery clear of your cutting path so you never lose control mid-cut.
When a Dremel Is and Is Not the Right Tool
A rotary tool like a Dremel excels at detailed, precise grout removal in bathrooms, backsplashes, and small-to-medium floor areas where control matters most. For very large floors, however, the small bits and the tool’s size make the job slow, and an oscillating multi-tool with a grout blade or a dedicated grout removal machine may be faster over big areas. The Dremel’s advantage is precision and reach into tight corners and narrow joints, so it remains the best choice for the fiddly, careful work where protecting delicate tile edges is the priority. Pair it with the right bit size, the depth-guide attachment, and patient technique, and you will pull out old grout cleanly without harming a single tile.
Prefer to explore on your own?
See how new flooring looks in your actual room in seconds — free, no signup.
Try the free Floor Studio →