Water stains on the fascia board right behind a perfectly clean gutter are one of the most common complaints gutter installers hear, and the culprit is almost always a missing or badly placed metal flashing strip at the roof edge. A properly installed drip edge for gutters bridges the small gap between the shingles and the back of the gutter so rain can’t cling to the underside of the roof deck and run down behind the trough. Without it, water follows surface tension around the edge of the sheathing, soaks the fascia, and eventually rots the wood that holds your gutters up.
Part of our Roofing guide — explore the full guide →
The short answer to where it goes: along the eaves, the metal edge sits on top of the roof deck and under the underlayment, and its lower flange should extend into the gutter rather than stopping short of it. If your roof already has shingles, you can slide a gutter apron (a longer, bent flashing profile) under the first course and let it lap over the back edge of the gutter. Both approaches send water into the trough instead of behind it.
- How Drip Edge for Gutters Works at the Roof Edge
- Drip Edge vs Gutter Apron: Which One You Need
- Over or Under the Underlayment: Getting the Layering Right
- Tools and Materials
- How to Retrofit Gutter Apron Under Existing Shingles
- Troubleshooting Common Drip Edge Problems
- Typical Cost Ranges
- Ladder Safety and When to Call a Pro
- Frequently Asked Questions
Retrofitting is realistic DIY work on a single-story eave with asphalt shingles. Steep pitches, brittle old shingles, and second-story rooflines are a different story, and those situations are covered in the safety section.
How Drip Edge for Gutters Works at the Roof Edge
Roof sheathing typically stops at or slightly beyond the face of the fascia. Rain running down the shingles reaches that edge and, instead of dropping straight down, tends to curl back under because of surface tension. The drip edge solves this with a small outward kick at the bottom of the flange that forces water to break away from the building. When a gutter hangs below, the same flange needs to direct that water into the trough.
There are three common profiles you’ll see at a supply house:
- Type C (L-style): a simple 90-degree angle. Inexpensive and common on older homes, but it offers the least projection past the fascia.
- Type D (T-style or D-style): has a small outward hem at the bottom that throws water away from the fascia. Many building codes and shingle manufacturers now expect this profile at eaves.
- Gutter apron (Type F): features a longer, angled lower flange designed to reach into the gutter. It is the go-to choice for retrofits and for gutters mounted slightly low on the fascia.
When choosing drip edge for gutters on most homes, a wide-flange drip edge or gutter apron is the better match because it closes the gap even when gutter hangers set the trough an inch or so below the roof plane.
Drip Edge vs Gutter Apron: Which One You Need
People use the terms interchangeably, but the parts do slightly different jobs. Drip edge is a roofing component installed during a reroof, often on both eaves and rakes. Gutter apron is specifically an eave flashing that reaches down and into the gutter. On a new roof, a quality Type D drip edge with a long enough lower leg can do both jobs. On an existing roof with gutters already hung, the apron is usually easier to install because it slips under the shingles without disturbing the fascia.
Ask yourself these questions:
- Is there any metal at the eave now? Lift the first shingle gently with a putty knife on a cool morning. If you see bare wood sheathing edge, you have no flashing.
- How far below the roof deck is the back of your gutter? If the gap is more than about 1/2 inch, choose a gutter apron with a longer flange.
- Is the roof being replaced soon? If so, wait and have the roofer install drip edge properly under the underlayment during the reroof.
Over or Under the Underlayment: Getting the Layering Right
Layering is where most confusion comes from, and the order changes between eaves and rakes. Along the eaves, where gutters hang, the drip edge goes directly on the roof deck, and the underlayment (felt or synthetic) laps over it. That way any water running down the underlayment lands on top of the metal and drains off into the gutter. If you put the underlayment under the drip edge at the eave, water that gets beneath the shingles can run under the metal and straight onto the fascia.
On the rakes (the sloped side edges), the order flips: underlayment first, then drip edge on top. That keeps wind-driven rain from sneaking under the rake flashing. Ice and water shield, where used in cold climates, typically goes over the eave drip edge as well, sealing around the nails.
For gutter apron retrofits, you can’t easily lift the underlayment without damage, so the apron is slipped under the first course of shingles and on top of the existing underlayment. That’s an accepted compromise, as long as the upper flange reaches far enough under the shingles to stay covered and the lower flange lands inside the gutter.
Tools and Materials
- Aluminum drip edge or gutter apron in 10-foot lengths, color-matched to your trim (aluminum is light, corrosion-resistant, and easy to cut)
- Roofing nails, 1 1/4-inch galvanized or aluminum, matched to the flashing metal to avoid galvanic corrosion
- Flat pry bar or shingle ripper, plus a stiff putty knife
- Aviation tin snips (left and right cut)
- Roofing sealant compatible with asphalt shingles
- Hammer, tape measure, chalk line, and a hand seamer or pliers for bending tabs
- Extension ladder with a standoff, work gloves, and safety glasses
How to Retrofit Gutter Apron Under Existing Shingles
1. Pick the Right Weather
Work on a mild day, ideally 50 to 80°F. Cold shingles crack when lifted; very hot shingles tear and smear. Early morning on a warm day is a good compromise.
2. Break the Seal Strip
Slide a flat bar or putty knife under the starter course and first row of shingles to break the adhesive strip. Go slowly along the whole run. You only need to lift the edge a few inches.
3. Remove or Loosen Nails as Needed
Nails near the bottom edge can block the apron. Pull them with a shingle ripper, or simply notch the apron’s upper flange around them if they sit high enough.
4. Cut and Fit the First Piece
Start at one end of the run. Cut the end of the apron cleanly and, at the corner, fold or notch it so it wraps neatly. Slide the upper flange under the shingles and underlayment edge until the lower flange rests inside the gutter, against or just past the back wall of the trough.
5. Overlap Joints by 2 to 3 Inches
Each new length laps over the previous one by 2 to 3 inches. Lap in the direction that sheds water toward the downspout outlet where practical.
6. Fasten High
Nail through the upper flange every 12 to 16 inches, keeping nails high enough that the shingle above covers them completely. Never nail into the lower flange or the gutter.
7. Reseal the Shingles
Press the shingles back down and apply dabs of roofing sealant under the tabs you disturbed. Warm sunlight will help reactivate the original strips over the next few days.
8. Test With a Hose
Run water down the roof slowly and watch from below. Water should drain off the flange into the gutter without dripping behind it.
Troubleshooting Common Drip Edge Problems
Water still runs behind the gutter. The lower flange probably ends short of the trough. Check whether the gutter was hung too low; raising it on new hangers, or switching to a longer apron, usually fixes the problem.
Gutter overflows at the front. That’s a gutter capacity or pitch issue, not a drip edge issue. Clean the trough and check for about 1/4 inch of slope per 10 feet toward the outlet.
Flashing is bowed or wavy. Overdriven nails or thermal movement cause waviness. Use fewer, correctly placed nails and leave a small gap at long runs.
Rust streaks on aluminum gutters. Steel nails or mixed metals are corroding. Replace with aluminum or stainless fasteners.
Ice dams push water back under shingles. Drip edge alone won’t stop ice dams. You need ice and water shield plus adequate attic insulation and ventilation.
Typical Cost Ranges
Material cost for drip edge for gutters is modest. Aluminum drip edge and gutter apron generally run a few dollars per 10-foot length at home centers, with painted or heavier-gauge stock costing somewhat more. A typical single-story home with 120 to 160 linear feet of eave needs a few dozen dollars to a little over a hundred dollars in flashing and fasteners.
Hiring a roofer or gutter contractor to retrofit apron usually costs a few dollars per linear foot installed, often bundled with a gutter cleaning or rehang. Fascia repair from years of missing flashing can add significantly more if boards have to be replaced. Installing drip edge as part of a full roof replacement adds very little to the overall roof price.
Ladder Safety and When to Call a Pro
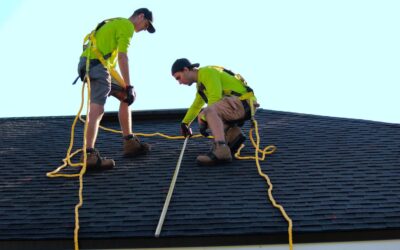
Most drip edge work happens at the top of a ladder, leaning over the gutter, which is exactly where falls happen. Set your extension ladder at roughly a 4-to-1 angle (1 foot out for every 4 feet of height), use a standoff so the ladder doesn’t rest on the gutter, and extend it at least 3 feet above the roof edge if you’ll step off. Keep three points of contact, avoid overreaching, and move the ladder instead of stretching sideways. Never work on a wet or frosty roof, and have a helper foot the ladder.
Call a roofing or gutter professional if:
- The eave is two or more stories up, or the roof is steeper than a walkable pitch
- Shingles are brittle, curling, or near the end of their life
- The fascia is soft, rotted, or pulling away from rafter tails
- You have wood, tile, or metal roofing rather than standard asphalt shingles
- Your HOA or local building department requires permits for roofing work
A pro can also tell you whether a reroof is close enough that retrofitting doesn’t make sense. Protecting the fascia with the right drip edge for gutters is inexpensive insurance, so it’s worth doing right the first time.
Frequently Asked Questions
Should drip edge go inside the gutter?
Yes. At the eaves, the lower flange of the drip edge or gutter apron should extend into the gutter or overhang its back edge so water drains into the trough instead of behind it.
Is drip edge required on roofs with gutters?
Many current building codes and most shingle manufacturers call for drip edge at eaves and rakes regardless of gutters. Check with your local building department for requirements in your area.
Can I install gutter apron without removing shingles?
Usually, yes. Break the seal on the first course, slide the apron under, nail it high, and reseal the tabs. Brittle shingles may need replacement.
What is the difference between drip edge and gutter apron?
Drip edge is general roof-edge flashing for eaves and rakes. Gutter apron has a longer angled flange designed specifically to reach into a gutter along the eave.
Does the drip edge go over or under the underlayment?
At the eaves it goes under the underlayment, directly on the deck. On the rakes it goes over the underlayment.