Most homeowners find out about egress rules the hard way, when an inspector red-tags a finished basement bedroom over a window that is two inches too short. The egress window size requirement is not a suggestion or a local quirk. It comes straight from the International Residential Code (IRC), it is enforced in nearly every jurisdiction in the country, and it exists for one blunt reason: a firefighter in full gear has to be able to climb through that opening, and a sleeping occupant has to be able to get out. I have measured hundreds of these openings, and the failures almost always trace back to one of four numbers people either forget or fudge. Let me walk you through all of them.
Part of our Windows & Doors guide — explore the full guide →
- The Four Numbers That Define a Legal Egress Opening
- Why 20 by 24 Does Not Equal 5.7
- Net Clear Opening vs. Nominal Window Size
- The 44-Inch Sill Rule and Why It Matters
- Basement Egress: Wells and Ladders Add Rules
- Matching Real Windows to the Egress Window Size
- Where People Get Burned at Inspection
- Rough Opening and Budget Reality
The Four Numbers That Define a Legal Egress Opening
An egress window has to satisfy four separate minimums at the same time. Hitting three out of four does not pass. Here is the full IRC R310 set:
- Minimum net clear opening: 5.7 square feet. This is the actual hole you can crawl through with the sash fully open, not the size of the glass or the frame.
- Minimum opening height: 24 inches. Measured vertically through the clear opening.
- Minimum opening width: 20 inches. Measured horizontally through the clear opening.
- Maximum sill height: 44 inches above the finished floor, measured to the bottom of the clear opening.
Grade-floor and above-grade sleeping rooms get a small break: the minimum drops to 5.0 square feet for openings at or below grade level only in specific code editions, but for anything you would call a basement bedroom, plan on the full 5.7. When in doubt, build to 5.7 and you are covered everywhere.
Why 20 by 24 Does Not Equal 5.7
Here is the trap that catches more DIYers than any other. Multiply the two minimum dimensions, 20 inches by 24 inches, and you get 480 square inches, which is only 3.33 square feet. That is nowhere near 5.7 square feet, which works out to 820.8 square inches. The code sets floor values for height and width independently, then sets a larger area requirement on top of them. So a window that is exactly 20 inches wide has to be much taller than 24 inches to make area, and a window that is exactly 24 inches tall has to be much wider than 20 inches.
To clear 5.7 square feet with a 20-inch width, you need roughly 41 inches of open height. With a 24-inch height, you need about 34 inches of open width. Real windows almost never hit the minimums on both axes, so the area number is usually the binding constraint. Size your rough opening to the area first, then confirm the two dimensional minimums fall in line.
Net Clear Opening vs. Nominal Window Size
The single biggest mistake I see is a homeowner ordering a window by its call size, say a 3-0 by 4-0, and assuming the opening is three feet by four feet. It is not. Net clear opening is what remains after the sash, frame, screen track, and any operating hardware eat into the space. On a double-hung window, only the bottom sash opens, so your clear height is roughly half the glass height minus the meeting rail. That is why a standard double-hung often has to be quite large on paper to yield a legal egress opening.
Casement windows are the efficiency champions here. Because the entire sash swings out of the way on a crank, a casement delivers nearly its full frame dimension as clear opening. A casement with a 20-inch wide sash and about 42 inches of height can make egress in a much smaller wall footprint than a double-hung ever could. If your wall space is tight, a casement is almost always the smart call.
The 44-Inch Sill Rule and Why It Matters
The bottom of the clear opening cannot sit more than 44 inches above the finished floor. The logic is simple: a child or a groggy adult has to be able to reach and climb through it in the dark. Anything higher and the code assumes people cannot get up and out fast enough.
In a basement, this rule interacts with your ceiling height and your window well depth. If you set the window high in the wall to keep it above grade, you can blow past 44 inches without realizing it. The fix is usually a permanent step or a built-in bench below the window, but inspectors want a fixed, non-removable surface, not a stack of storage bins. Plan the sill height on paper before you cut a single stud, because raising or lowering a basement egress opening after the fact means re-cutting concrete.
Basement Egress: Wells and Ladders Add Rules
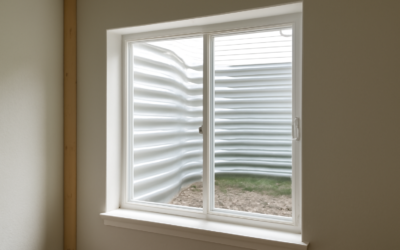
When the window sits below grade, the code piles on additional requirements for the window well outside it. The well has to give you a horizontal projection of at least 36 inches and a net area of at least 9 square feet, so a person can fully open the window and climb out without the well pinching them.
If the well is deeper than 44 inches, it needs a permanently attached ladder or step system. That ladder can project up to 6 inches into the well and must have rungs at least 12 inches wide, spaced no more than 18 inches apart vertically. Bolt-on steel or aluminum egress ladders run about $60 to $150. Do not skip this on a deep well; it is a common failure point at final inspection.
Matching Real Windows to the Egress Window Size
Once you know the target opening, matching product is straightforward. Here is how the common window types shake out for meeting the egress window size minimums:
- Casement: best clear-opening efficiency. A unit around 2-0 wide by 4-0 tall typically clears 5.7 sq ft with room to spare.
- Double-hung: needs to be large. Look for a call size near 3-0 wide by 5-0 tall, and always confirm the manufacturer’s published clear-opening spec.
- Sliding (horizontal): only one half opens, so like the double-hung, size up. A 4-0 by 4-0 slider is a common egress-rated choice.
- Awning: rarely qualifies for egress because the sash blocks the top of the opening. Avoid for bedrooms.
Every reputable manufacturer publishes an egress or clear-opening chart. Andersen, Pella, and Marvin all list the exact net clear opening for each model and size. Do not eyeball it, and do not trust the glass dimension. Pull the spec sheet and read the clear-opening number in square feet.
Where People Get Burned at Inspection
A few recurring failures worth burning into memory. First, insect screens and storm windows do not count against clear opening, and window wells and covers cannot require a key, tool, or special knowledge to operate from the inside. Second, bars, grilles, or security covers are allowed only if they release from inside without tools. Third, the finished floor is the reference point for the 44-inch sill, so if you plan to add a raised subfloor or thick flooring later, account for it now.
Finally, remember that every sleeping room needs egress, not just basements. A converted attic bedroom, a bonus room over a garage, or any space with a bed and a closet that gets used for sleeping falls under the same rule. If you are adding or finishing a bedroom anywhere in the house, the egress window size math applies exactly the same way.
Rough Opening and Budget Reality
Your framer needs the rough opening, which is the finished window unit plus roughly a half inch of shim space all around. Order the window first, get the manufacturer’s rough-opening dimension, and frame to that. Cutting a basement egress into a poured foundation wall is the expensive part: figure $2,500 to $5,000 for a below-grade cut, well, and window installed by a pro, with concrete cutting and a steel well driving most of that cost. An above-grade bedroom window swap that already meets egress is far cheaper, often $500 to $1,200 installed.
Get the four numbers right, buy off the manufacturer’s clear-opening chart rather than the nominal size, and confirm the 44-inch sill and well dimensions before you frame. Do that and your inspection is a formality instead of a callback.