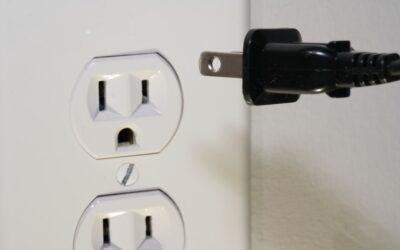
The most dangerous mistake in any wiring project isn’t a wrong connection, it’s working on a live circuit because you assumed the breaker was off. Understanding electric outlet wiring starts and ends with safety: cut the power, prove the circuit is dead with a tester, and only then touch a wire. This guide walks through how a standard receptacle is wired and the safety rules that protect you, but be clear from the start that mains-level wiring is serious work, and anything beyond a simple like-for-like replacement is a job for a licensed electrician.
- Safety First: Always Kill the Power
- Verify the Circuit Is Truly Dead
- Understanding the Three Wires
- How a Standard Outlet Is Wired
- Where GFCI Outlets Are Required
- Common Wiring Mistakes to Avoid
- When This Is a DIY Job vs. a Pro Job
- Final Safety Reminders
- Tools and Materials for a Safe Outlet Swap
- Understanding Amperage and Outlet Ratings
Safety First: Always Kill the Power
Before anything else, go to the breaker panel and switch off the breaker feeding the outlet. Flipping the wall switch or unplugging an appliance is not enough; only the breaker truly de-energizes the circuit. If the breakers aren’t clearly labeled, this is reason enough to slow down and identify the right one.
Once the breaker is off, plug a lamp or use a circuit tester at the outlet to confirm it’s dead. Power off, then verify; never trust a label alone. This single habit prevents the vast majority of serious shocks during electrical work.
Verify the Circuit Is Truly Dead
A non-contact voltage tester is the cheapest insurance you’ll ever buy, usually under $20. After flipping the breaker, hold the tester against the outlet terminals and the wires; it should stay silent and dark. Test it first on a known live outlet to confirm the tester itself works.
Check every wire in the box, not just the obvious ones. Some boxes contain multiple circuits, so one set of wires can stay live even after you’ve killed the breaker for another. If the tester lights up at all, stop and find the correct breaker before proceeding.
Understanding the Three Wires
A standard 120-volt receptacle uses three conductors, each with a specific job and a matching terminal on the outlet. Connecting them correctly is the heart of outlet wiring.
- Hot (black wire): Carries current to the outlet. Connects to the brass (gold-colored) terminal.
- Neutral (white wire): Returns current to the panel. Connects to the silver terminal.
- Ground (bare copper or green wire): Provides a safe fault path. Connects to the green grounding screw.
Reversing hot and neutral creates a “reversed polarity” condition that’s a genuine shock hazard, even though the device may still power on. The color coding and terminal colors exist precisely so the connections aren’t a guessing game.
How a Standard Outlet Is Wired
With power confirmed off, the basic sequence is straightforward. The black hot wire lands on a brass screw, the white neutral on a silver screw, and the bare ground on the green screw. Wrap each wire clockwise around its screw so tightening pulls it snug rather than pushing it away.
Many outlets offer push-in (back-stab) holes as an alternative to the screws, but experienced electricians prefer the screw terminals because they hold far more reliably over time. Once connected, gently fold the wires into the box, push the outlet in, and secure it with its mounting screws before adding the cover plate.
Where GFCI Outlets Are Required
Ground-fault circuit interrupter (GFCI) outlets are mandatory in any location where water and electricity might meet. They sense tiny imbalances in current and cut power in milliseconds, preventing electrocution.
- Kitchens (counter-serving receptacles)
- Bathrooms
- Garages and unfinished basements
- Outdoor receptacles
- Laundry areas and near wet bars or utility sinks
GFCI outlets wire similarly to standard ones but have designated “line” and “load” terminals, and getting those backward stops the protection from working. If your project involves any of these locations, code compliance is not optional.
Common Wiring Mistakes to Avoid
Even a simple outlet swap goes wrong in predictable ways. Loose connections top the list; a wire that isn’t tightly secured arcs and generates heat, a leading cause of electrical fires. Always tug each wire after tightening to confirm it’s locked in.
Other frequent errors include reversing hot and neutral, leaving the ground unconnected, overcrowding the box with too many wires, and using a 15-amp outlet on a 20-amp circuit where a 20-amp device is required. Each of these is a code violation and a safety risk. If you’re unsure which is correct for your situation, that uncertainty is itself a signal to bring in a pro.
When This Is a DIY Job vs. a Pro Job
Replacing an existing outlet with an identical type, where the wiring is already in place and you simply transfer the connections one terminal at a time, is within reach for a careful, code-aware homeowner. Even then, follow your local permit requirements.
Anything more, running new circuits, adding outlets, working in the breaker panel, handling aluminum wiring, or any 240-volt work, belongs to a licensed electrician. These tasks involve load calculations, code compliance, and live-panel risk that casual DIY shouldn’t touch. The few hundred dollars a licensed pro charges buys a safe, inspected, insurable result.
Final Safety Reminders
Treat every wire as live until your tester proves otherwise. Use insulated tools, work in good light, and never rush. Match the outlet’s amp rating to the circuit, secure every connection, and confirm the ground is solid before you button up the box.
When in doubt, stop and call an electrician. Electricity offers no second chances, and there’s no shame in hiring out work that carries real risk to your home and your safety. Use this guide to understand what’s happening behind the cover plate and to ask informed questions, but let a professional handle anything past a straightforward replacement.
Tools and Materials for a Safe Outlet Swap
Before you touch a single screw, gather the right gear. The correct tools make the difference between a clean, safe job and a frustrating, hazardous one. For even a basic like-for-like replacement, have these on hand:
- Non-contact voltage tester: The most important item; confirms the circuit is truly dead.
- Insulated screwdrivers: A flathead and a Phillips, both with insulated handles.
- Wire strippers: For cleanly exposing the right length of conductor.
- Needle-nose pliers: To bend wires into neat hooks around the terminal screws.
- The correctly rated outlet: Matched to the circuit amperage and the GFCI requirement for the location.
Never substitute a cheap tester or skip it; that single tool is what stands between you and a serious shock.
Understanding Amperage and Outlet Ratings
Outlets aren’t interchangeable. A standard household receptacle is rated for either 15 or 20 amps, and it must match the circuit it serves. Putting the wrong outlet on a circuit is a code violation and a fire risk, so confirm the breaker rating before you choose a replacement.
A 15-amp circuit uses 14-gauge wire and a 15-amp outlet, while a 20-amp circuit uses heavier 12-gauge wire and accepts a 20-amp outlet (recognizable by the small horizontal slot on one prong). Kitchens, bathrooms, and laundry areas often require 20-amp circuits for appliances that draw heavy loads. If you’re unsure which rating your circuit carries, that uncertainty is one more reason to have a licensed electrician verify before you proceed.