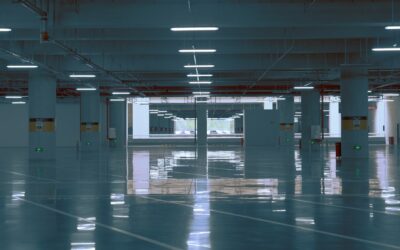
Epoxy concrete paint turns a dull, dusty slab into a hard, glossy, easy-to-clean floor that stands up to cars, foot traffic, and dropped tools. Unlike ordinary latex porch paint, true epoxy is a two-part system that chemically cures into a thick, bonded coating, which is why it has become the go-to finish for garages, basements, workshops, and patios.
Part of our Epoxy, Concrete & Garage Floors guide — explore the full guide →
Done right, an epoxy floor lasts many years and resists oil, chemicals, and abrasion. Done poorly, it peels within months. The difference is almost entirely in the preparation, so this guide focuses on getting it right the first time.
What Epoxy Concrete Paint Actually Is
Real epoxy is not paint in the traditional sense. It ships as two components: a resin and a hardener. When you mix them, a chemical reaction begins that cures the coating into a rigid plastic-like film bonded to the concrete. That is fundamentally different from “epoxy-fortified” one-part paints, which are easier to apply but far less durable.
You will see three broad categories on the shelf. Water-based epoxy is the most beginner-friendly and lowest in odor. Solvent-based epoxy is tougher but has stronger fumes. One-hundred-percent solids epoxy is the thickest, most durable professional-grade option and the least forgiving to install. For a DIY garage, a quality water-based or solvent-based kit is usually the sweet spot.
Why Surface Prep Makes or Breaks the Job
I cannot overstate this: the coating is only as good as the bond underneath it. Concrete must be clean, profiled, and bone-dry before a drop of epoxy goes down.
- Test for moisture. Tape a 2×2-foot plastic sheet to the slab and leave it 24 hours. Condensation underneath means the slab is too damp and epoxy will fail. New concrete should cure at least 28 to 30 days before coating.
- Degrease. Scrub out oil and grease stains with a concrete degreaser. Epoxy will not stick to contaminated areas.
- Profile the surface. Etch with the acid or chemical etcher in the kit, or mechanically grind the floor. Properly profiled concrete should feel like 120-grit sandpaper, which gives the epoxy something to grip.
- Repair defects. Fill cracks and spalls with a concrete patch compound and let them cure fully.
- Rinse and dry completely. Remove all etching residue and dust, then allow the slab to dry, often 24 hours or more depending on humidity.
If you skip profiling or coat damp concrete, the epoxy will eventually delaminate and peel in sheets. Most failures I see trace directly back to rushed prep.
Tools and Materials You Will Need
- Concrete degreaser and etching solution or a floor grinder
- Stiff-bristle deck brush and a wet/dry vacuum
- Two-part epoxy kit sized for your square footage
- 3/8-inch nap rollers, an extension pole, and a quality brush for edges
- A clean mixing bucket and a drill with a paddle mixer
- Decorative flakes and a clear topcoat if you want added durability and grip
- Personal protective equipment: chemical-resistant gloves, safety glasses, and a respirator rated for the product
Step-by-Step Application
Work in manageable sections and keep a wet edge so the coating blends seamlessly. Epoxy has a limited pot life once mixed, so read the data sheet and do not mix more than you can apply in that window.
- Mix precisely. Combine resin and hardener in the exact ratio on the label and stir for the full time specified, usually two to three minutes. Let it sit for the induction period if the manufacturer requires one.
- Cut in the edges. Brush a 4-inch band around the walls and obstacles before rolling the field.
- Roll the floor. Apply in thin, even coats from the back of the room toward the exit. Work quickly within the pot life.
- Broadcast flakes. If using decorative chips, scatter them onto the wet coat immediately for color and slip resistance.
- Apply a topcoat. Once the base cures per the instructions, a clear topcoat dramatically improves wear and chemical resistance.
Cure Times and Working Temperature
Patience during curing is non-negotiable. Foot traffic is usually safe after 16 to 24 hours, but you should keep vehicles off the floor for a full 72 hours or longer. Full chemical cure, the point at which the coating reaches maximum hardness, typically takes 5 to 7 days.
Temperature matters too. Most epoxies want a floor and air temperature between 60°F and 85°F during application and curing. Coating in cold weather slows or stops the cure, while heat shortens your pot life. Always defer to the product data sheet, because formulations differ.
Safety and Ventilation
Epoxy components and especially solvent-based products release fumes during application. Work with the garage door open and use fans to move air, and wear a properly rated respirator, chemical-resistant gloves, and eye protection. Acid etchers are corrosive, so protect your skin and eyes during prep as well. If you have any doubt about ventilation in an enclosed basement, or the job is large, hiring a licensed flooring professional is money well spent. Follow the manufacturer’s instructions on every container without shortcuts.
Common Mistakes to Avoid
Most epoxy failures are predictable and preventable. After seeing plenty of redo jobs, the same handful of errors show up again and again.
- Coating damp or new concrete: Moisture rising through the slab breaks the bond. Always run the plastic-sheet test and let new slabs cure a full month.
- Skipping the profile step: Epoxy needs a rough surface to grip. A smooth, troweled floor that was not etched or ground is the number-one cause of peeling.
- Mixing the ratio by eye: Off-ratio epoxy may never fully harden. Measure exactly and stir thoroughly, scraping the sides of the bucket.
- Working too slowly: Once mixed, the clock is running. Spreading past the pot life leaves you with a gummy, uneven finish.
- Driving on it too soon: Tires can leave marks and peel a coating that has not fully cured. Wait the full 72 hours or longer.
Take the prep slow and the application fast, and you sidestep nearly every one of these.
Cost and Whether to DIY
A DIY water-based or solvent-based kit for a standard two-car garage of about 400 to 500 square feet generally runs $150 to $600 in materials, depending on quality and whether you add flakes and a topcoat. Professional installation of a high-end 100-percent-solids system typically falls in the range of $3 to $12 per square foot installed; treat these as estimates that vary by region and floor condition.
Epoxy concrete paint is a realistic weekend project for a confident DIYer, provided you respect the prep and cure times. If your slab has moisture problems, heavy oil contamination, or you want a flawless showroom finish, a pro with grinding equipment will deliver a longer-lasting result.