Before you replace a scratched refrigerator or a yellowed washing machine, consider that a few cans of appliance epoxy paint might give it years of new life for a tiny fraction of the cost. Formulated to bond to metal and cure into a hard, glossy, washable shell, this specialty finish lets you refresh worn appliances, restore a chipped tub, or update a color without a major purchase. Done correctly, the result looks remarkably factory-fresh.
Part of our Epoxy, Concrete & Garage Floors guide — explore the full guide →
This guide covers what makes epoxy appliance finishes different, where they work, how to prep and apply for a smooth result, realistic cure times, and the safety steps you absolutely cannot skip when working around appliances and fumes.
What Makes Appliance Epoxy Paint Different
Ordinary wall or trim paint will not survive on an appliance. It scratches, peels, and cannot handle heat, moisture, or frequent cleaning. Appliance epoxy is engineered specifically for hard, nonporous surfaces like enameled steel and metal. Its epoxy or modified-enamel chemistry cures into a tough, chemical-resistant, moisture-resistant film that mimics the original baked-on factory finish. It resists the everyday abuse appliances take, including wiping, splashes, and minor impacts, far better than standard coatings.
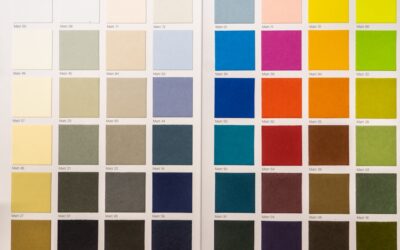
It comes in both aerosol spray cans, which are convenient for whole appliances, and brush-on form for small touch-ups and chips. White and almond are the most common colors, with some stainless-look and other options available.
What You Can and Cannot Paint
The finish is versatile but has clear limits. Good candidates and exclusions include:
- Good candidates: exterior surfaces of refrigerators, washers, dryers, dishwashers, and the outside of metal cabinets and lockers.
- With the right product: porcelain and enameled tubs and sinks, using a kit rated for that use.
- Cautions: stove and oven exterior surfaces only with high-heat-rated products; never standard appliance paint near burners or in the oven cavity.
- Avoid: interior food-contact surfaces, cooktop cooking surfaces, and any area exposed to direct flame unless the product is specifically rated for it.
Always read the label to confirm the product is rated for your specific surface and its heat and contact conditions.
Surface Preparation Is Everything
Epoxy bonds only to a clean, dull, sound surface, so prep determines whether your finish lasts years or peels in months. Work through these steps:
- Disconnect power, and for gas appliances shut off and disconnect the gas before doing anything.
- Remove or mask hardware, handles, knobs, gaskets, and any areas you will not paint.
- Clean thoroughly with a degreaser to strip oils, food residue, and grime.
- Lightly sand the entire surface to dull the existing finish so the epoxy can grip.
- Repair chips and rust spots, then wipe away all dust with a tack cloth.
- Mask surrounding areas and floors against overspray.
Skipping the sanding or cleaning is the top reason appliance refinishing fails; the new coat needs a clean, abraded surface to mechanically bond to.
Application for a Smooth Finish
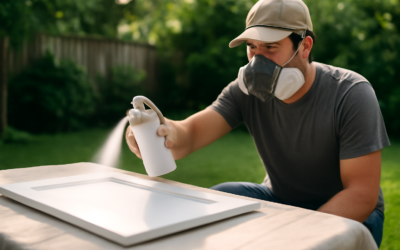
Thin, even coats beat one thick coat every time. Heavy passes run, sag, and trap solvent. For the best result, apply several light coats, holding an aerosol can the recommended distance, usually around 10 to 12 inches, and keeping the can moving in steady overlapping strokes. Let each coat flash off for the time the label specifies before recoating. For brush-on touch-ups, use smooth strokes and avoid going back over partly set paint, which leaves marks. Work in a dust-free area, since the glossy finish shows every speck that lands in wet paint.
Cure Times and Returning to Service
Patience here protects all your prep work. Appliance epoxy is typically dry to the touch in a few hours but needs much longer to fully cure and reach its final hardness, often several days. Do not reconnect, load, or use the appliance until the cure time on the label has passed, and avoid washing or scrubbing the new finish until it is fully hardened. Reinstall gaskets, handles, and hardware only after the surface is cured to avoid imprinting or sticking. Rushing back into service is how a beautiful new finish gets dented and marred before it ever toughens up.
Tools and Materials You Will Need
Gathering everything before you start keeps the job moving and helps you avoid stopping mid-coat. A typical refinishing kit-out includes:
- Appliance epoxy paint in aerosol or brush-on form, rated for your surface.
- A quality degreaser or appliance cleaner to strip oils and residue.
- Fine-grit sandpaper or a sanding sponge to dull the existing finish.
- Painter’s tape and masking film or drop cloths to protect surroundings.
- Tack cloths to remove dust before painting.
- A respirator rated for paint vapors, eye protection, and chemical-resistant gloves.
Buy a little more paint than you think you need so you are not forced to pause between coats while ordering more, which can leave visible lines where new paint meets partially cured paint.
Realistic Expectations and Limitations
It helps to know what this finish can and cannot do. On a well-prepped exterior surface, the result can look genuinely close to factory, with a smooth, glossy, durable shell that lasts for years. That said, it is a refinish, not a brand-new appliance, and a few realities are worth accepting up front.
The finish will not be quite as tough as a baked-on factory enamel, so it benefits from gentle care and pads under anything that slides across it. High-wear and high-heat zones are the most likely to show eventual wear, and touch-ups may be needed over time. Color options are limited compared to custom paint, and matching an exact existing shade can be tricky. For an old but functional appliance you want to keep, though, these are minor trade-offs against the cost of replacement.
Safety: The Critical Part
This is non-negotiable. Always unplug and disconnect power, and for gas units shut off and disconnect the gas line, before you sand or paint any appliance. The fumes from appliance epoxy paint are strong and potentially harmful, so ventilate the area aggressively with open windows and fans, and wear a respirator rated for paint vapors along with eye protection and gloves. Keep the product away from any open flame, pilot light, or ignition source, since the vapors can be flammable. Keep children and pets out of the work area through application and curing.
One more critical rule: do not paint interior food-contact or direct-cooking surfaces unless the product is explicitly rated for that use. Always follow the manufacturer’s instructions, which override general guidance and cover the specific cure times, ventilation, and use limits for your exact product. Respect those steps and a worn appliance can look new again for a fraction of replacement cost.