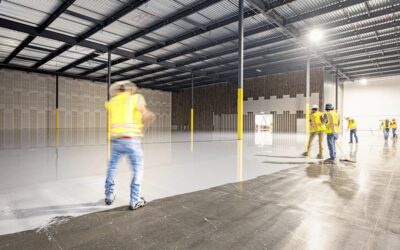
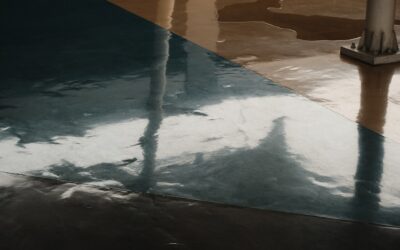
When a floor takes a real beating (forklift traffic, dropped tools, hot oil, constant washdowns) a thin roll-on coating won’t cut it. That’s where epoxy mortar flooring earns its keep. Built by combining epoxy resin with graded silica aggregate, this system trowels down into a dense, seamless slab-on-slab surface that ranges from about 1/8 inch to 1/4 inch thick and can shrug off impacts that would chip and gouge ordinary coatings. I’ve installed these systems in machine shops, commercial kitchens, and food-processing plants, and when the prep is done right they outlast almost anything else you can put on concrete.
Part of our Epoxy, Concrete & Garage Floors guide — explore the full guide →
This guide covers where epoxy mortar makes sense, how it’s installed step by step, the surface prep and safety measures that determine whether it succeeds or fails, and what you should realistically expect to pay. I’ll be specific about coverage rates, pot life, and cure times, because with epoxy those numbers are the difference between a floor that lasts 20 years and one that delaminates in a season.
What Epoxy Mortar Flooring Is
Epoxy mortar is a trowel-applied system made from three components: an epoxy resin, a hardener, and a blend of oven-dried silica sand or quartz aggregate. When you mix them, you get a stiff, mortar-like material with the consistency of damp sand that gets screeded and troweled across the slab rather than rolled. The aggregate is what gives the system its thickness and compressive strength, while the epoxy binds it into a monolithic, non-porous surface.
The result is far more than a coating. A typical epoxy mortar floor delivers compressive strength well above 10,000 psi, which is stronger than the concrete beneath it. It’s chemically resistant, waterproof, and thick enough to be resurfaced or ground flat if it ever wears. Because it’s placed as a mortar bed, it can also fill and level minor slab damage in the same pass, making it a repair system as much as a finish.
Most installations finish with one or two topcoats of clear or pigmented epoxy or polyurethane to seal the aggregate texture, add color, and improve cleanability. Without a topcoat the mortar surface is porous and gritty, so that seal coat is not optional for most uses.
Where It’s Used
Epoxy mortar flooring is a workhorse system, so you’ll find it wherever floors face heavy mechanical and chemical abuse. Manufacturing plants, warehouses with forklift and pallet-jack traffic, auto repair bays, and aircraft hangars all rely on it because it takes point-load impacts without cracking. In these settings the thickness is the point: a 1/4-inch mortar bed absorbs the shock of dropped parts and rolling loads that would shatter thin epoxy.
It’s equally at home in wet, corrosive environments. Commercial kitchens, breweries, dairies, and food-processing facilities use epoxy mortar because it’s seamless and non-porous, so there’s nowhere for bacteria, grease, or water to hide, and it stands up to hot-water and caustic washdowns. Many of these installations add cove bases (the mortar is turned up the wall in a curved transition) so the floor and wall clean as one continuous surface with no dirt-trapping corner.
You’ll also see it as a patch-and-resurface solution over spalled, pitted, or previously coated concrete that’s too rough for a thin system. Because it builds thickness and self-levels reasonably well under a screed, it rescues slabs that would otherwise need replacement.
Surface Preparation: The Make-or-Break Step
I tell every client the same thing: epoxy mortar succeeds or fails entirely on prep. The slab must be mechanically profiled, not just cleaned. For a mortar system this thick, I always diamond grind or shot-blast the concrete to a CSP 3 to CSP 5 profile (concrete surface profile), which opens the pores and gives the epoxy a rough, clean surface to grip. Acid etching alone is not adequate for a mortar bed; it leaves too smooth a profile and can trap residue, so grinding is the professional standard.
Before any grinding, the slab has to be structurally sound and fully cured, generally at least 28 days for new concrete. Grind out and repair cracks, remove all existing coatings, oil, and curing compounds, and vacuum the dust thoroughly. Any bond breaker left behind (grease in a shop, sealer, laitance) will cause delamination no matter how good the epoxy is.
Moisture testing is non-negotiable. Concrete that looks bone-dry can still push vapor that blisters an epoxy floor from below. I run a calcium chloride test (looking for under 3 pounds per 1,000 square feet per 24 hours) or, more reliably, an in-situ relative humidity probe test per ASTM F2170, aiming for readings under 75 to 80 percent depending on the product. If the slab reads high, you install a moisture-mitigation primer first. Skipping this step is the most common reason these floors fail.
Installation Step by Step
With prep done, installation moves fast and demands a coordinated crew because the material sets on a clock. First comes a neat epoxy primer, rolled or squeegeed onto the profiled slab to seal it and promote adhesion, typically at a coverage of about 200 to 300 square feet per gallon. While the primer is still tacky, the crew mixes the mortar: resin and hardener are blended first, then the aggregate is folded in with a mortar mixer until the material is uniformly wetted.
The mortar is placed and struck off with a gauge rake or screed set to the target thickness, usually 1/8 to 1/4 inch, then troweled smooth by hand or with a power trowel. This is where pot life matters. Once mixed, a batch of epoxy mortar has a working window of roughly 20 to 40 minutes depending on temperature; warmer slabs shorten it dramatically. The crew works in manageable sections, keeping a wet edge so batches blend seamlessly rather than leaving cold joints.
After the mortar cures enough to walk on (usually 8 to 12 hours at 70°F), it’s lightly ground or screened to knock down any high spots, vacuumed, and sealed with one or two topcoats. A typical grout or seal coat covers around 150 to 250 square feet per gallon per coat, filling the surface texture and locking everything in. Get the thickness and the timing right and you have a floor that behaves as one solid piece.
Ventilation, PPE, and Safety
Epoxy is a serious industrial material and deserves respect. The resin and hardener release fumes during mixing and curing, and the hardener component in particular is a sensitizer that can cause skin reactions and, with repeated exposure, allergic responses. I never install epoxy without cross-ventilation (open doors, fans moving air out, and in tight interior spaces, forced mechanical ventilation). In enclosed areas with poor airflow, an organic-vapor respirator is warranted, not just a dust mask.
For PPE, that means nitrile gloves rated for epoxy, safety glasses or goggles because splashes to the eye are a genuine hazard, and covered skin. During the grinding and shot-blasting phase, silica dust is the bigger danger, so use vacuum-shrouded grinders and an N95 or better respirator to stay compliant with silica exposure limits. Keep the area free of ignition sources and never let uncured epoxy contact skin for long, since the exothermic reaction can generate real heat in a mixing bucket.
Temperature and humidity also govern safety and success. Install between about 55°F and 85°F on a slab that’s above the dew point, because cold slows cure and traps moisture, while excess humidity causes surface hazing called amine blush. Read the product data sheet every time; formulations vary, and the manufacturer’s numbers override any rule of thumb.
Cure Times and Return to Service
Cure time is where impatience ruins floors. At a standard 70°F, expect the mortar to be firm enough for light foot traffic in 8 to 12 hours and the topcoats to be walkable overnight. Full mechanical cure (the point where the floor reaches its rated hardness and can take forklift and rolling loads) takes about 5 to 7 days. Chemical resistance to aggressive cleaners and washdowns matures last, generally at the 7-day mark.
Cold weather stretches these numbers significantly. Every 18°F drop can roughly double cure time, so a 50°F slab may need twice as long before it’s ready for heavy use. Don’t rush a facility back into full production; putting a forklift on a floor that’s only reached foot-traffic cure is a classic way to gouge a fresh mortar bed and void the warranty.
What Epoxy Mortar Flooring Costs
Because it’s a thick, professionally installed system, epoxy mortar sits at the higher end of resinous flooring. Materials and labor together typically run $7 to $15 per square foot for a standard installation, and complex jobs with heavy moisture mitigation, cove bases, chemical-resistant topcoats, or extensive slab repair can push $15 to $20 or more. The mortar aggregate and multiple coats mean more material and more labor hours than a basic roll-on epoxy that might cost $3 to $7 per square foot.
For most facilities the value math favors the mortar system despite the higher upfront number. A properly installed epoxy mortar floor commonly lasts 15 to 25 years with minimal maintenance, while a thin coating in the same abusive environment might need recoating every 3 to 5 years. When you factor downtime, re-prep, and lost production for repeated recoats, the durable system almost always wins on lifecycle cost. Get at least a couple of bids from installers who grind rather than acid-etch, ask to see their moisture-test protocol, and make sure the quote spells out thickness, primer, mortar, and topcoats separately so you know exactly what you’re buying.
Prefer to explore on your own?
See how new flooring looks in your actual room in seconds — free, no signup.
Try the free Floor Studio →