A crack in your foundation can be alarming, but not every crack is a crisis. Epoxy foundation crack repair is a proven method for sealing certain cracks in poured concrete walls, bonding the concrete back together and stopping water intrusion. The catch is that epoxy injection is the right answer for some cracks and absolutely the wrong answer for others. Knowing the difference protects both your wallet and your home, so let’s walk through when this repair works, when it does not, and how the process actually goes.
Part of our Epoxy, Concrete & Garage Floors guide — explore the full guide →
When Epoxy Injection Is Appropriate
Epoxy injection shines on narrow, stable, non-structural cracks in poured concrete foundation walls. It is well suited to:
- Hairline to roughly 1/4-inch vertical or diagonal cracks that are not actively widening.
- Shrinkage cracks that appear in the first year or two as concrete cures.
- Cracks that leak water but show no displacement, meaning both sides of the crack are still flush.
Because cured epoxy is actually stronger than the surrounding concrete, a properly injected crack is bonded into a single mass. For minor, stable cracks, that creates a durable, watertight repair.
When You Must Call a Professional First
This is the part too many DIY guides skip, and it matters more than the repair itself. Some cracks signal structural movement, and sealing them with epoxy would hide a serious problem instead of solving it. Stop and have a structural engineer or qualified foundation specialist evaluate the situation before doing anything if you see any of the following:
- Horizontal cracks, which often indicate soil or hydrostatic pressure pushing against the wall.
- Wide cracks beyond roughly 1/4 inch, or cracks that are visibly growing over time.
- Displaced or offset cracks, where one side sticks out farther than the other.
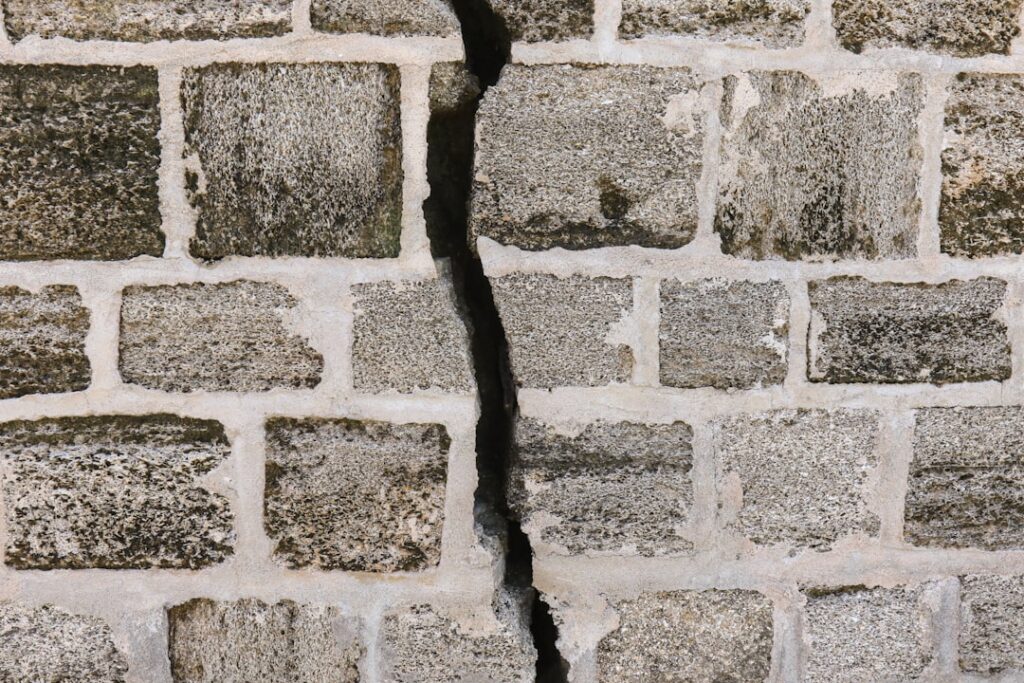
- Stair-step cracks in block or brick foundations.
- Bowing, leaning, or bulging walls, or doors and windows that suddenly stick.
These conditions point to structural stress that epoxy alone cannot fix. They may require carbon-fiber reinforcement, wall anchors, piering, or excavation, all of which need professional design. Injecting epoxy into a moving crack simply causes the concrete to crack again somewhere nearby.
Address the Water Source
Many foundation cracks leak because water is collecting against the wall. Sealing the crack without fixing the drainage is treating the symptom, not the cause. Before or alongside any repair, make sure gutters are clean and downspouts discharge several feet away from the foundation, the soil grades away from the house, and any clogged or failing perimeter drainage is addressed. Persistent groundwater problems may call for an exterior waterproofing membrane or an interior drainage system, which again is professional territory.
Epoxy vs. Polyurethane Injection
The two common injection materials serve different goals. Epoxy is rigid and high-strength, designed to structurally rebond a dry, stable crack. Polyurethane is flexible and foams as it cures, making it better for actively leaking cracks where stopping water is the priority and structural strength is not the concern. Many homeowners with a simple leaking, non-structural crack actually need polyurethane, while those rebonding a stable dormant crack want epoxy. Read the product’s intended use and match it to your situation.
How the DIY Process Works
For a minor, stable, non-structural crack, low-pressure injection kits are sold for homeowner use. Always follow the specific kit’s instructions, but the general sequence looks like this:
- Clean the crack thoroughly with a wire brush and vacuum, removing dust, paint, and loose concrete so the epoxy can bond.
- Attach injection ports along the crack at the spacing the kit specifies, typically every few inches.
- Spread a surface-sealing paste over the crack face and around the ports, leaving the port openings clear. Let it cure as directed.
- Inject the two-part epoxy starting at the lowest port, working upward until material flows from the next port, then cap and move up.
- Let the epoxy cure fully per the manufacturer’s timeline before removing the ports and trimming the surface seal.
Patience is everything here. Inject slowly so the epoxy travels the full depth of the wall rather than just bridging the surface.
Safety and Ventilation
Epoxy resins and hardeners can irritate skin, eyes, and lungs. Wear chemical-resistant gloves and eye protection, ventilate the area well, and read the safety data sheet for the specific product. Mix only what you can use within the working time, and keep the components away from skin. If fumes bother you in an enclosed basement, add fans and take breaks in fresh air. These are not medical-grade precautions, just basic chemical safety that keeps a small job from becoming a bad day.
Monitoring a Crack Over Time
Before you decide a crack is stable enough to inject, it pays to watch it. A simple, reliable method is to mark the ends of the crack with a pencil and write the date, then measure and record the width at a few points. Some homeowners glue a small inexpensive crack monitor across the gap, or place a dab of plaster over it, which will visibly break if the crack moves. Check it over several weeks, ideally through a wet season and a dry one, since foundations move with seasonal soil moisture.
If the crack stays put, it is far more likely to be a stable, non-structural crack suitable for epoxy. If it widens, lengthens, or the plaster bridge breaks, that movement is your signal to stop and bring in a structural engineer rather than sealing over an active problem. After a successful injection, keep an eye on the repaired area too; a properly sealed stable crack should stay dry and intact, while any new cracking nearby suggests the underlying cause was never addressed.
Setting Expectations and Costs
A DIY injection kit for a single crack typically runs in the modest range of a few dozen dollars, while professional injection commonly lands in the few-hundred-dollar range per crack. Structural repairs involving piers, anchors, or excavation cost dramatically more, often several thousand dollars, which is exactly why correctly diagnosing the crack first is so important. A successful epoxy repair on the right crack is permanent and watertight, but it is not a cure for an underlying structural or drainage problem.
Used on the right crack, epoxy foundation crack repair is one of the more satisfying home repairs you can tackle. Just be honest about what you are looking at. When a crack is narrow, stable, and non-structural, seal it with confidence. When it is wide, horizontal, displaced, or paired with any sign of movement, put the kit down and call a structural engineer first.